Crochet with Kate: Christmas Garland
Published on 28 November 2015 By Merion 2 min read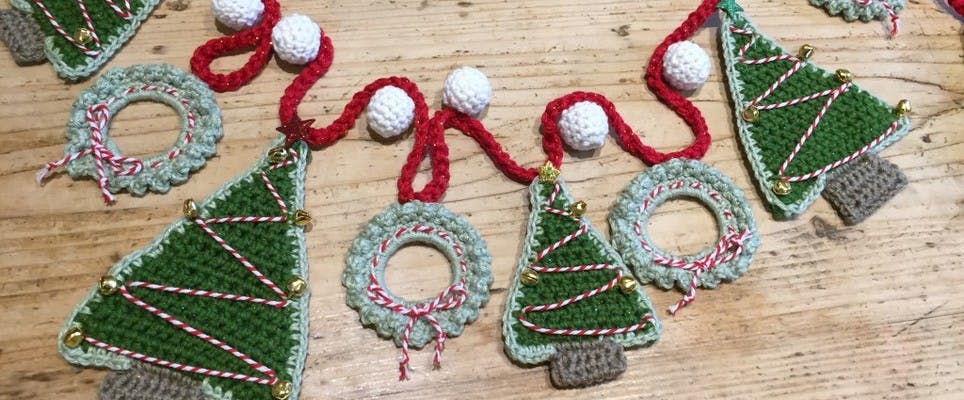
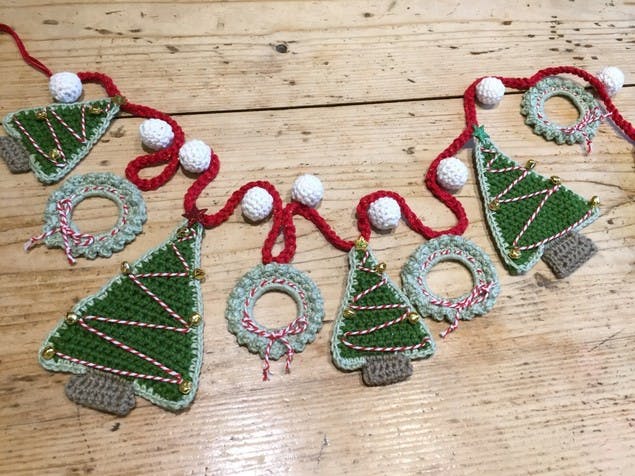
We love Kate Eastwood's crochet tutorials so much, we begged her to make a Christmas garland for us, because we all need a Christmas garland in our lives. Grab your hooks and yarn and get festive!
Each year I love to add a new Christmas decoration to my collection and this year I decided to have a go at making my own Christmas garland. I wanted to try and create something that was quite simple in design but that still had a lovely festive feel to it.
In total I made 3 x large Christmas trees, 4 x small Christmas trees, 6 x wreaths and 13 x snowballs.
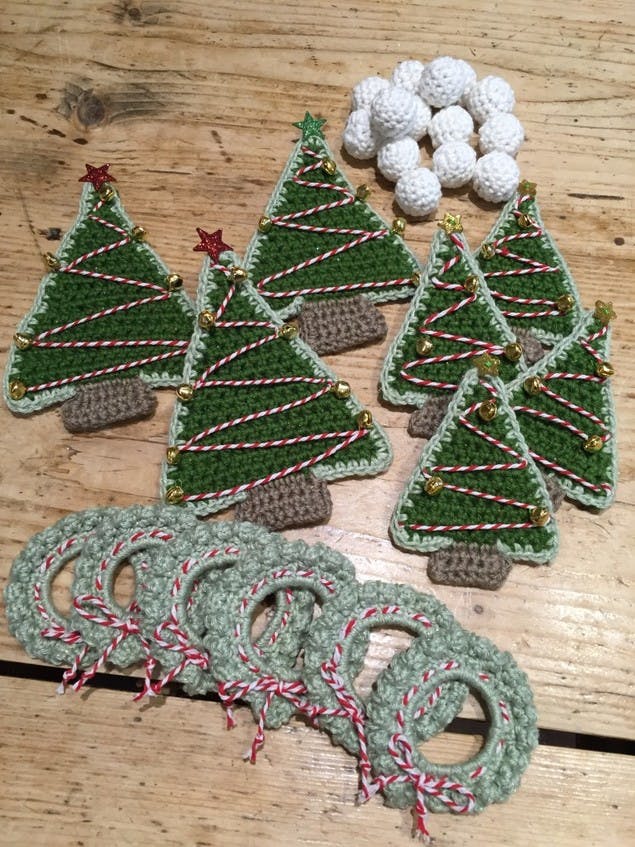
Accessories and hooks
I chose a selection of star buttons and bells to decorate the trees with. For my wreaths and final tree decoration I used a red and white string, but you could just as easily use ribbon or embroidery thread. You will also need a small amount of toy stuffing for the snowballs.
I used a 3.5mm hook to give a good, close texture to all of the items for the garland, and then I used a 5mm hook and three strands of yarn to make the chain for the garland.
Yarn notes
Just to add a little extra Christmassy sparkle I used Cascade Sunseeker as it has a lovely bit of twinkle to it! I used shades Treetop 32, White 03, Crimson 06, Bok Choy 11 and Limestone 27.
A great DK weight substitute yarn for this project is Paintbox Yarns Simply DK. It doesn't have a touch of sparkle like the original yarn, however you can match the colours easily and it's super affordable!
Materials
- Paintbox Yarns Simply DK in Racing Green
- Paintbox Yarns Simply DK in Pistachio Green
- Paintbox Yarns Simply DK in Paper White
- Paintbox Yarns Simply DK in Pillar Red
- Paintbox Yarns Simply DK in Slate Grey
- Paintbox Yarns Simply DK
- 3.5 mm hook
- KnitPro Waves Crochet Hook
- 5 mm hook
- Pony Easy Grip Crochet Hook
To make the large Christmas tree
1
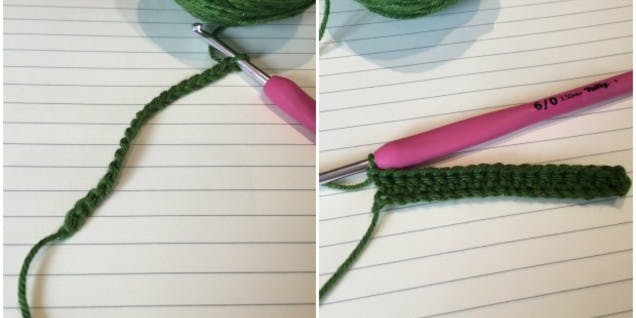
To get started. Each tree is made up of two tree shapes joined together with an edging of DC in the light green. Chain 19. Starting in the second chain from the hook, work a row of HTR. Chain 1 and turn. 18 sts.
2
Next. Work a row of HTR, decreasing in the first and last stitches. 16 sts.
3
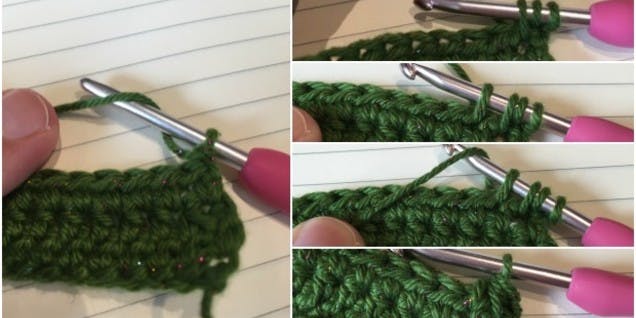
Time to decrease. Decrease as follows: Yarn over, pull up loop in 1st stitch, pull up loop in 2ndstitch, this leaves 4 loops on your hook. Yarn over and pull through all 4 loops.
4
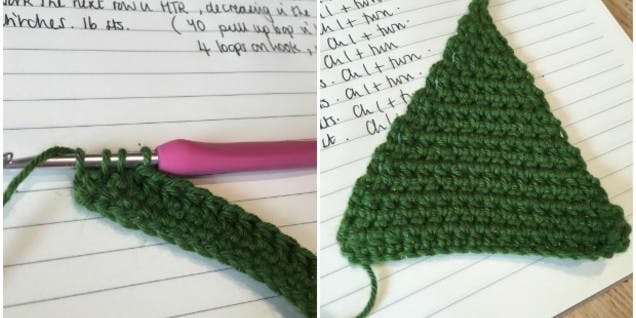
Keep going. Decrease in the same way across the last two stitches. At the end of the row CH1 and turn.
5
Next. Work a straight row of HTR. 16sts. CH1 and turn.
6
For the next row. Your next row will be another decrease row, leaving you with 14sts. CH1 and turn.
7
Next. Your next row will be a straight row of HTR. 14 sts.
8
Continue on. Continue working a decrease row followed by a straight row until you have 1 st left. Finish off and sew in ends. Make a another tree to match.
9
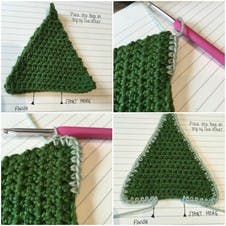
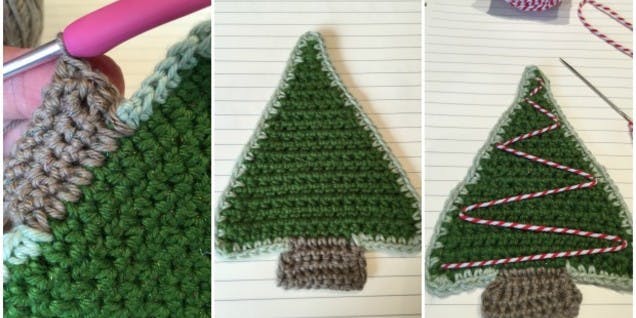
Join them up. Now lay one tree on top of the other ready for them to be joined together. To join the trees together, starting from the bottom right hand third of the tree work a round of DC all the way around the edges of both trees. As you work around the corners work two or three extra DC to ease the border round. Finish off at the end of the bottom left hand third of the tree. This will leave you with a gap between the start and finish stitches. This is where the tree trunk will be going.
10
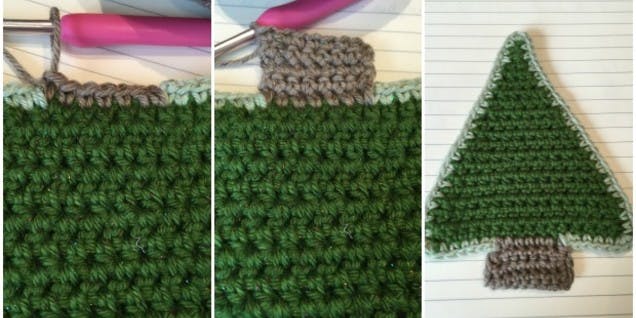
For the trunk. To make the trunk join in the Limestone yarn across the middle third of the bottom of the tree and work 8 rows of DC, remembering to CH1 and turn at the end of each row.
11
Finish the trunk. To finish off the trunk, fold it in half and DC the two edges together.
12

Decorating time! The final step is to decorate your tree. I chose to thread some red and white string across the front of the tree and finished it off with a star button sewn on to the top and a few bells added on to the main part of the tree.
For the small Christmas tree
1
Repeat! The small tree is made in exactly the same way as the large tree except that your starting chain is 13 and your first row is 12 sts.
To make the Christmas wreath
1
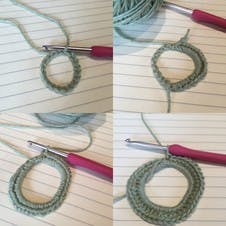
To make the wreath. The wreath is made around a circle and finished off with some Christmas string or ribbon threaded through and tied in a bow. Begin by making a chain of 20. Join together with a sl st. Work 40 DC in to the circle. Work a round of DC. 40 sts.
2
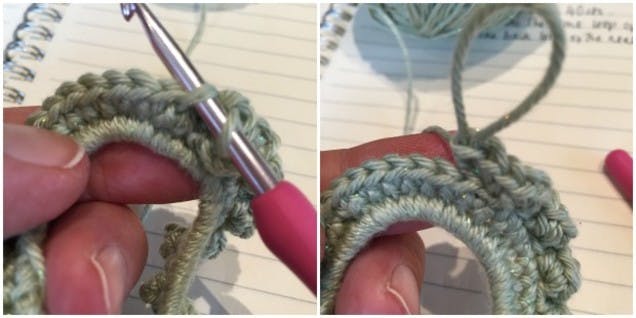
Ruffle time. To create the ruffle around the circle you are now going to work 3DC in to the front loop of the next stitch, 3 DC in to the back loop of the following stitch, 3DC in to the front loop of the next stitch and so on all the way around the circle.
3
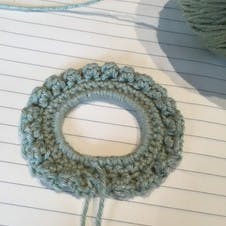
Join it. When you have worked your way all the way around join with a sl st.
4
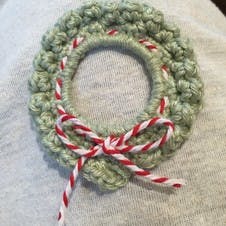
The final step. Thread your string or ribbon around the circle and tie with a bow at the bottom of the wreath.
To make the snowball:
1
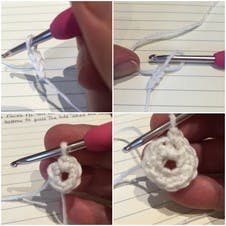
To get started. Chain 2 and in to the 2nd chain work 6DC. Work 2 DC in to each st. 12 sts.
2
Next up. Work 3 rounds of 12 stitches. In the next round decrease by DC 2 stitches together all the way around. 6 sts.
3
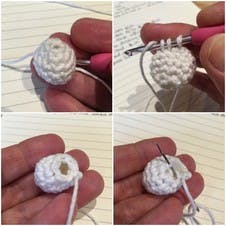
Stuffing time. Stuff your snowball with a little bit of toy stuffing and using a needle sew your ends in and pull up the last few stitches to close the hole at the bottom of the snowball. I made a total of 13 snowballs for my garland.
Putting the garland together:
1
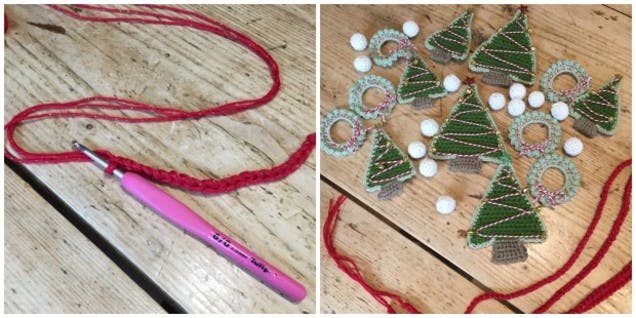
Let's get started. For my garland string I used three strands of red yarn and a size 5mm hook. I made a chain of 280, but obviously you can alter your chain to fit the required length at this point.
Pro Tip
I always find it helpful to lay my garlands out at this stage and roughly place your items where you want them to be so that you can get the spacing nice and even. A top tip here is to ensure that your chain is laying flat and is not twisted at any point.
2
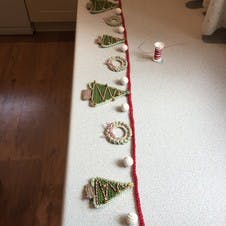
Sew it! Once you are happy with your spacing its just simply a matter of sewing everything in place.and then finding the perfect place to hang your string of Christmassy festiveness!
