Learn the top ten embroidery stitches
Published on 24 July 2019 3 min readLearn the top ten basic hand embroidery stitches to start your embroidery journey! It may look intimidating to some people, but you only need to master a handful of embroidery stitches to have a go at a whole range of embroidery patterns. Follow along with Adam as he talks you through each stitch - running stitch, French knots and more!
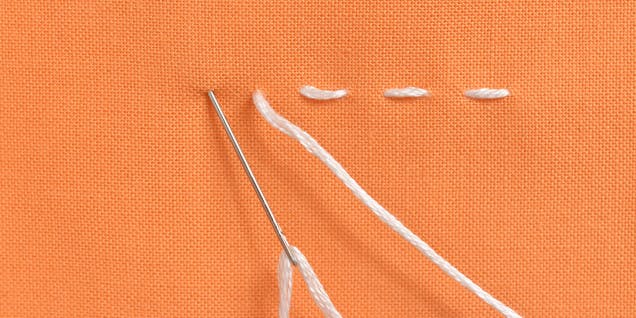
1. Running stitch
Running stitch is the simplest embroidery stitch to learn, but it's versatile both for embroidery and other embellishments.
1
Make a stitch. Come up from the back of the fabric then go back down a short distance away.
2
Repeat. Come up in a new position, a short distance away, and go back down.
Pro Tip
For the best looking stitches, try to keep each stitch the same length. Practice makes perfect!
That's all you need to know to master the running stitch. Now you can put your simple stitch in to practice! If you need to create a quick plane of stitching in your design, rows of evenly spaced running stitch work perfectly! Stitch in straight lines for a uniform, striped look, alternatively try staggering the rows like a brick wall, to create a more filled in plane of stitching.
2. Split stitch
This stitch gets its name from the way each new stitch splits and comes through the previous one. The result is a solid line that barely shows each individual stitch.
1
Make a stitch. Come up from the back of the fabric and go back down a short distance away.
2
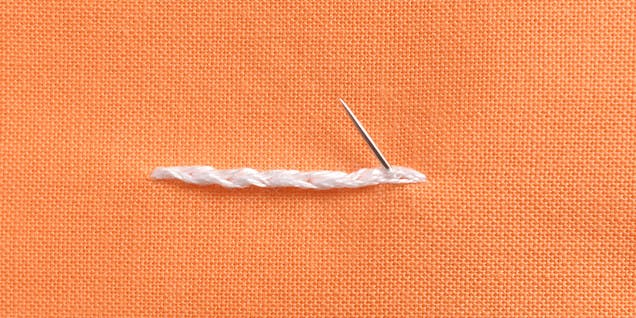
Making a second stitch. Come up through the fabric again, this time bringing the needle up through the first stitch.
3
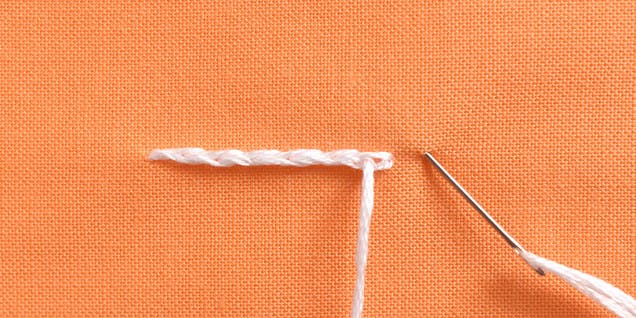
Repeat. Go back down and repeat, always splitting the previous stitch.
Pro Tip
To keep the stitches looking smooth and without a gap in the middle, let the needle split through a strand or two of the embroidery thread, instead of simply going between the strands.
3. Back stitch
Back stitch shows up in most patterns so you'll get lots of opportunities to practice this basic line stitch. At first, this one can feel backwards to stitch, but that's because it sort of is!
1
Make a start. Come up from the back of the fabric a short distance from the starting point of your line.

2
Create a stitch. Go back down at the starting point.
3
For the next stitch, come up a short distance from the first stitch and go back down at the end of the first stitch, and repeat.
Pro Tip
The individual stitches should touch end to end, creating a continuous line.
4. Stem stitch
Stitch outlines, detail lines, and yes, even stems with this stitch.
1
Make a start. Come up from the back of the fabric.
2
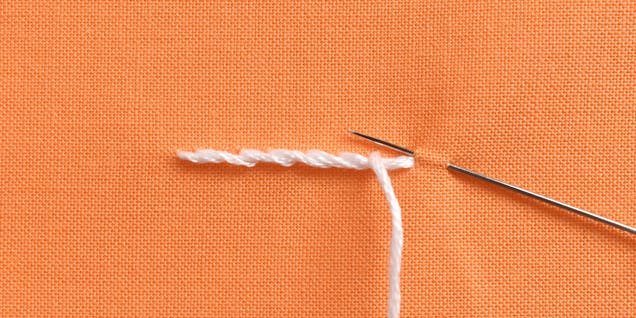
Going through at an angle. Dip your needle through the fabric, one stitch length away, then come up about halfway between the stitch at a slight angle.
3
Next stitch. Keep your working thread below your line of stitching. Pull the needle through and repeat.
4
To end. Go back down through the fabric.
Pro Tip
If you don't like the angled stitches, you can also keep the stitches straight and right on your pattern line.
5. Chain stitch
There are lots of variations on chain stitch, but this version is the easiest and looks great for thick lines. You can also stitch rows and rows of it to fill in an area!
1
Make your first stitch. Make a small straight stitch on your stitching line.
2
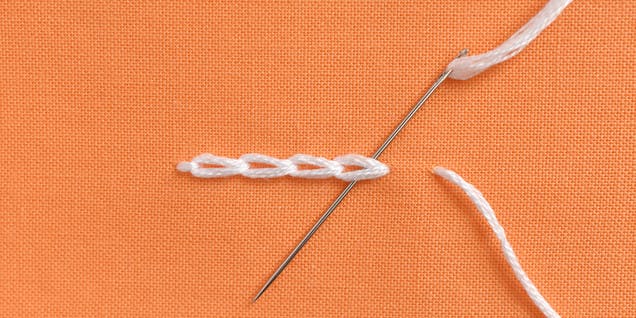
Start the chain. Come up from the back of the fabric a short distance away, then slide the needle through the straight stitch.
3
Back down. Go back down in the same place you came up.
4
Come up. Come up again this time sliding your needle through the previous stitch. Go back down and repeat.
Try out your new stitches with our FREE patterns

Queen Bee in DMC - PAT0447 - Downloadable PDF

Floral Kaleidoscope in DMC - PAT0452 - Downloadable PDF

Camomile in DMC - PAT0321 - Downloadable PDF

Triple Fern in DMC - PAT0003 - Downloadable PDF

Cat in DMC - PAT0523 - Downloadable PDF

Cursive Font in DMC - PAT0050 - Downloadable PDF
6. Lazy daisy
Use this stitch to make flower petals, raindrops, and lots of other small details. Sometimes this stitch is also called a detached chain stitch.
1
Make a loop. Come up from the back of the fabric and go back down in the same location, leaving a loop of thread on the surface.
2
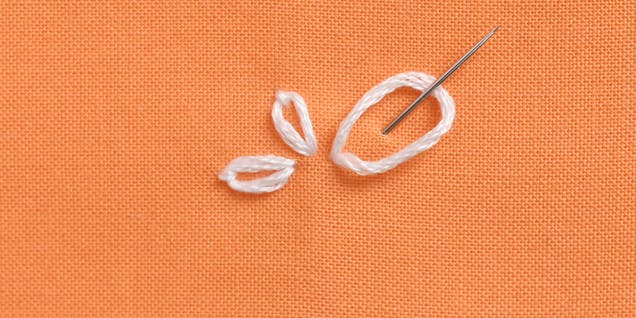
Catch the loop. Bring your needle back up a short distance away, catching the loop of thread.
3
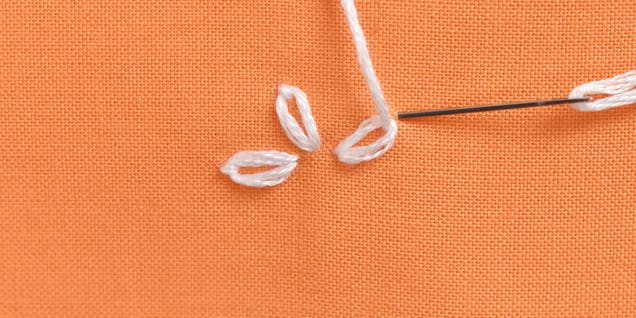
Make it taught. Pull the loop so it's slightly taut.
4
Complete the loop. Go back down on the other side of the loop, tacking it into place.
Pro Tip
You can make these stitches tiny, extra long and skinny, or anything in between!
7. Fly stitch
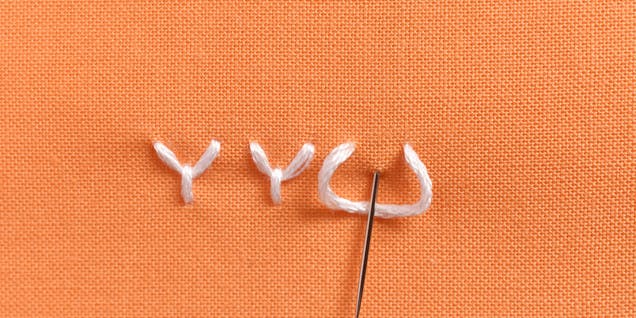
Scatter this Y-shaped stitch to fill an area of your embroidery or work it in lines for a fun border design. You can also change the length of the bottom stem to change the look, including making a tiny tacking stitch so it looks like a V or U.
1
Make a stitch. Come up from the back of the fabric and go back down a short distance away, leaving a loop of fabric on the surface.
2
Come up again. Come up again at a point that's centred and just below where you came up and went back down.
3
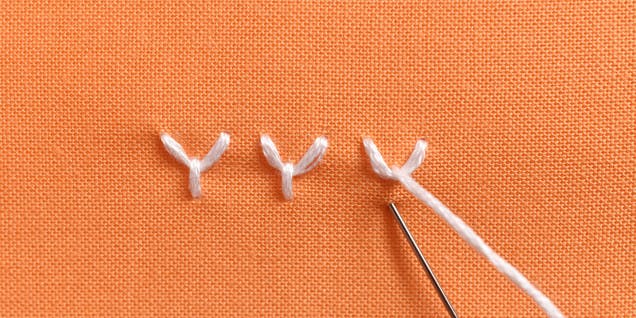
Make it taut. Pull the thread taut (or leave it a little loose if you want to make a U-shaped stitch).
4
Go back down again. Go back down a short distance below where the thread came up.
8. French knot
French knots often have a reputation for being difficult, but with a little practice and the right tension, you can do this!
1
Make a start. Come up from the back of the fabric.
2
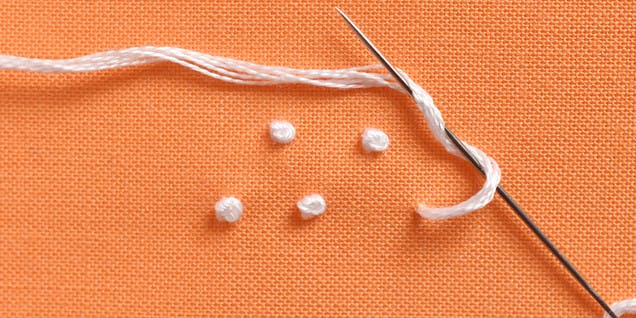
Wrap the thread. Wrap the thread around the needle two times.
3
Go back down. Hold the working thread as you insert the needle next to the point (not in the same point) where the thread comes through the fabric.
4
Hold it taut. Pull the working thread taut so the wraps tighten around the needle. Hold the working thread taut as you pull the needle all the way through the fabric.

Pro Tip
French knots are almost impossible to unknot, so it's best to work this stitch with a fresh length of embroidery thread when possible. It's so much easier if you need to cut them away to redo them!
9. Satin Stitch
This smooth stitch is great for filling in small areas. You can leave it without a border or stitch an outline around it with back stitch!
1
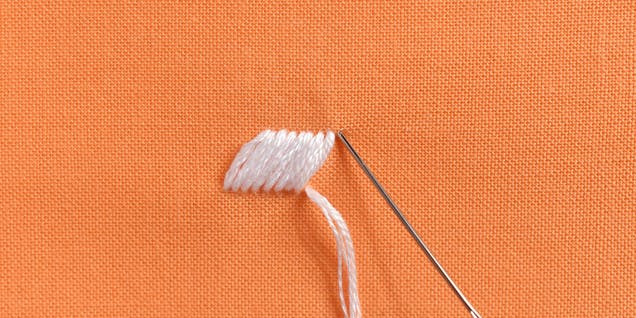
Make the fist stitch. come up through the fabric on one side of the area you are filling. Go back down on the other side.
2
Make a parallel stitch. Come up again next to the point where you came up and go back down next to the point you went down.
3
Repeat. Repeat this process, following the outline of the area.
Pro Tip
Be careful not to let the stitches get too long because they can snag.
10. Long and Short Stitch
When you need to fill a larger area, long and short stitch is a good option. It's also great for blending colours in an area.
1
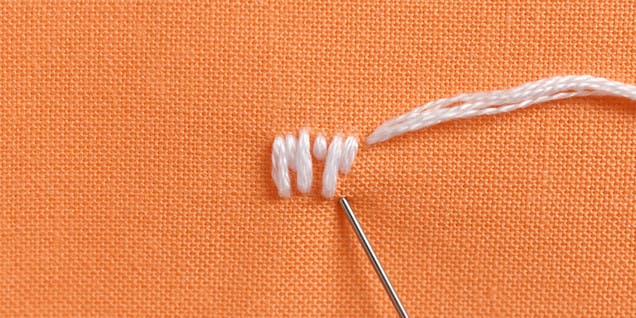
Make a row of stitches. Stitch a series of vertical stitches along one end of the area you are filling. Alternate between long and short stitches.
2
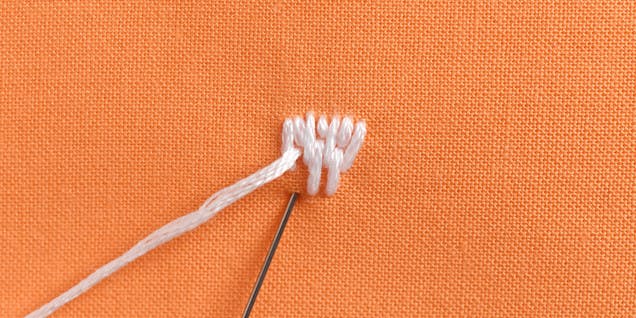
Fill in the gaps. Next, fill in the gaps below the short stitches with more long stitches.
3
Repeat. Repeat the second step to fill the entire area, ending with long and short stitches to fill in the gaps on the last row.
Pro Tip
Only the first and last rows truly have both long and short stitches, but you can adjust the length of the stitches as you work to fill an area with a more organic look.
You're ready to stitch!
There's no end to what you can learn about embroidery, but now that you know these ten stitches, you can embroider your favorite patterns!
