Paint by numbers quilt - Free tutorial!
Published on 16 January 2020 By Holly Butteriss 3 min read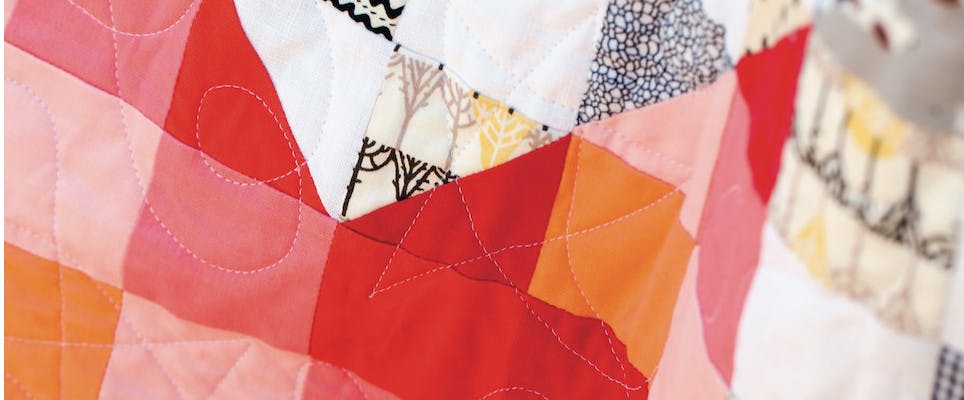
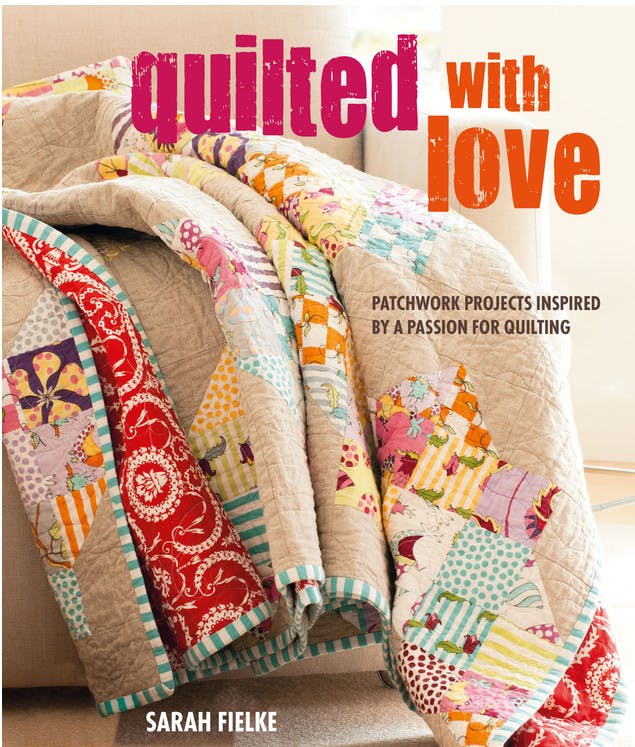
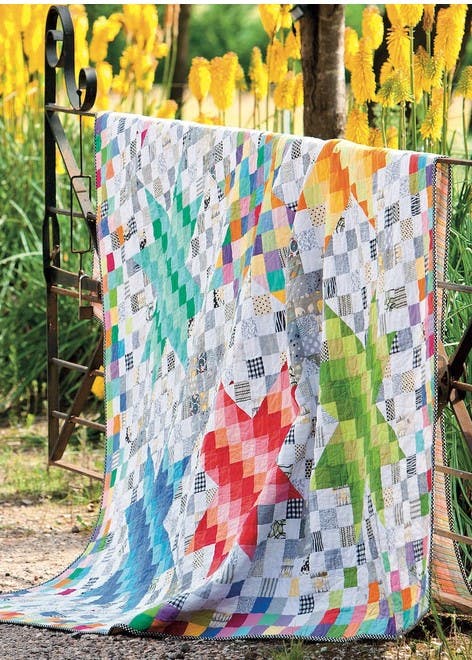
Check out this bright and bold star print quilt from the fantastic Sarah Fielke's Quilted with Love. Follow the step-by-step guide to make your very own, perfect for cosy nights in. This quilt is big enough for the entire family!
I made the first star in this quilt intending to make a pillow, but the more I pieced, the more into the idea I got! Using all the different grades of colour is oddly satisfying, like colouring in with a beautiful box of pencils. Pixelating the colours out into the border frames the stars and pulls all the different colours together.
Note on quilting: Paint by Numbers is machine quilted in a star and loop pattern, using white thread.
Finished size: King-size quilt, 100½ in. (250 cm) square.
Materials
- Two jelly rolls of Kona Cotton Brights for stars and border (Alternatively, buy 6 in.(15 cm) of at least five tones for each color of star (five greens, five pinks etc).
- 10 in. (25 cm) each of ten black-on-white prints
- 2¾ yd (2.5 m) plain white linen
- 6 in. (15 cm) each of six gray fabrics
- 1 yd (90 cm) black-and-white spotted fabric for binding
- 9 yd (8.2 m) backing fabric
- 2-yd (190-cm) square piece cotton batting (wadding)
- Half-square triangle ruler
- Small piece of template plastic if not using ruler
- Cotton thread for piecing
- Rotary cutter, mat, and ruler
- Sewing machine
- General sewing supplies
Cutting
If you are not using jelly rolls, cut all your coloured fabrics into strips 2½ in. (6.5cm) wide.
For each star:
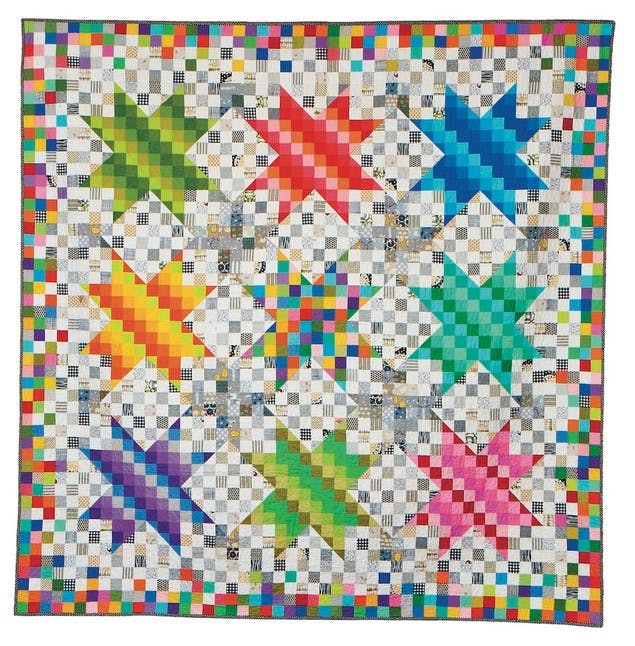
Referring to the photo of the quilt below, separate the five colours for each star and decide where you want them to fall on the star. All squares are 2½ in. (6.5 cm); all triangles are cut from a 2½-in. (6.5-cm) strip, using a half-square triangle ruler or template, or Template A.
Colour 1: Cut 8 triangles, 13 squares
Colour 2: Cut 8 triangles, 13 squares
Colour 3: Cut 4 triangles, 11 squares
Colour 4: Cut 12 squares
Colour 5: Cut 4 triangles, 11 squares
Cut colours for nine stars and set them aside in colour order. Cut all the remaining coloured fabric into 2½-in. (6.5-cm) squares for the borders. You will have more than you need, but this will give you a lot of choice when it comes to mixing colours.
From each of the black-and-white fabrics, cut:
• Four strips, 2½ in. (6.5 cm) wide. From these strips, cross cut 510 x 2½-in. (6.5-cm) squares and 108 triangles using Template A.
From the white linen, cut:
• 37 strips, 2½ in. (6.5 cm) wide. From these strips, cross cut 510 x 2½-in. (6.5-cm) squares and 108 triangles using Template A
From each of the gray fabrics, cut:
• Two strips, 2½ in. (6.5 cm) wide. Cross cut these strips into 96 x 2½-in. (6.5-cm) squares and 48 triangles using Template A.
From the black-and-white spotted binding fabric, cut:
• Eleven strips, 3 in. (7.5 cm) wide
Pro Tip
Want to make it smaller?
To adjust this pattern to make a queen-size (double) quilt, you could leave off the borders. For a throw, make only four stars with a border. For a quilt for a twin (single) bed, make six stars with a border.
Paint by numbers
1
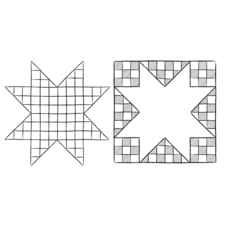
Lay the first block out on a design wall, the floor, or a bed. The five tones for each colour of star run diagonally across the star from left to right in the sequence shown (see image left); in the background to the stars, the black fabrics always alternate with the white linen (see image left). Mix the black fabrics well.
2
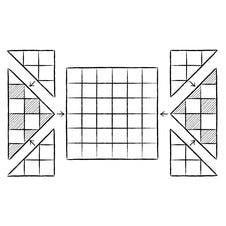
Sew the star together in sections (see image right). When you have made all the sections, sew them together in rows to make the star. Make nine stars, using all the different colours you cut.
3
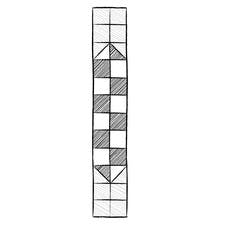
To make the sashing, lay out gray, white, and black pieces in rows, as shown in the image on the left. Sew the pieces into pairs, and then the pairs into one long strip to make the sashing. Make twelve strips of sashing in this order.
4
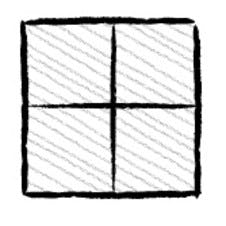
Using the remaining gray fabrics, make four 4-patch blocks (see image right).
5
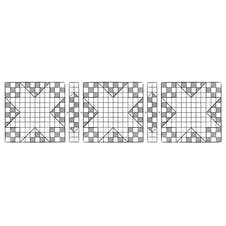
Lay all the stars out in three rows of three. Move them around to decide where you want to place them, using the photo of the quilt above as a guide. Beginning and ending with a star, alternating stars and vertical sashing strips, sew the top row together (see image left). Repeat with Rows 2 and 3.
6
Beginning and ending with a horizontal sashing strip, alternating sashing strips and 4-patch blocks, sew the remaining sashing strips together in two rows of three sashing strips and two 4-patch blocks.
7
Sew the three rows of stars together. Beginning with Row 1, then a sashing/4-patch strip, then Row 2, then a sashing/4-patch strip, then Row 3. Press.
8
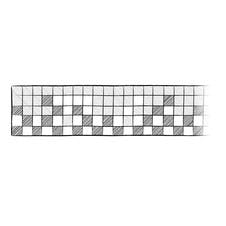
Next make the borders. There is no exact pattern for this: the image on the right gives you an indication of placement of colour, but you can have fun making your own pattern. The first row (the row closest to the stars) consists of alternating black and white fabrics; the second row has one or two coloured fabrics; the third is about 50/50 black and white and coloured; the fourth row is almost all coloured fabrics with a black or white square thrown in; and the fifth (the outermost row) is all coloured fabrics.
The top and bottom borders should be 5 rows deep and 44 squares long, and the side borders should be 5 rows deep and 50 squares long.
9
Sew the short border strips to the top and bottom of the quilt. Making sure to attach them to the points of the stars. Press. Sew the long borders to the sides of the quilt in the same way and press. Your quilt top is complete. Backing, quilting, and binding.
10
Cut the backing fabric crosswise. Cut into three pieces, each 108 in. (2.7 m) long. Remove the selvages (selvedges). Sew the three backing pieces together along their long edges. Press the seams open, then press the backing piece carefully.
11
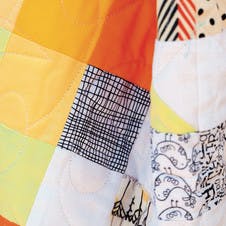
If hand quilting, tape the backing fabric right side down to the floor or a very large table using masking tape, smoothing out any creases as you go. Lay the batting (wadding) on the backing fabric, with the quilt top right side up on top.
Smooth any creases and hand baste (tack) the three layers together, using large stitches and working from the center out. The backing and batting (wadding) should be larger than the top for ease of quilting; don’t be tempted to trim them back.
12
Quilt as desired. Bind the quilt.
Loved this pattern? You can find even more gorgeous patterns in Quilted with Love from MAKEetc.com for £10 (RRP £12.99) with no P&P for UK customers - use code LOVECRAFTS10 at checkout.
Photography by Sue Stubbs CICO Books.
