How to read a knitting pattern
Published on 16 July 2020 By Merion 7 min read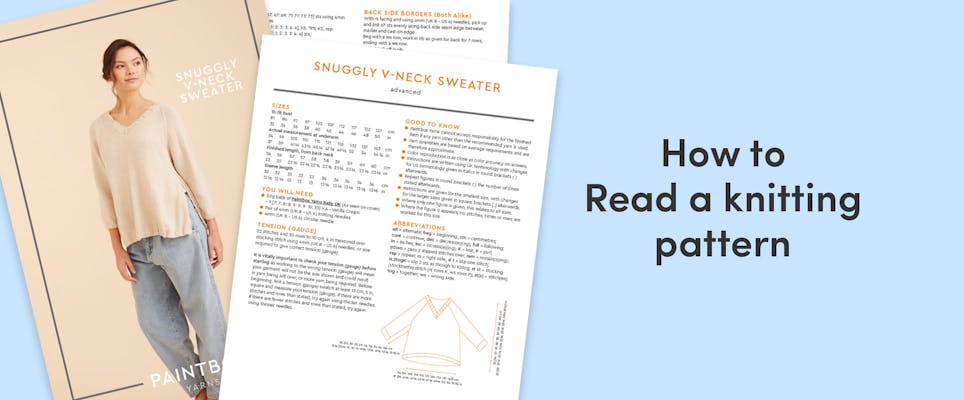
When you first learn to knit, patterns look terrifying - just a long list of words and numbers that make no sense! Let’s have a look step by step and find out how to understand each section in turn.
A simple, snuggly sweater by Paintbox Yarns
Our example pattern is for a sweater, but the rules apply for any knitting pattern.
Sizes
To begin with, choose the size of garment (if you’re making a sized pattern) that you need. Take into account the ‘ease’ that might be shown, and this means the fit of the garment. If it’s a slouchy oversized garment, it will have what is called ‘positive ease’ built into the pattern, which means that extra slouchiness is already built in, and so you don’t need to choose a bigger size to create a slouchy fit. If it’s a close fitted garment, this might have ‘negative ease’ built in, which means if you knit your size it will fit you closely and there is no need to go down a size to make sure it fits tightly.
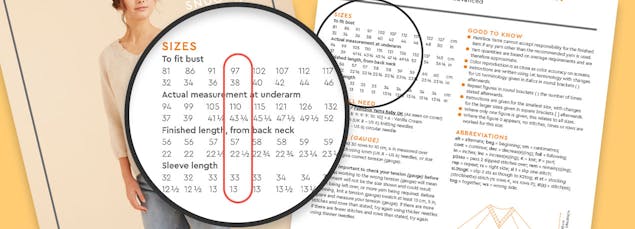
Make a note of which column your size is shown in - for example, if you are going to knit a 38” bust sized sweater (in the chart above), it is shown in the fourth column. This will show you which instructions to knit as you move throughout the pattern.
You will need:
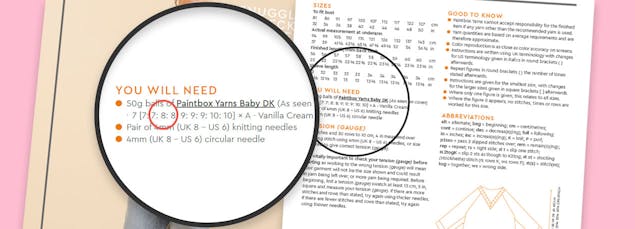
This is the section that tells you what you need to knit the pattern, and contains the information regarding quantity of yarn and needles, buttons or other notions necessary.
Yarn
The numbers in the square brackets denote the number of balls of yarn you need to make your sweater. The first number, which is before the brackets, is always the smallest size, and this will follow throughout the pattern.
To make your size - in our example, the 38” bust size, choose the number of balls listed in the fourth number listed in the brackets, matching the column number of your size in the previous chart. For the 38” bust size sweater, you will need 8 balls of yarn.
Needles
The needles that you will need will be specified here - if circular needles are required, the pattern will list them, otherwise you can assume you can use straight, single point needles. In the example above, the pattern needs straight 4mm needles, and a 4mm circular needle too.
Tension or gauge
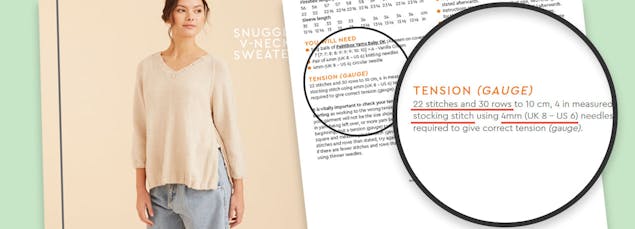
Tension translates into meaning the tightness of the tension in the fabric when we knit. Some people have a tight tension, some people have a looser tension - it all depends on our needles, the way we hold the yarn, and the sizes of our stitches. When you knit a garment, in order for it to match the sizes specified in the pattern, the designer will tell you what the ideal tension is for the project. This is usually calculated by working a 10 x 10 cm square, known as a swatch. So for example, for this pattern, working in a DK weight yarn, if you knit a 10 x 10cm square using 4mm needles, you will end up with 22 stitches across and 30 rows down. If you knit that 22 stitches/30 rows and your swatch is bigger or smaller than 10 x 10cm, that shows that your tension is either tighter (smaller) or looser (bigger) than the tension for the project.
Fixing this is easy! You need to re-knit the swatch using either a bigger or smaller needle to achieve the 10 x 10cm size - and then use those needles to knit the project.
Abbreviations
Abbreviations are knitting’s shorthand for techniques and stitches. There will be a list of abbreviations at the top of the pattern, and the more you knit, the more you will become familiar with them all, learning new ones as you go along!
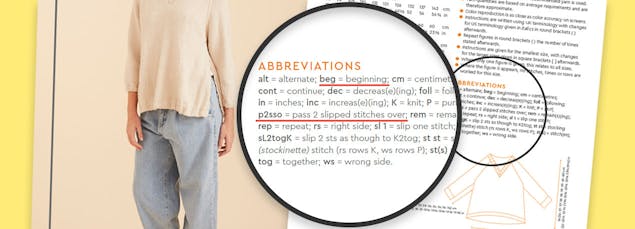
There’s no mystery here, it just saves writing words out in full and making the pattern longer!
Some abbreviations are more obvious than others, for example ‘beg’ is short for beginning, but ‘psso’ is short for ‘pass slipped stitch over’ and for these techniques you may need to refer to video tutorials to help!
Let’s get started!
The first line of the pattern tells us how many stitches to cast on. Remember when you chose your size from the list at the beginning of the pattern? You choose the same number from the list here - for example, for a size 38” which was the fourth in the list, we choose the fourth in the list here - 137 stitches.
Unless the type of cast on is specified, you can use your favourite cast on method.
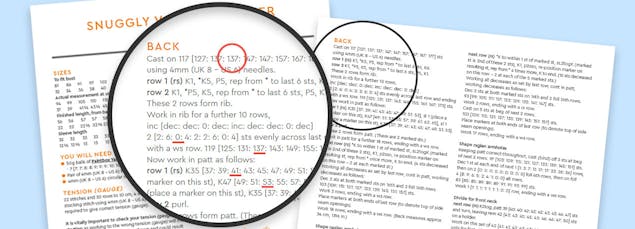
The first row is indicated (rs) which means right side - this is the front side, the right side of the knitting.
The first row:
row 1 (rs) K1, *K5, P5, rep from * to last 6 sts, K6.
Let’s de-code the first line!
Row 1 (rs) indicates that this is row one and the rs - right side - of the work.
To begin, K1 - knit one stitch
Next, *K5, P5, rep from * to last 6 sts - the asterisks are used as markers in a pattern to denote from and to - so here, the pattern tells us to knit 5 stitches, then purl 5 stitches, and to repeat those two steps from the asterisk to the last 6 stitches of the row.
The last instruction of the row is to K6 - knit 6 stitches.
The second row:
row 2 K1, *P5, K5, rep from * to last 6 sts, P5, K1
Row 2 translates as: Knit 1 stitch, then purl 5 stitches, knit 5 stitches and repeat that purl and knit sequence to the last 6 stitches, then purl 5 stitches and knit 1.
Working in pattern
You often find the words “now work in patt as follows” and this is shown here to illustrate the pattern for the next section of the design. In this example, the pattern is two rows long, and you just repeat these two rows for another 18 rows, ending on a ws (wrong side) row.
Now work in patt as follows: row 1 (rs) K35 [37: 39: 41: 43: 45: 47: 49: 51: 53], sl 1 (place a marker on this st), K47 [49: 51: 53: 55: 57: 59: 61: 63: 65], sl 1 (place a marker on this st), K35 [37: 39: 41: 43: 45: 47: 49: 51: 53]. row 2 purl. These 2 rows form patt. (There are 2 marked sts.) Work in patt for a further 18 rows, ending with a ws row.
Shape sleeves
You might often see the instruction to cast or bind off (these are the same), to create shaping in the middle of a pattern. Here it is indicated for shaping a raglan/sleeve: cast off 3 sts at beg of next 2 rows - and that means exactly what it says, to cast off 3 stitches at the beginning of this row, and the following row (even though you will be on the wrong side for the second row).
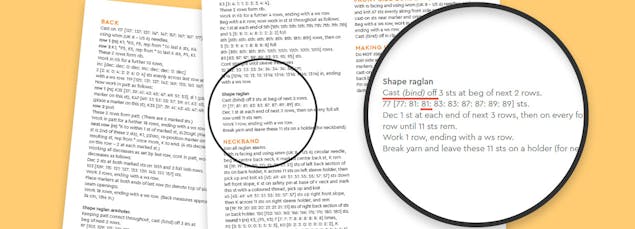
Often a pattern instruction may tell you to decrease or increase stitches “at the end of the next 3 rows, then on every foll alt row until x stitches remain”. When this instruction appears it is often good to write down the decrease rows on a piece of paper and tick them off as you go - so in this case, you will be decreasing at the end of the next three rows, but then the following rows 5, 7, 9, 11 and so on until you have the correct number of stitches left.
Making up
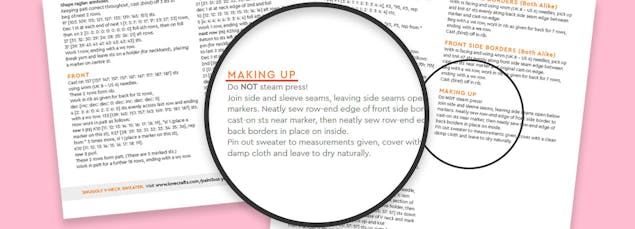
Making up is knitting shorthand for sewing together. There will usually be a schematic to follow and the instructions will show you which piece to sew to which piece, and in which order.
There you go! You’ve mastered how to read a pattern, now time to cast on! Here's a selection of beginner patterns to test your new skills.


