How to quilt a Christmas stocking!
Published on 13 November 2019 By Holly Butteriss 2 min read
The festive season calls for frosty evenings curled up beneath a blanket, hands warming around a mug of hot chocolate, the fire roaring in the background, and of course a gorgeous quilted stocking hanging on the mantlepiece!
This step-by-step tutorial will show you how to quilt your very own cute Christmas stocking, why not make one for all the family? They're a beautiful festive accessory that will look picture perfect hanging in your home!
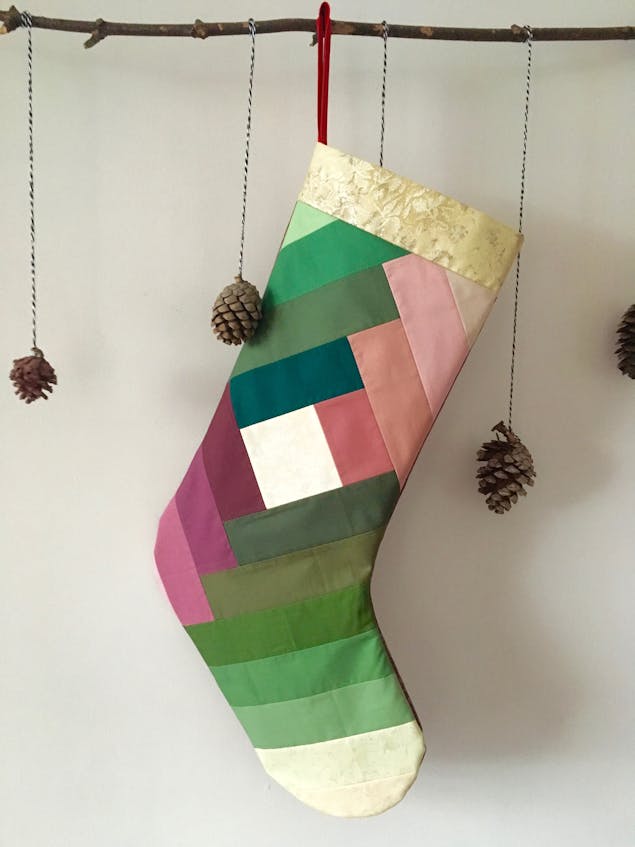
This impressive patchwork stocking is easier than it looks, and it means you can play with (almost) as many colours and fabrics as you want.
First, we’re going to make a log cabin patchwork rectangle, then we’ll cut out our stocking shape from it, line it, back it and turn it into a beautiful finished stocking.
There are a few tools that are invaluable when quilting, and those are a quilters ruler, a cutting mat, and a rotary cutter. They will make your life a lot easier, but don’t worry if you don’t have them, a ruler, pencil and scissors will make do.
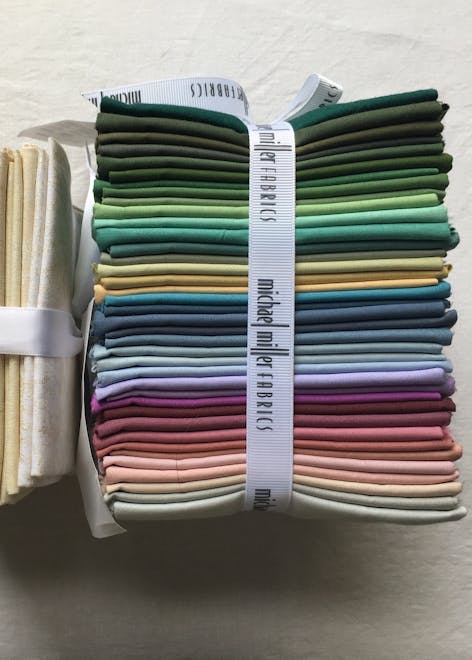
For this stocking I’m using fabrics from the bundle Cotton Couture, which has some lovely pastel red and green shades in it, and I’m going to mix them up with neutral colours from a Fairy Frost bundle.
Design and Fabrics
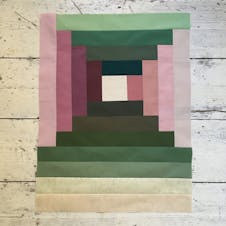
Start by thinking about how you might want to play with the colour layout in this pattern – you could do two sides of the square in light colours and two sides in dark colours, or you could alternate light and dark stripes each time you go around the square, or make the whole stocking in different shades of the same colour... the possibilities are endless!
For this stocking, I’m going to make two opposite sides of my square in pastel reds and pinks, and the other two alternate sides in greens from the Cotton Couture bundle, and I’m going to use Fairy Frost fabrics for the details and backing.
How to make your log cabin stocking!
1
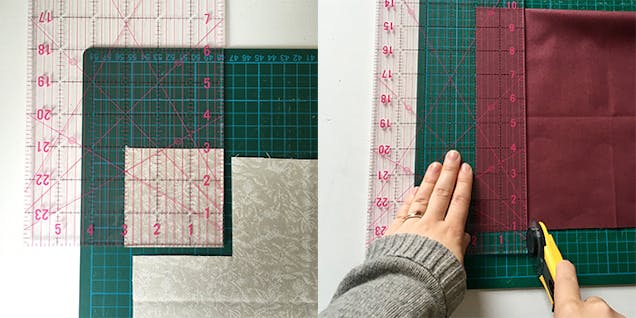
Cut out a 3” square with one your fabrics. I’ve used a white fabric from Fairy Frost bundle. This will form the centre of your design.
Then, cut a 2” strip from your next fabric. (This is where your rotary cutter and ruler really come in handy!)
2
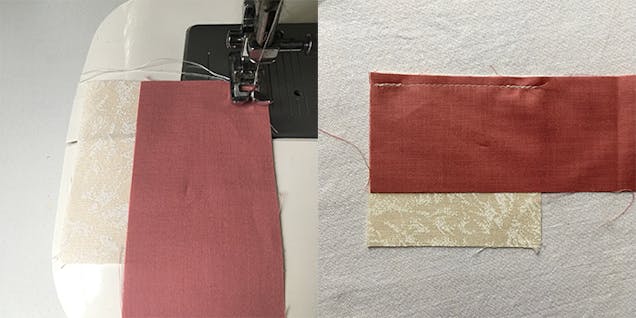
With face sides together, line up the corner of the strip with the corner and edge of the square, and sew them together using a 0.5cm seam allowance.
To make a 0.5cm seam allowance, I move the needle of my sewing machine over to the right as far as it will go, and then keep my fabrics lined up with the right edge of my presser foot as I sew.
Different machines have different settings, so do some practice seams on scraps to check you’ve got the measurements right.
3
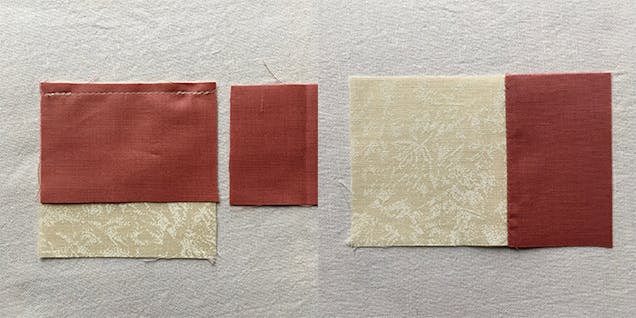
Then, trim your strip so that it is the same length as the square and press the seams open. Ta da! Your first seam. Now onto the next one...
4
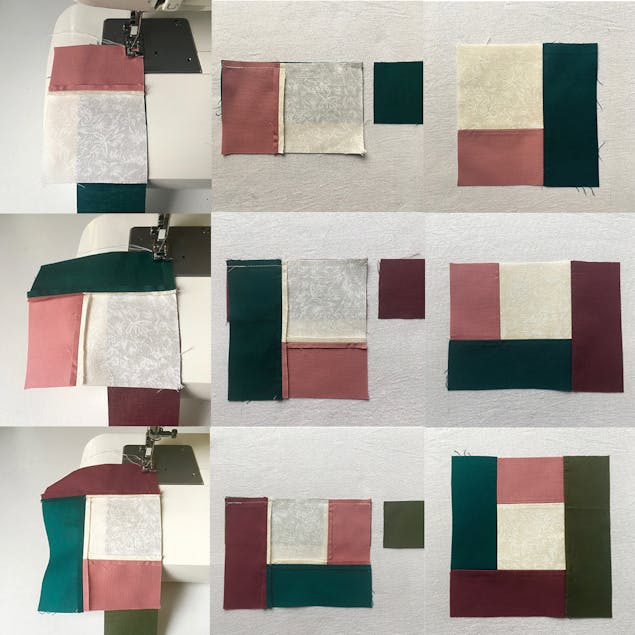
Cut, sew, trim and press each fabric strip, working your way around the square one side at a time. And once you’ve done all four sides, keep on going! (See image below).
Continue until you have 4 strips sewn on each side of the square (16 strips in total).
Finishing off your stocking!
1
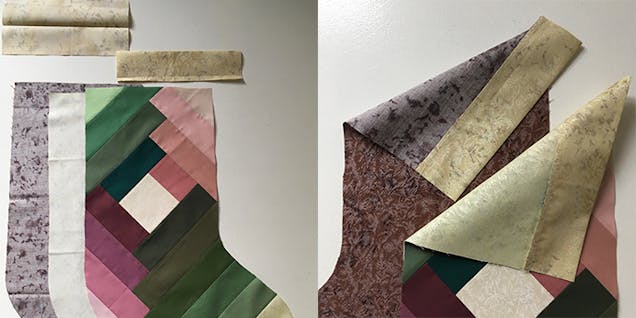
Because stockings aren’t square, and we don’t want to waste too much fabric, once you have done 4 strips around all four sides of the square, sew 2 additional strips following your colour pattern onto the next side of your square, then sew a further 2 strips onto the same side again.
I have used two strips from the Fairy Frost bundle to create a contrasting toe on my stocking.
These extra 4 strips give us the width and length we need for the foot of our stocking, whilst keeping our square at the centre of the design.
2
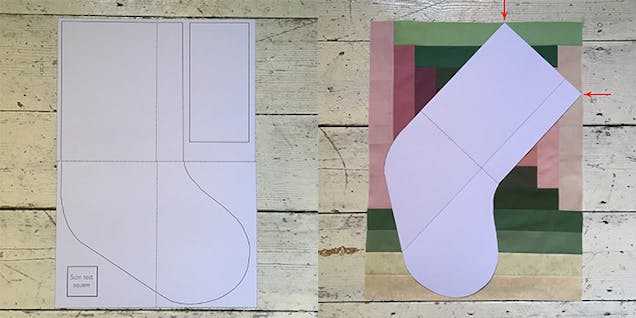
Print your PDF stocking template out onto A4 paper, making sure the scale is set to 100%, then tape the sheets together and cut out both the stocking template and the rectangle template for the top of the stocking.
3

Cut out your log cabin patchwork piece using the stocking template. Line up the top corners of your stocking template with the top and right edges of your patchwork rectangle to keep your square centred.
4
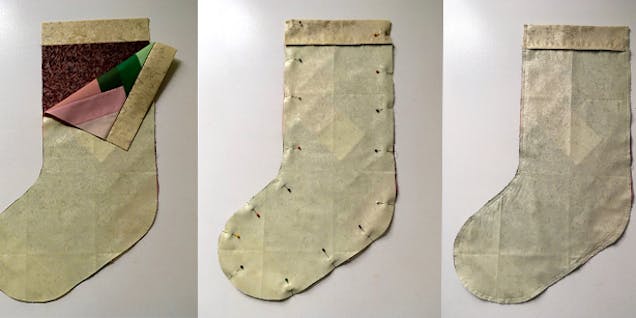
Use your stocking template to cut out one piece of fabric for your lining, and one for your backing. (We’re only going to line the front piece of your stocking to hide all the log cabin seams, but the back piece does not need to be lined.)
Cut out two rectangles using the template and iron both in half lengthways for the top of your stocking. Line one of them face sides together with the back stocking piece, and one of them face sides together with the patchwork and lining stocking pieces.
5
Sew each of the tops with a 0.5cm seam allowance, and then go over the seam allowance with a zig-zag stitch to seal the edge and stop it fraying.
6
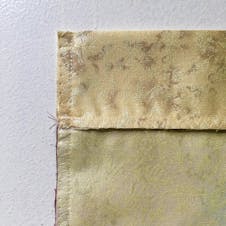
Press the seams down, then pin your front and back stocking pieces face sides together. Sew your pieces together first with a 0.5cm seam allowance, then with a zig zag stitch to seal the seams and stop them fraying. (Make sure not to sew the top edge!)
7
Turn your sewn stocking inside out, and voila! A beautiful patchwork stocking.
Finishing Details:
Hand sew a piece of ribbon in the top corner once you’re done so that you can hang your stocking. Monogram someone’s initials in the square at the centre of the pattern or embroider someone’s name on the top band.
Follow @kate.owen for more quilting inspiration and use #LoveCrafts to share all your quilted creations!