How to knit cables for beginners
Published on January 13, 2020 By Yazmin 3 min readWhether you're giving your project a simple twist or working elaborate braids, cable knitting gives fabulously rich texture and heaps of character to any knitting project. Learn how to knit cables with this beginners tutorial and guide by Anna Nikipirowicz. (Anna uses UK terms.) We'll also show you how to read a knitting chart and our fave cable inspiration!
What is cable knitting?
Cables are created by transferring a number of stitches to a cable needle and knitting them in a different sequence. Cables are sometimes referred to as Aran stitches, named after the Aran Islands off the west coast of Ireland, where the techniques are thought to have originated.
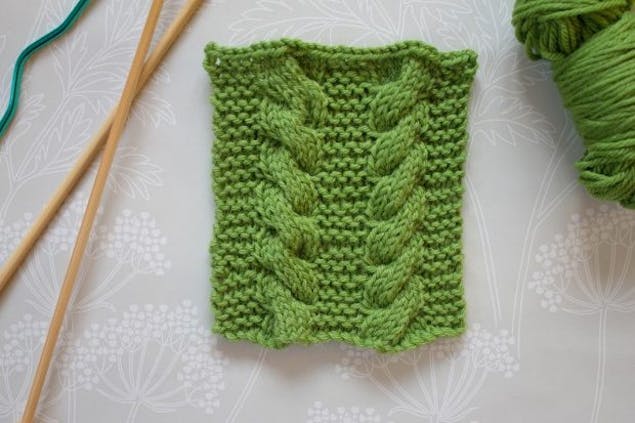
Cables are worked on the right side, and are usually worked in stocking stitch on a background of garter stitch, reverse stocking stitch or moss stitch, to allow the cables to stand out.
How to knit cables
1
Cast on 28 stitches.
2
Row 1 (RS): knit.
3
Row 2: knit 4, purl 8, knit 4, purl 8, knit 4.
4
Rows 3 & 4: as rows 1 and 2.
Pro Tip
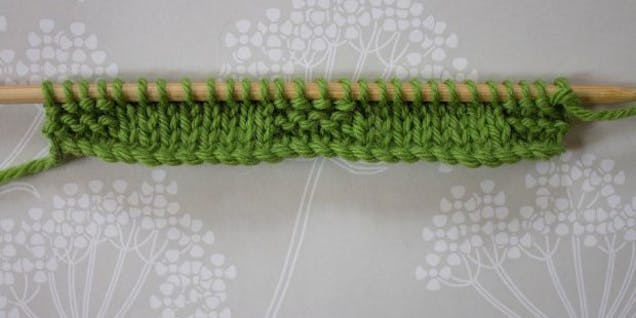
As you can see our pattern is forming. It's easy to see now the stocking stitch which will house our cable and the garter stitch on each side.
5
Row 5 (RS): knit 4.
6
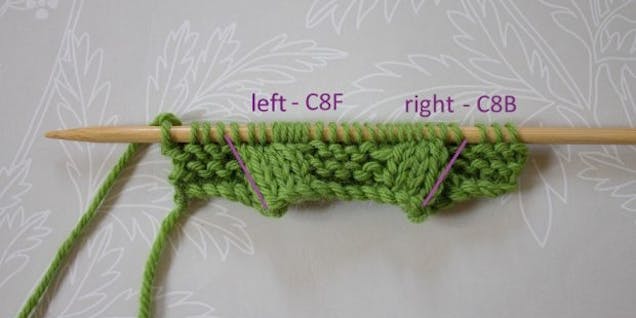
Our first cable slants to the right and is marked as C8B – cable 8 back.
7
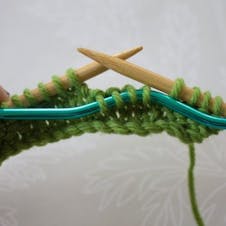
Slip the first 4 stitches from the left hand needle onto cable needle and move it to the back of the work.
8
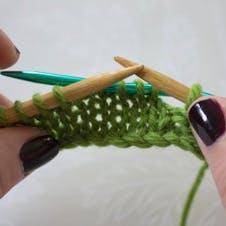
Coming in front of the cable needle, knit 4 stitches from the left hand needle, now knit the 4 stitches from the cable needle to complete the cable 8 back.
9
Now knit the next 4 stitches as normal and we come to our next cable which slants to the left and is marked as C8F – cable 8 front.
10
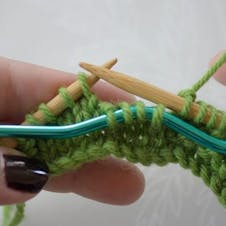
Slip the first 4 stitches from the left hand needle onto cable needle and leave it at the front of work.
11
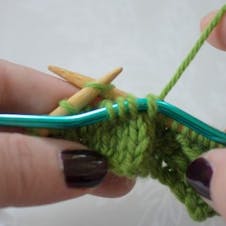
Going behind the cable needle, knit 4 stitches from the left hand needle, now knit the 4 stitches from the cable needle to complete the cable 8 front.
12
If we look at our work now you can see how the stitches are slanting, exactly as shown on the chart.
13
We now have to work a few rows in pattern in between our cables otherwise the work will twist too much if we work the cables too close to each other.
14
Try following the chart to see how you get on, if not just work rows 1 and 2 for 5 rows.
Pro Tip
If you find that the first stitch knitted after the cable needle is a little baggy, try knitting into the back of it to tighten.
15
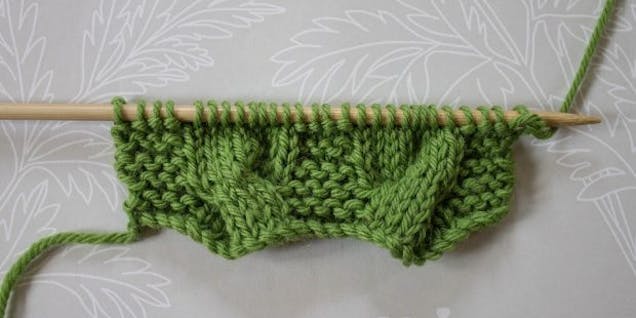
When you reach row 11 your work should look like this:
16
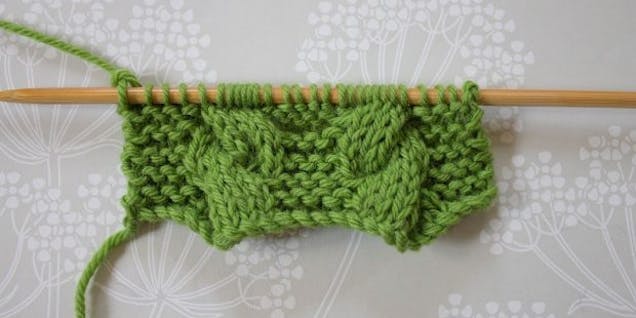
Work row 11 and you can see a lot better how the pattern emerges.
17
Continue working from chart repeating rows 1 to 12 until your work has the desired length. You did it! You've mastered your first cable stitch.
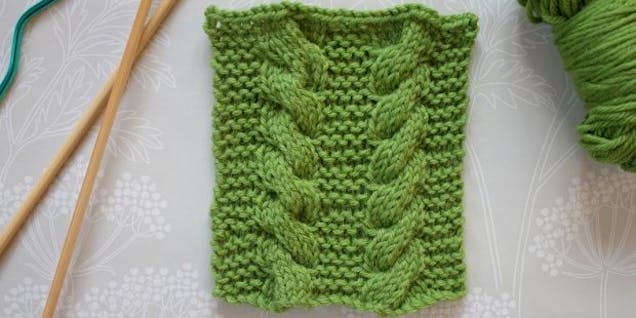
In the example below the cable stitches are worked over 8 stitches, but can be made over any even number of stitches (for example, 4-stitch, 6-stitch or 10-stitch cables). You divide the stitches into two groups, for example a cable of 4 stitches will have 2 stitches in each group, first group of 2 stitches will be moved onto a cable needle and held at the back or front of work, and then you knit the 2 stitches from the left-hand needle and finally the 2 from the cable needle.
I'll take you step by step and show you the techniques that create cables, but first let’s talk about tools needed and instructions!
Handy tools and materials to get started
What's a cable needle?
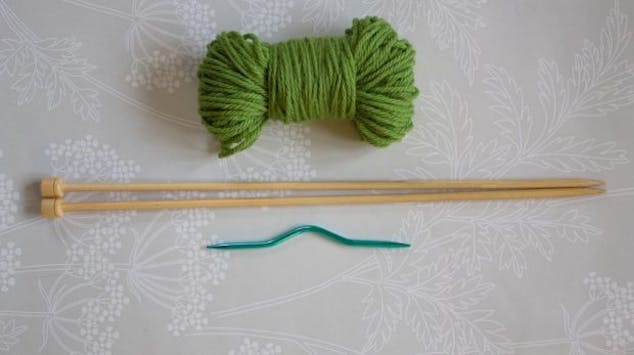
Cable needles are a short needles with two points like a double-pointed needle. They can be straight or cranked like the one in the picture below. The cranked needle makes it almost impossible for the stitches to slip off while you work on the next stitches, which is very helpful.
They usually come in a pack of 2 or 3 sizes, it is best to use the one closes to the size of your knitting needles, it does not have to be exact, but if the cable needle is too small the stitches may slide off when you are working on your cable and if it is too thick the stitches will stretch.
Cable charts
Very often cable patterns are charted, as it gives a visual representation of what the cable will look like when it’s knitted up, and it is also quite a compact way of showing instructions for a large and complicated design.
Each cable has a symbol and they do vary widely. Always, check the symbol key for detailed instructions on how to work the cable in each design.
For our swatch I have written and charted the instructions so you can familiarize yourself with both. Our chart is for a flat work so it reads from right to left on the right side and left to right on the wrong side.
Below is the key and our chart:
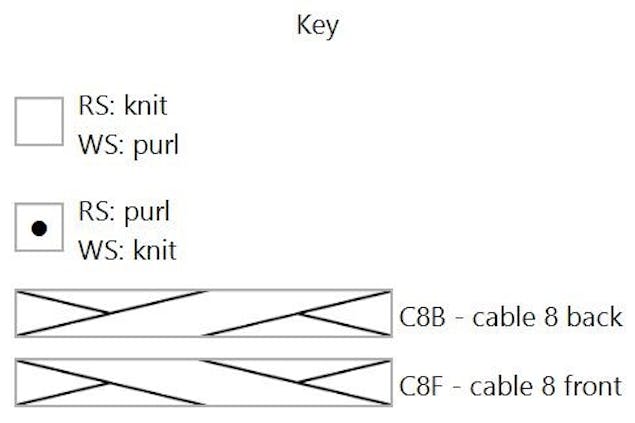
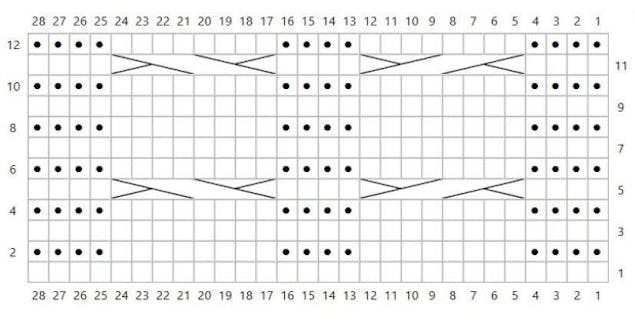
This is a chart for a simple right and left cable, each worked over 8 stitches. Our cables are in stocking stitch on a background of garter stitch. The first cable starts on row 5 which is a right side row. Cables will rarely start on the first or second row as they produce a very twisted edge. Let's get started!
Learn the honeycomb stitch
Now that you've mastered your basic cable stitch, why not try this lovely honeycomb pattern which uses C4B and C4F cables and is worked entirely in stocking stitch.


