Relax, and stitch a mindful embroidery piece
Published on June 11, 2021 By Shikira Alleyne 2 min read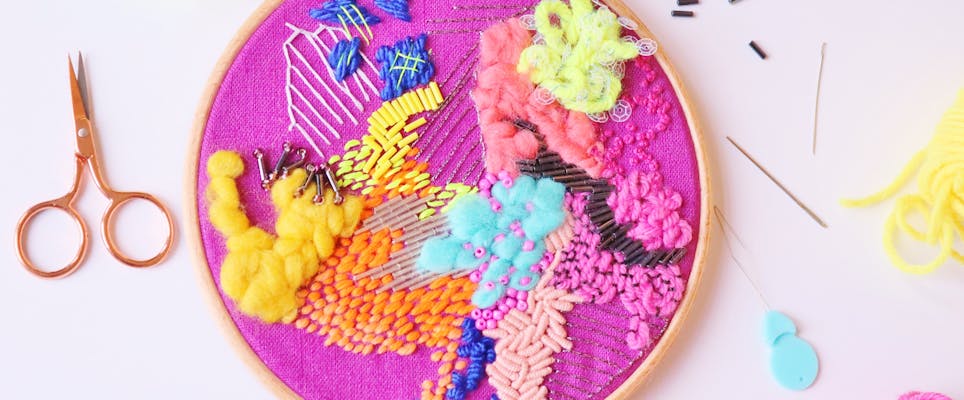
Everybody is talking about mindfulness these days. But mindfulness doesn’t just take its form as meditation, oh no no no! Finding a pocket of peace to be more mindful can be achieved with some stitching too. Follow a pattern or just let yourself get creative and experimental like in this tutorial!
Just go with the flow make decisions as they come and feel and trust your intuition.
Have you ever heard about a psychology theory called flow?
Well, finding yourself in a state of flow can bring you the same positive benefits as doing a yoga class or meditation, and because we already love doing embroidery we’re winning! But how about going a step further to exercise 'letting go.'
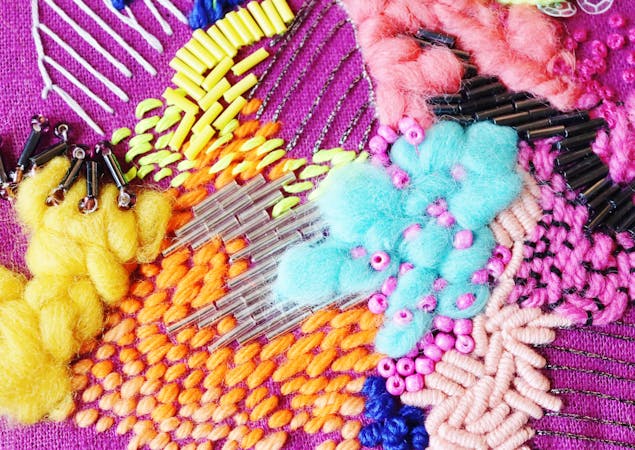
Okay, so we always approach a project/tutorial with a clear idea of the outcome. In this project I invite you to step outside of your comfort zone, go grab whatever sewing materials you have, threads, beads, sequins, wool, and just sew without any idea of what stitches or what threads. Just go with the flow make decisions as they come and feel and trust your intuition. Feel love and acceptance for the magic used to create, two important factors of the science of happiness.
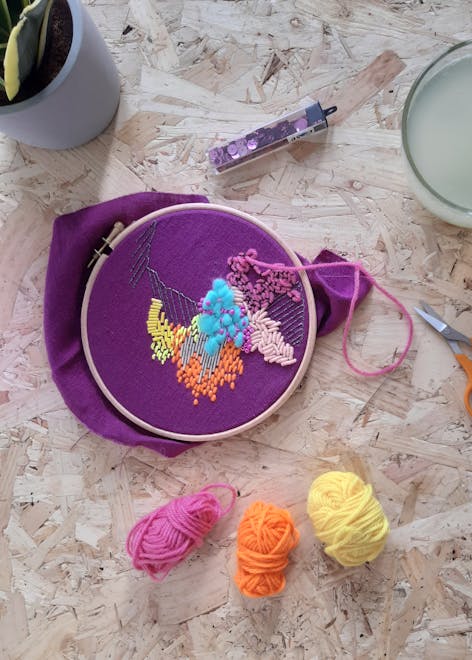
If your not quite ready to let go, that’s fine! Everything in its time. Follow my lead, with this vibrant project which uses lots of different techniques.
NOTE: The materials listed are not the exact products I’ve used. I just rummaged through my craft stash and took anything interesting. But I’ve put together this list in case you’d like something specific for this project. I do however, encourage you to make use of your craft stash.
Materials
- 7" hoop
- Kona Cotton
- in berry colour
- Sewing needles
- DMC Light Effects
- in colour E305 (metallic grey), E980 (neon yellow)
- Bugle beads
- in colour 72010 – Ice
- Round Beads
- in colours similar to berry pink and deep plum
- in colours blood orange, and lipstick pink
- Rolving wool assortment
- DMC embroidery thread
- in colours 310 black, 718 berry, 818 soft pink, 415 powder blue
- Paintbox chunky yarns
- in colour royal blue 340
Other materials used
- Neon yellow chunky yarn
- Neon yellow bugle beads
- Dark grey bugle beads
- Clear sequins
- Regular sewing cotton thread
- Needle threader
I used a few different stitches on this piece including Bullion knots, Couching stitch, Blanket stitch, Running stitch and French knots. If you need a refresher on how to do these stitches, check out this video guide!
Let’s get stitching…
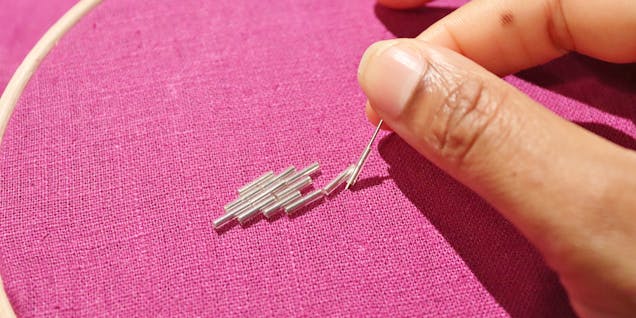
1
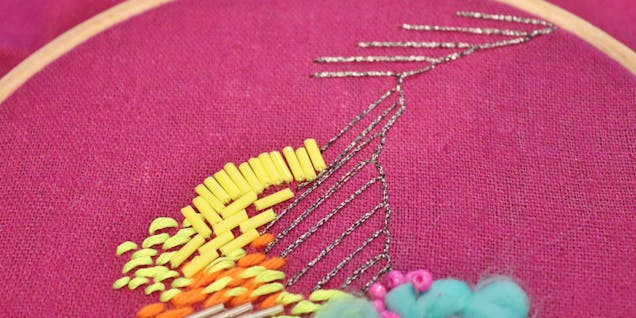
First thing to do is place your fabric inside of the embroidery hoop. I began placing silver bugle beads in a arrangement. I chose to lay them with long and short rows and built it up like brick work.
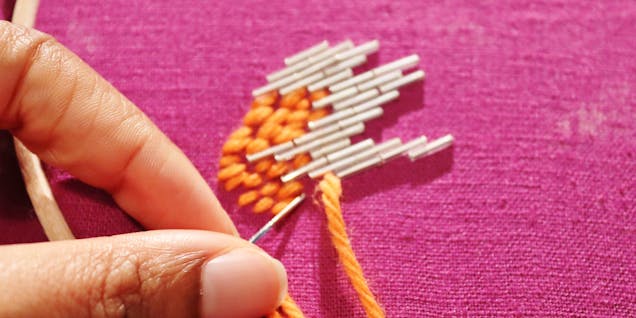
2
Once I was happy to move on, I picked up this bright blood orange coloured yarn and added a running stitch to complement the bugle beads. It was totally random. I let go of how much I should do and just kept going till it felt good inside.
3
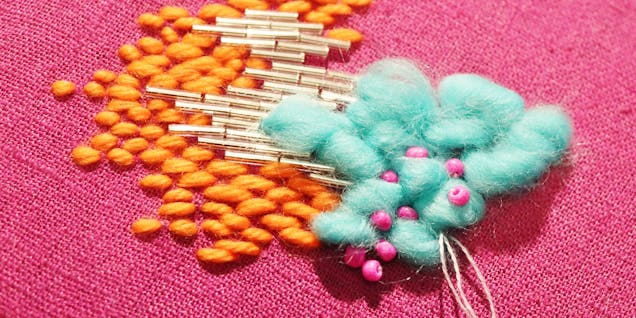
From the needle collection, I choose the biggest needle there. Carefully separate some of the turquoise roving wool and use the needle threader to assist threading it through the eye of the large needle. I started stitching making these bubble type stitches with it.
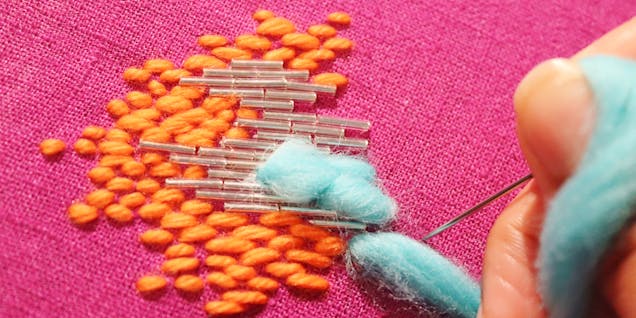
Pro Tip
The roving wool is quite delicate, so take time pulling it through the fabric to avoid it breaking. It gives you a nice texture to touch and see.
4
Taking a complimenting cotton thread, I took some of these round beads which are a berry colour and stitched them into the roving wool. Again there is no right or wrong way, I just went with the flow, adding beads until it felt good.
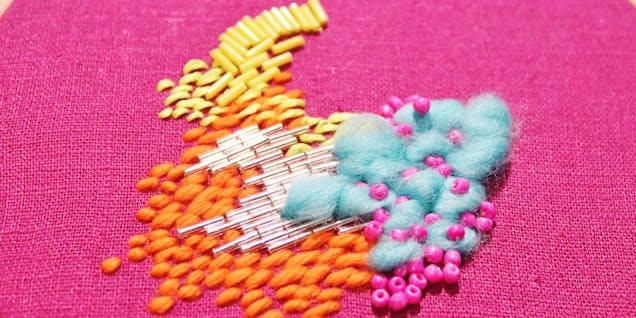
5
From here I took some of the dmc neon yellow embroidery thread E980, and started stitching similar running stitches into the orange yarn already there. I started to feel like I should add something extra so I introduced these neon yellow bugle beads into the design. I started to feel excited.
Pro Tip
Try paying attention to how you feel as you change elements. Become aware of the questions you ask yourself. I would say to myself, “does this feel good?” as I’m stitching, or “do I like the direction this is going?” or “should I change the material element or colour?” Questions like this allow you to keep checking in with yourself as you move through the design.
6
I really love these bugle beads but I don’t have them in other colours. So, I decided to use a bullion knot stitch to give a similar impression. I used dmc thread colour 818 for this and arranged them very randomly.
7
Moving on I used dmc thread colour E305 dark grey and a blanket stitch to create these long slanted stitches which also contour the embroidery hoop.
8
I really loved the effect of these stitches and wanted more! So I added some in the area central to the whole hoop and randomly stitched.
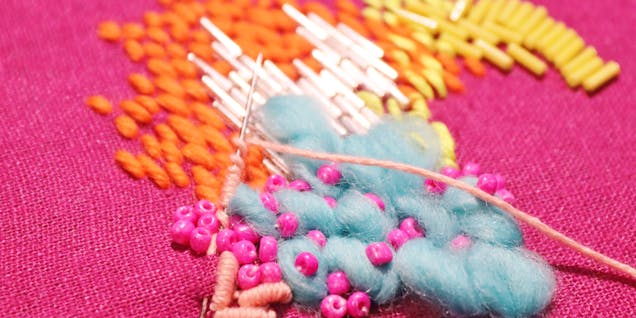
9
Here is a look at how the whole hoop is looking so far…

10
Taking some of this berry coloured yarn and dmc embroidery thread colour 310 black, I decided to use a couching stitch and swirl the yarn in different directions. I noticed that I wasn't feeling positive. I don’t know if it was the colour choice or stitch choice., but it was important not to remove anything I didn’t like and instead to find acceptance that it didn’t work, and thats OKAY. I decided that I did like the colour choice but couching wasn't working at this point.
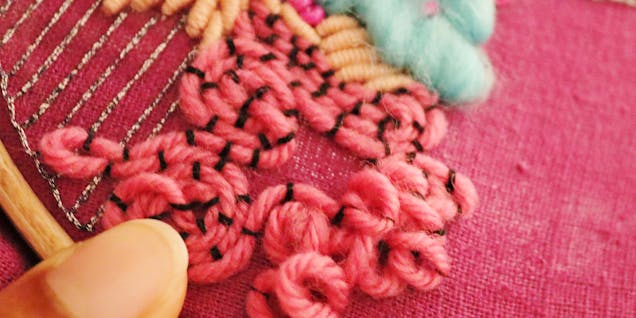
11
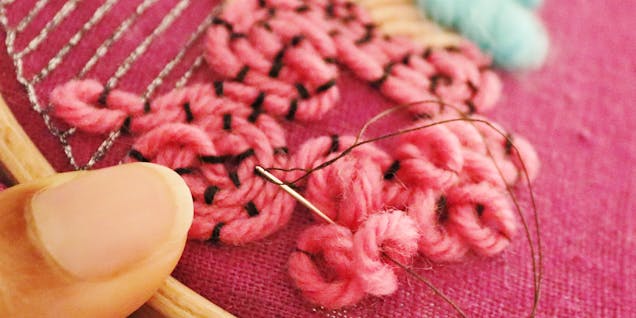
So instead I created these big loops and used just a regular cotton thread to hold some in place. I did this by doing a normal stitch coming up through the fabric but then instead of pulling the whole thread through, I just leave a loop hanging. Sometimes I would use the regular cotton to hold the loop in a desired position.
12
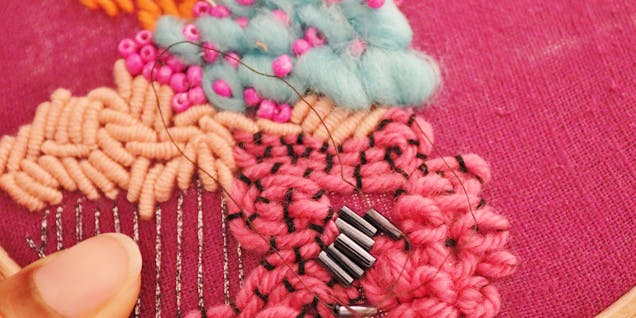
Because I wasn’t totally happy with this couching and yarn colour. I thought I’d add the bugle beads to the space. I used these grey bugle beads I had in my stash. I laid them side by side to fill the space and flow through the design.
Pro Tip
If you’re finding it hard to move on from an element of the design that doesn’t sit right with you, here is what I repeat to myself.
“Even though this last piece doesn’t mesh well, I love and accept it anyway. I know that this is just a part of the process of mindfulness to exercise letting go when I feel resistance, all will look beautiful in the end.”
If you notice tension it maybe a good idea to step away from the project, do something else to relax, then return later with a fresh enthusiasm.
13
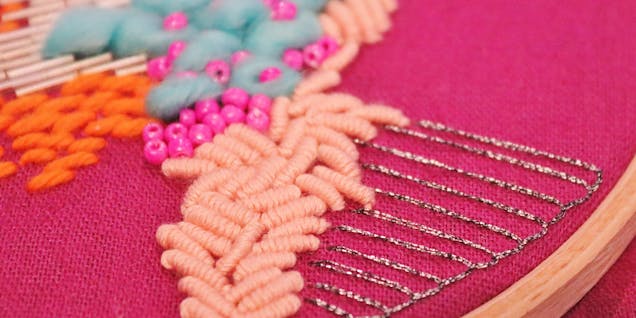
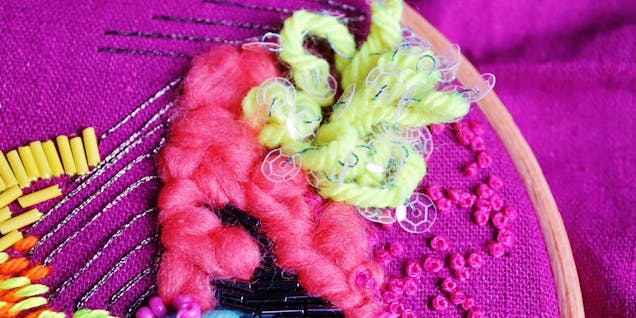
Into the space I added roving wool in a pink colour to sit beside the grey bugle beads and blanket stitch from step 8. I used the same method for stitching the wool. (see step 3). Together with this I added some French knots using dmc thread colour 718 and scattered them around the space next to the roving wool. This all felt good and I had nicely recovered from feeling a little icky. I used a chunky neon yarn to try that looped affect again that we saw in step 11. This time I made the loops bigger and bunched together. After looking at it, something was missing. I added these clear sequins to each loop. Yes! I was very happy!
14
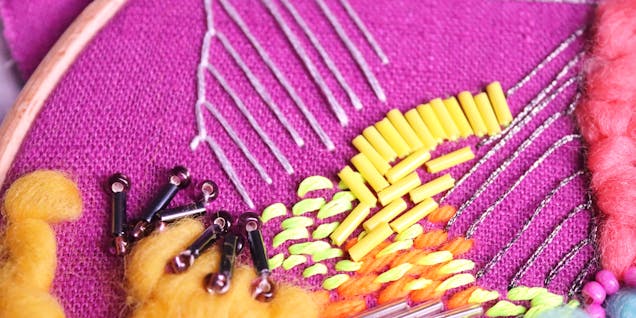
Now for the other side of the design. I was feeling good about using the roving wool and decided to add a pop of yellow roving wool to the design. On top of that I used the same grey bugle beads but this time I added a deep plum round bead to either end. Feeling in a flow, I used dmc thread colour 415 repeating the same blanket stitch next to the neons and beads. My aim wasn’t to fill the fabric but rather to keep building until I was satisfied.
15
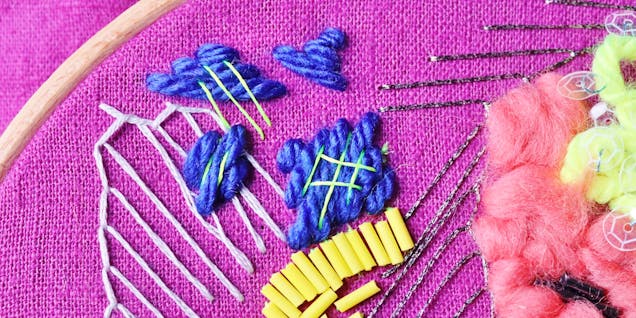
To fill the last few spaces I used this blue chunky yarn to create diagonal chunky stitches. I then used one strand of dmc thread colour E980, neon yellow, to add stitches over the top of the blue.
16
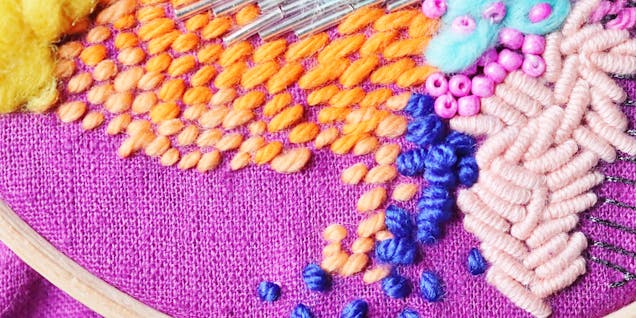
Loving the blue yarn I decided to use it again at the bottom of the design only this time doing small running stitches which look like dots. I also found a lighter orange and thought I’d add some to soften the blood orange running stitches.
17
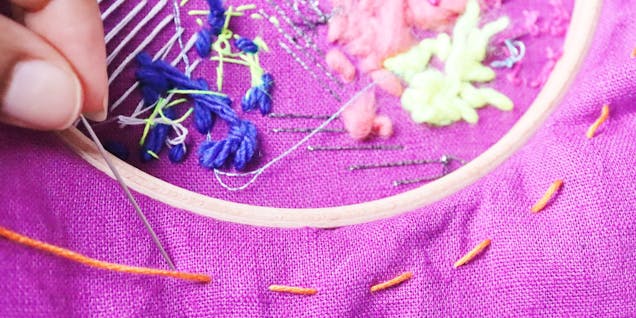
To finish off the hoop, turn it over onto the wrong side and place a loose running stitch around the whole hoop with roughly 1.5cm space from the edge. I’m using this orange thread just so you can see it clearly, but you can use any cotton thread.
18
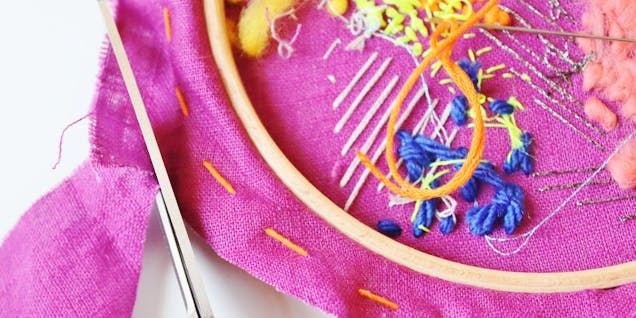
With some fabric shears leave a space roughly 1.5cm and cut around the running stitch.
19
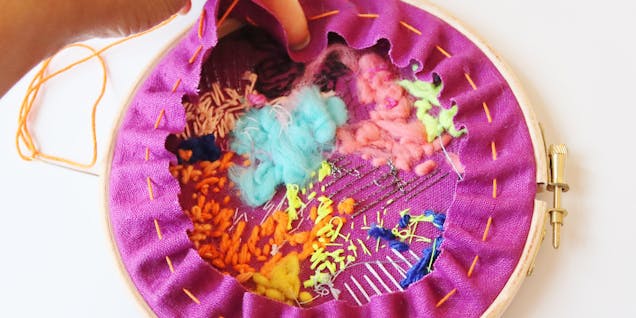
Pull the running stitch thread tightly so it gathers the fabric in as pictured. Complete by knotting the thread and you’re ready to hang your work.
And there you have it! One intuitively stitched embroidery piece you can proudly display in your home. It doesn't matter if you feel it looks messy, or if the colours clash. This shows an attachment to expectation. Work through this feeling by focusing on the accomplishment itself rather than the outcome (which I'm sure will be fabulous anyway!) Remember this all a part of the experiment in letting go, expressing yourself and taking the time to slow down and stitch to your soul's content.