Crochet a cute Christmas pudding and holly garland
Published on 13 November 2019 2 min read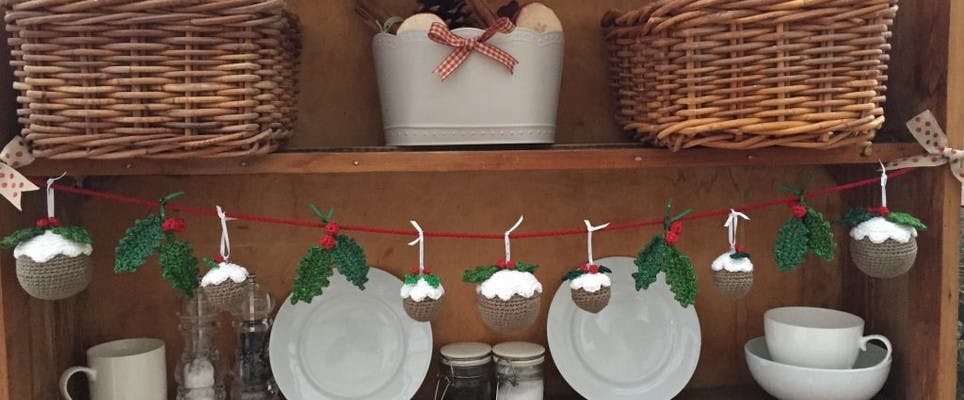
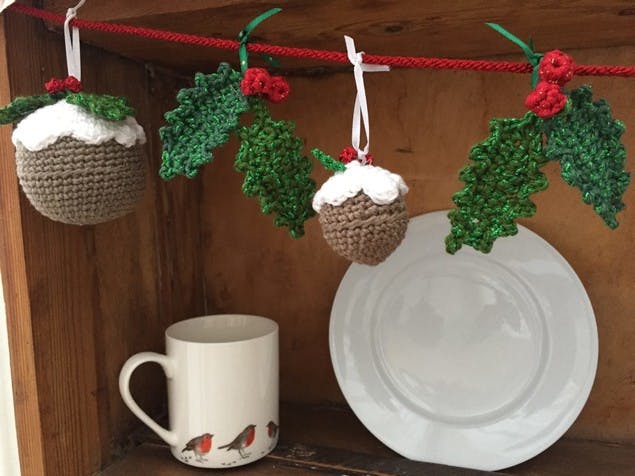
‘Tis the season to get crafty and we’ve got the perfect little crochet project to kick off your Christmas making! Add a little sparkle to your kitchen or dining room this festive season and crochet this gorgeous Christmas pudding and holly garland by the mega talented Kate Eastwood.
Kate’s delightful design is made by crocheting Christmas puddings in two different sizes – a large one that has a 6cm polystyrene sphere inside, and a smaller one that uses a 3.5cm sphere. There are also three different-sized holly leaves for the top of the puddings and to hang along the garland.
Ready to get started?
You’ll need:
- 3mm crochet hook
- Paintbox Yarns Simply DK in Coffee Bean (110)
- Paintbox Yarns Simply DK in Champagne White (102)
- Paintbox Yarns Simply DK in Rose Red (113)
- Paintbox Yarns Simply DK in Grass Green (129)
- Twilleys Goldfingering in Forest Green (051)
- Twilleys Goldfingering in Red (038)
- 6cm polystyrene spheres
- 3.5cm polystyrene spheres
- Thin white ribbon (for hanging the puddings)
- Red ribbon or cord (for the garland)
- A tapestry needle
We haven’t included quantities here as you can really go to town or just make a few. For reference, Kate’s garland was made up of three large puddings, four small puddings and four pairs of holly leaves.
How to make the large pudding
1
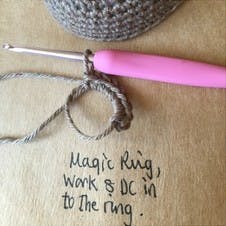
Round 1: Begin by making a magic ring and work 8 DC in to the ring.
2
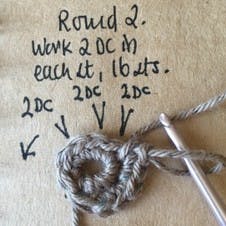
Round 2: Work 2 DC in to each stitch from Round 1, 16sts.
3
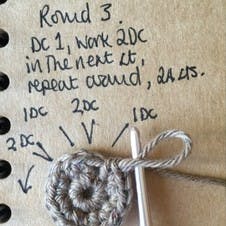
Round 3: *Work 1 DC in to the next stitch and then 2 DC in to the following stitch.*Work from * to * all the way around, 24sts.
4
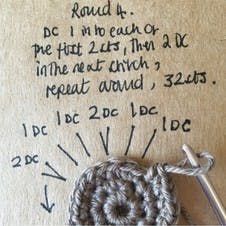
Round 4: *Work 1 DC in to each of the next 2 stitches and then 2 DC in to the following stitch.*Work from * to * all the way around, 32sts.
5
Round 5: *Work 1 DC in to each of the next 3 stitches, then work 2 DC in to the following stitch. * Repeat from * to * all the way around, 40sts.
6
Rounds 6 to 11: Work a round of DC, 40 sts.
7
You’ve now made the first half of the bauble – yay! Make a second half in exactly the same way.
8
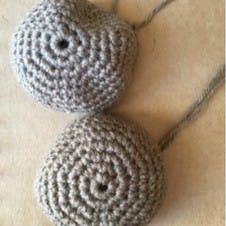
When both halves are complete, fit them onto the 6cm polystyrene sphere and use a length of yarn and a needle to carefully stitch the two halves together.
9
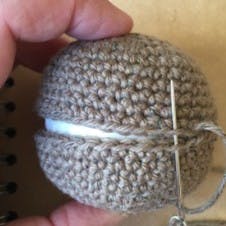
Finish off and sew in the ends.
How to make the topping for the large pudding
1
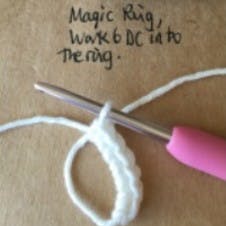
Round 1: Working in the white begin by making a magic ring and work 6 DC in to the ring.
2
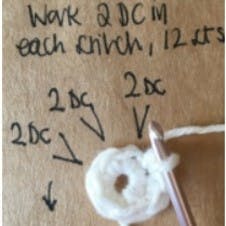
Round 2: Work 2 DC in to each stitch from the first round, 12 sts.
3
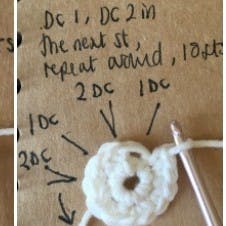
Round 3: *Work 1 DC in to the next stitch followed by 2 DC in to the next stitch*. Repeat from * to * all the way around, 18 sts.
4
Round 4: *Work 1 DC in to each of the next 2 stitches, followed by 2 DC in to the next stitch.* Repeat from * to * all the way around, 24 sts.
5
Round 5: *Work 1 DC in to each of the next 3 stitches, followed by 2 DC in to the next stitch.* repeat from * to * all the way around, 30sts.
6
Round 6: *Work 1 DC in to each of the next 4 stitches, followed by 2 DC in to the next stitch.* repeat from * to * all the way around, 36sts.
7
Round 7: *Work 1 DC in to each of the next 5 stitches, followed by 2 DC in to the next stitch.* repeat from * to * all the way around, 42sts.
8
Round 8: Work a round of DC, 42 sts.
9
Round 9: This is the final round of the scalloped pattern and is worked as follows: DC in to the first stitch, work a (HTR and TR) into the next stitch, a (TR and HTR) into the next and then work a Sl St in to each of the next two stitches.
10
For the second scallop work: a (TR, DTR and TR) in the next stitch and then Sl St in to the next 3 stitches.
11
For the third scallop work: a DC, then a (HTR and TR) in the next stitch, a (TR and HTR) in the next stitch, followed by a DC and then 2 Sl ST.
12
For the fourth scallop work: a DC, a HTR, a (TR, DTR and TR) in the next stitch, a (HTR and DC) in the next stitch and then Sl ST in to the next 3 stitches.
13
You’ll now be at the halfway point. Repeat the four scallops again, then finish off and sew in the ends.
14
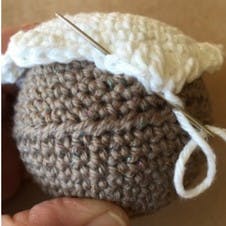
Line up the centre top of the pudding and the centre top of the topping and stitch the topping in place.
How to make the small pudding
The small pudding is made using exactly the same technique as the large pudding, just on a smaller scale.
1
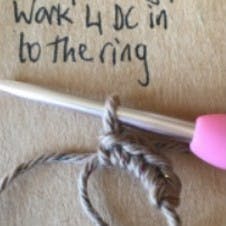
Round 1: Working in your main colour begin by making a Magic Ring and work 4 DC in to the ring.
2
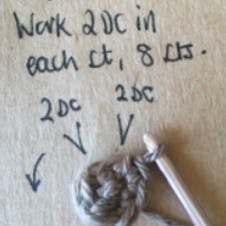
Round 2: Work 2 DC in to each stitch from the first round, 8 sts.
3
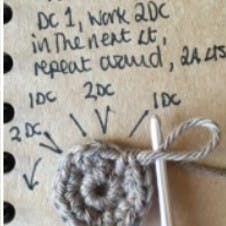
Round 3: *Work 1 DC in to the next stitch followed by 2 DC in to the next stitch*. Repeat from * to * all the way around, 12 sts.
4
Round 4: *Work 1 DC in to each of the next 2 stitches, followed by 2 DC in to the next stitch.* Repeat from * to * all the way around, 16 sts.
5
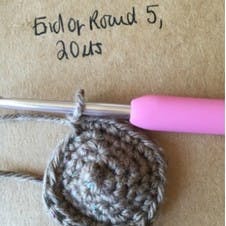
Round 5: * work 1 DC in to each of the next 3 stitches, followed by 2 DC in to the next stitch.* repeat from * to * all the way around, 20sts.
6
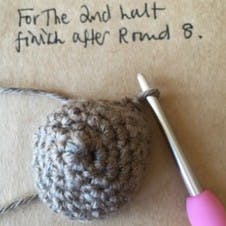
Rounds 6 to 9: Finish off and sew in the ends.
7
Now you’ve completed the first half, make a second half in exactly the same way, but on this half finish after round 8.
8
Once both halves are completed, fit them on to the 3.5cm polystyrene sphere and sew the two halves together.
9
Finish off and sew in the ends.
How to make the topping for the small pudding
1
Round 1: Working in the white begin by making a magic ring and work 3 DC in to the ring.
2
Round 2: Work 2 DC in to each stitch from the first round, 6 sts.
3
Round 3: Work 2 DC in to each stitch from the first round, 12 sts.
4
Round 4: *Work 1 DC in to the next stitch followed by 2 DC in to the next stitch*. Repeat from * to * all the way around, 18 sts.
5
Round 5: *Work 1 DC in to each of the next 2 stitches, followed by 2 DC in to the next stitch.* Repeat from * to * all the way around, 24 sts.
6
Round 6: Work a (DC and HTR) in the first stitch, a (TR and TR) in the next, a (HTR and DC) in the next and then work a Sl T in each of the next 2 stitches.
7
Work a (TR and DTR) in the next stitch, a (DTR and TR) in the next stitch, followed by a SL St in each of the next 2 stitches.
8
Work a (HTR and TR) in the next stitch, a (HTR and DC) in the next stitch, and then Sl ST 1.
9
Repeat these three scallops again.
10
Finish off and sew in the ends.
11
Stitch the topping on to the pudding.
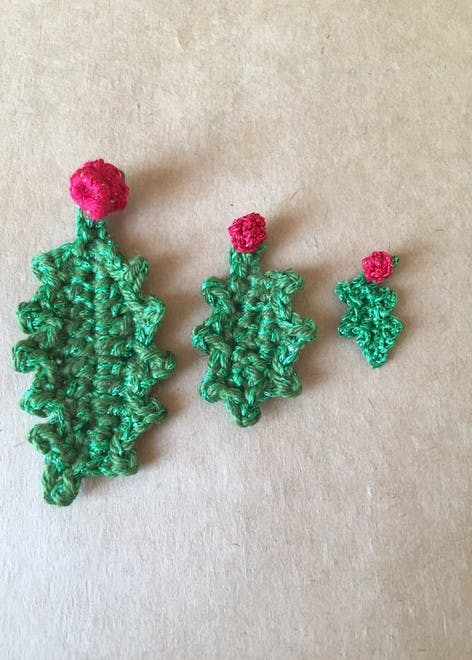
Now it’s time to make the holly leaves and berries
The large leaves and berries are hung in pairs from the garland; the medium size ones are for the top of the large puddings and the small size ones are for the top of the small puddings.
For a bit of extra sparkle, Kate made the large and medium leaves with one strand of Paintbox Yarns Simply DK in Grass Green (129) and one strand of Twilleys Goldfingering in Forest Green (051). The small leaf is made with just one strand of Twilleys Goldfingering.
The large berries are made with one strand of Paintbox Yarns Simply DK in Rose Red (113) and one strand of Twilleys Goldfingering in Red (038), and the medium and small berries are made with one strand of Twilleys Goldfingering.
How to make the large leaf
1
Using one strand of Simply DK yarn and one strand of Goldfingering, chain 12.
2
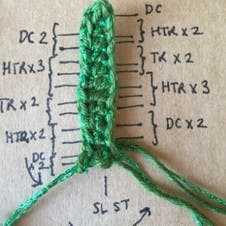
Starting in the 2nd chain from the hook work the following stitches along the chain: 2 x DC, 3 x HTR, 2 x TR, 2 x HTR and 2 x DC. You should now be at the top of the chain. Work a Sl ST across the top of the chain and then work the following stitch pattern back down the other side of the chain: 2 x DC, 3 x HTR, 2 x TR, 2 x HTR, 1 x DC.
3
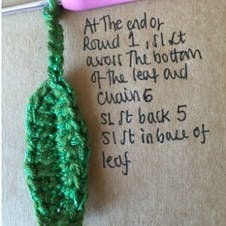
Work a SL St in to the bottom of the chain and then work a chain of 6 for the stalk. Work 5 x Sl St back along the chain and Sl St back in to the base of the leaf.
4
In the next round, you’ll be making the points of the holly leaf.
5
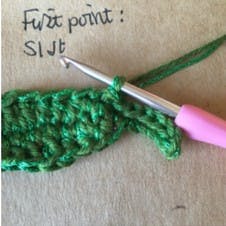
Point 1: Sl St in to the first stitch, CH2, Sl St back in to the first stitch of the chain and then Sl St back in to the leaf.
6
Continuing working along the side of the leaf as follows:
7
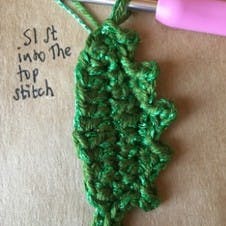
Point 2: DC, CH 2, Sl St back in to 1st Chain, Sl ST.
8
Point 3: DC, CH3, Sl St back in to the 1st chain, Sl ST.
9
Point 4: DC, CH2, Sl St back in to the 1st chain, Sl ST.
10
Point 5: Sl ST, CH 2 Sl St back in to the 1st chain, Sl ST.
11
Point 6: Sl ST in to the top stitch, CH 3, Sl ST back in to the 1st chain, Sl ST back in to the top of the leaf.
12
Now work back down the other side side of the leaf as follows:
13
Point 7: Sl ST, CH 2 Sl St back in to the 1st chain, Sl ST.
14
Point 8: DC, CH2, Sl St back in to the 1st chain, Sl ST.
15
Point 9: DC, CH3, Sl St back in to the 1st chain, Sl ST.
16
Point 10: DC, CH 2, Sl St back in to 1st Chain, Sl ST.
17
Point 11: Sl ST, CH 2, Sl St back in to 1st Chain, Sl ST .
18
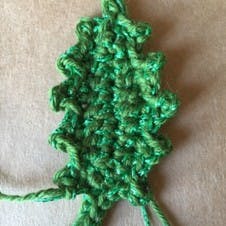
Finish off and sew in the ends.
How to make the large holly berry
1
Using one strand of Simply DK yarn and one strand of Goldfingering, make a magic ring. Work 5 DC in to the ring.
2
Work a round of DC, 5 sts.
3
Finish off and use the yarn tail to sew around the bottom of the berry, gather up into a ball shape and sew in the ends.
4
Sew one berry on to each stalk. Sew two leaves to the top of each pudding.
How to make the medium leaf
1
Using one strand of Simply DK yarn and one strand of Goldfingering, chain 6.
2
Starting in the 2nd chain from the hook work the following stitches along the chain: 2 x DC, 1 x HTR and 2 x DC. You should now be at the top of the chain.
3
Work a Sl ST across the top of the chain and then work the following stitch pattern back down the other side of the chain: 2 x DC, 1 x HTR , 1 x DC, 1 x Sl ST.
4
Work a SL St in to the bottom of the chain and then work a chain of 4 for the stalk. Work 3 x Sl St back along the chain and Sl St back in to the base of the leaf.
5
In the next round, you’ll be making the points of the holly leaf.
6
Point 1: CH2, Sl St back in to the first stitch of the chain and then Sl St back in to the leaf.
7
Point 2: DC, CH 2, Sl St back in to 1st Chain, Sl ST
8
Point 3: Sl ST, CH3, Sl St back in to the 1st chain, Sl ST
9
Point 4: Sl ST in to the top stitch, CH 3, Sl ST back in to the 1st chain, Sl ST back in to the top of the leaf.
10
Point 5: Sl ST, CH 2 Sl St back in to the 1st chain, Sl ST.
11
Point 6: DC, CH2, Sl St back in to the 1st chain, Sl ST
12
Point 7: Sl ST, CH2, Sl St back in to the 1st chain, Sl ST. Finish off.
How to make the medium holly berry
1
Using one strand of Goldfingering yarn, make a magic ring.
2
Work 5 DC in to the ring.
3
Work a round of DC, 5 sts.
4
Finish off and use the yarn tail to sew around the bottom of the berry, gather up into a ball shape and sew in the ends. Sew one berry on to each stalk.
How to make the small holly leaf
1
Using one strand of Goldfingering yarn, chain 7.
2
Starting in the second chain from the hook, work the following stitches: Sl ST 1, DC and CH 2, SL ST back in to the first chain, Sl ST, DC and CH 3, Sl St back in to the first stitch, Sl St, Sl ST, chain 3 for the stalk, Sl ST back 2, Sl ST back in to the base of the leaf.
3
Now work along the other side of the chain as follows: Sl ST, CH 2, Sl ST back in to the first chain, Sl ST, DC and CH 2, Sl ST back in to the first chain, Sl ST, Sl ST and finish off.
How to make the small holly berry
1
Using one strand of Goldfingering yarn, make a magic ring.
2
Work 3 DC in to the ring.
3
Work a round of DC, 3 sts.
4
Finish off and use the yarn tail to sew around the bottom of the berry, gather up into a ball shape and sew in the ends. Sew one berry on to each stalk.
How to make up your garland
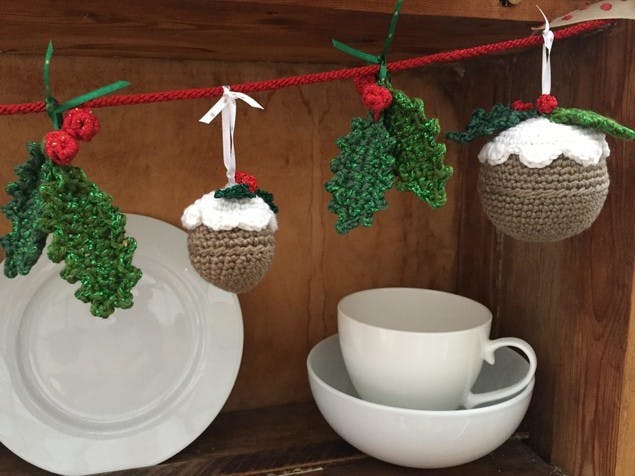
1
Sew two leaves to the top of each pudding.
2
Thread a short piece of ribbon through the top of each pudding and through the pairs of large leaves.
3
Tie the ribbon onto a long length of ribbon to create the garland.
Love this pattern?