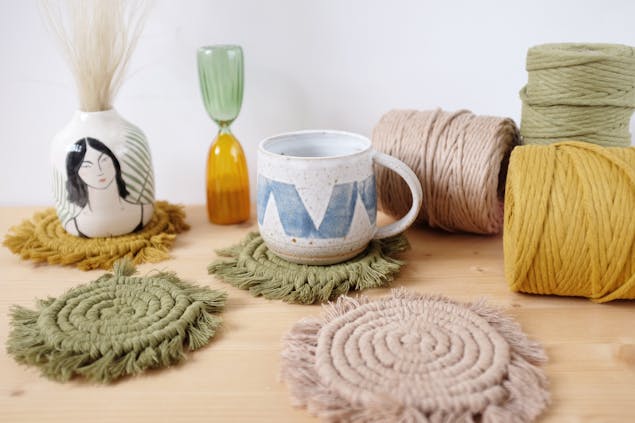
Learn how to make your own macramé coasters
Published on January 12, 2022 By Sarah J 1 min readThis macramé coaster tutorial teaches you all the necessary macramé knots to create this delightful decor project - super quick and oh-so simple! Follow along with Lucy from Peas and Needles as she talks you through each step and shows you all you need to make your very own macramé coasters in just a few hours. Once you've made one, you won't be able to stop!
Materials
- 4 mm macramé cord
- 4mm macramé cord in Olive, Beige and Mustard
- Tape measure
- Sharp scissors
How to make your macramé coasters
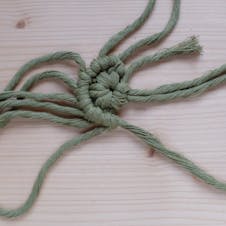
1
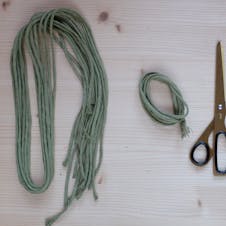
Cut 1 strand of cord to 130cm (this will be the working cord), and 20 strands of cord to 90cm
2
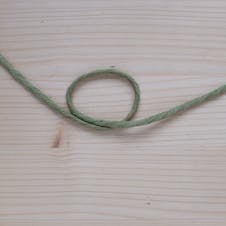
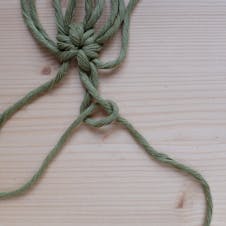
Start by making a loop at one end of the working cord.
3
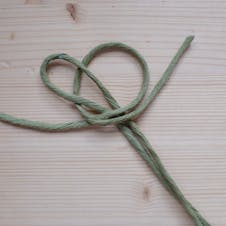
Take one of your 90cm strands and fold in half. Pass the halfway fold under the loop of the working cord.
4
Pass the 2 ends through the halfway fold loop.
5
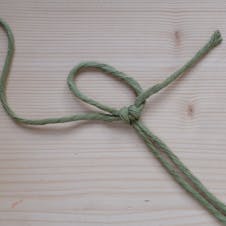
Pull tight. This is called a lark's head knot.
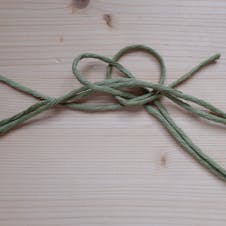
6
Repeat this knot with 4 more 90cm strands. You should have 5 larks head knots.
7
Pull the loop of the working cord tight.
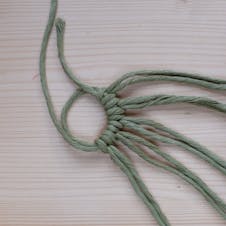
8
Spread the cords out so you have the working cord to the right hand side. Working with one strand at a time, bring the long working cord over the shorter first cord.
9
Bring the shorter cord back over the working cord (to create a number 4 shape) loop the end of the shorter cord back under the working cord and through the loop.
10
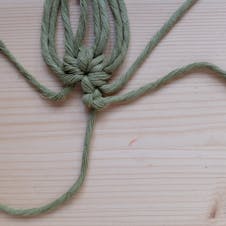
Gently tighten the knot, keeping the working cord straight and slide the shorter cord up. Repeat this knot again on the same cord so you have 2 knots on the working cord. This knot it called a double half hitch knot.
11
Move onto the next shorter cord.
12
Repeat this double half hitch knot with each cord, working your way around.
13
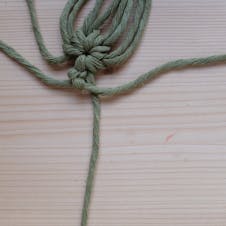
As you work around your coaster you will notice a gap between the shorter cords which is too far to fill with a half hitch knot.
14
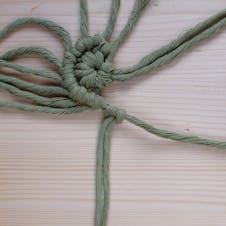
Take another short cord and attach it to the long working cord using a larks head knot. Gently pull tight and pull so it sits neatly in the gap.
15
Carry on knotting around your working cord. You will need to occasionally add in extra cords as your coaster grows in size.
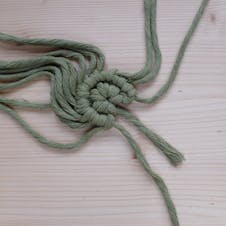
16
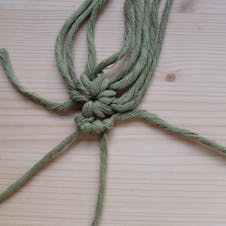
Tuck the short working cord end under the work as you won’t need this anymore. Repeat these knots to grow your coaster.
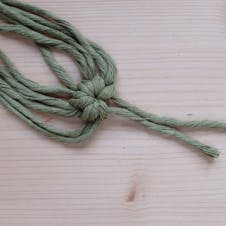
17
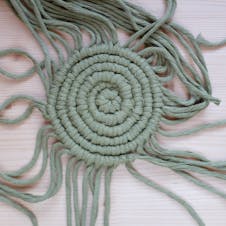
Repeat the knots until your coasters are approximately 12cm wide.
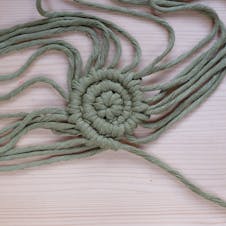
18
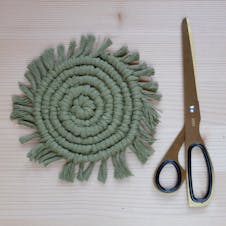
Trim the cord ends so they are 1.5cm in length with some sharp scissors.
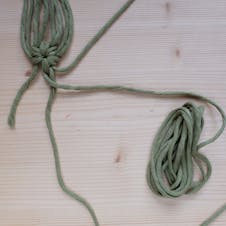
Pro Tip
For a finishing touch, you can brush the cords with a small comb to create a little fringe. Create a whole stack of macramé coasters to gift to your loved ones or scatter around your own home!