Learn how to ice biscuits using royal icing with these fabulous floral designs
Published on 25 March 2022 By Kate 1 min readEvery celebration needs a sweet treat and nothing can beat these beautiful flower biscuits from Katie Reed aka @katiethecookiebee! Katie shows you how to ice your biscuits with royal icing - from how to flood to how to use a scribe. Learn all the basic techniques of icing and create a gorgeous 3D, floral design in the process!

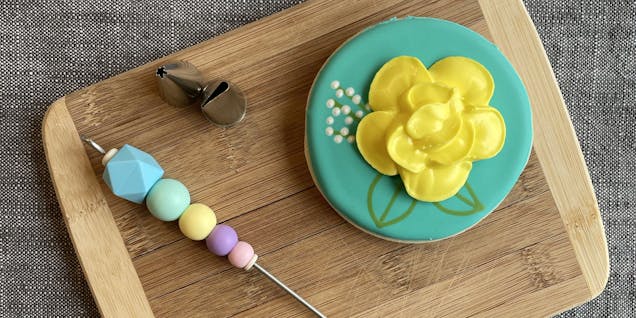
Materials
- Biscuit cutters
- Piping bags
- Meringue powder or egg white substitute
- Decorating scribe tool
- Wilton #3 round and #16 open star decorating tips
How to ice your flower cookies
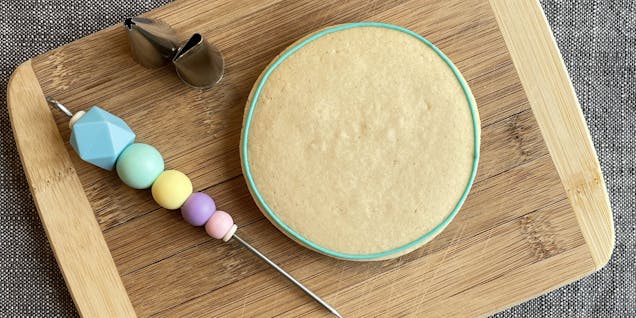
1
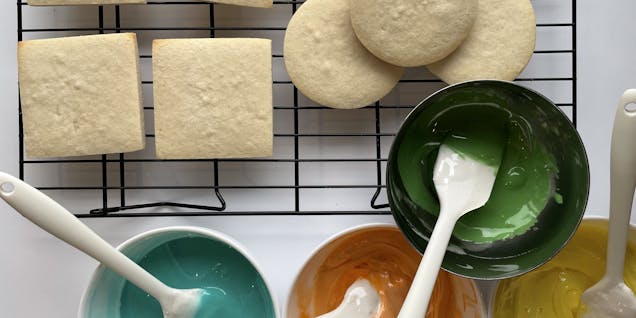
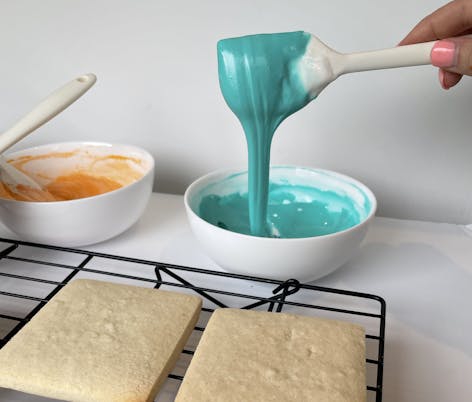
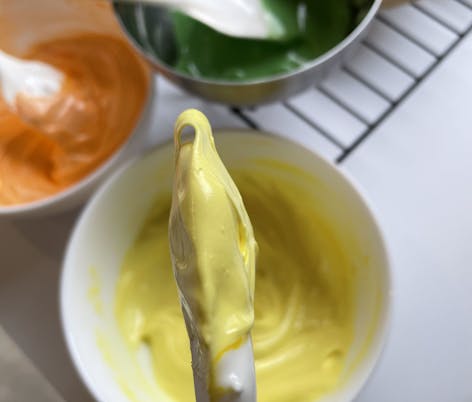
Pick your biscuit shapes and bake them. You can use a circle shape and fit just about any design onto it! While your biscuit are baking, choose your colour palette and mix up your icing. I’m using two icing consistencies here: flood and stiff. The teal and green are both a flood consistency, while white, orange, and yellow are a stiff consistency.
Pro Tip
Flood consistency icing should fall off or ribbon off your spatula. You can achieve this by adding small amounts of water to royal icing. Add a half teaspoon at a time until your icing is loose and flows off your spatula.
Stiff icing should create a little loop when you pull the spatula out of the icing. You will see a little swirl at the tip of your spatula, but it will not settle back into itself in the bowl. This will create lots of dimension in your flower petals.
2
Outline your biscuit shape. This creates a little icing wall so that the flood consistency icing doesn’t overflow the edges of your biscuit. You can let this dry for just a few minutes before you move on to the next step.
3
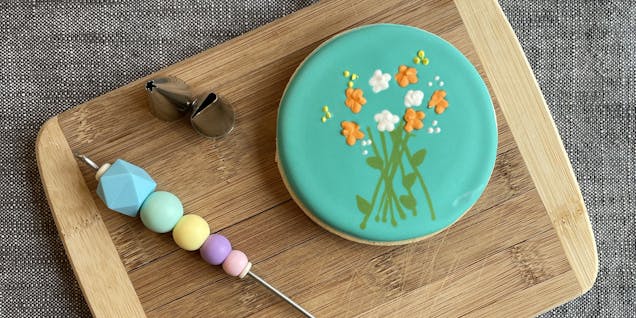
Flood the biscuit with your base colour. You want the icing to cover the entire biscuit surface. Use your scribe to help fill in any small edges or bubbles. Both of the floral designs use the ‘wet-on-wet’ technique so you’ll start to add your flowers, leaves, and stems right away while the base colour is fresh. Use dots, lines, and small star shapes to make your flowers. Remember that they are meant to be natural! I love making flower biscuits because each one is different.

4
Allow the base colour to dry. I like to let my iced biscuits dry for at least 6 hours, and overnight if I have time. The royal icing will harden and you’ll be able to pick up the biscuits for the next decorations.
5
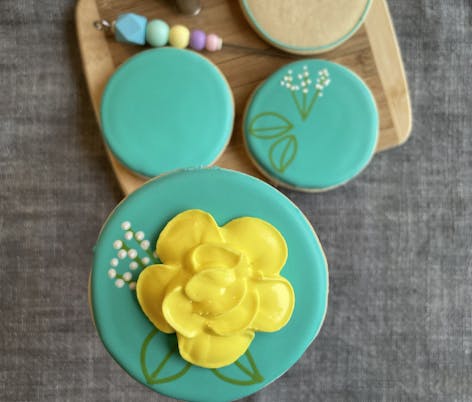
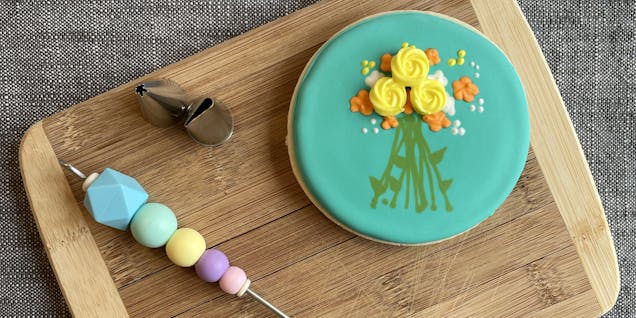
To finish your floral bouquet, use the Wilton Open Star tip 16 to create flowers on top of the dried icing. Using the stiff icing, point the star tip straight down onto the biscuit, and make a tight circle. Release the squeezing pressure and pull the star tip away quickly to get a clean ending to your flower.
6
To finish your single rose, use the Ateco 4 Piece Rose Tube Set and the stiff icing to ice flowers on top of the fully dry icing. For smaller flower petals, use tip 101 and for larger petals use tip 104. Holding the icing tip so that the narrowest part is facing upwards, create petals by making semi-circles. Layer each petal in a circle right next to the previous one, creating a flower. You can use a paper towel under your biscuit to make it easy to turn the biscuit for each petal. These flowers will be 3D and are meant to stick up off your base icing.
7
Allow these flowers to dry for at least 12 hours, and then you will be able to package them up for your celebration!