How to knit stripes in the round
Published on 15 February 2022 3 min readIf you're a knitting newbie, learning how to knit stripes might seem like an ambitious task. With this simple jogless stripes step-by-step, you'll be knitting stripes in the round in no time! This technique is ideal for knitting stripy hats, and here we'll show you how to make a newborn version.
For this tutorial, we're using double pointed needles (also known as DPNs). DPNs are our circular knitting method of choice when working on small projects, but remember you can use circular needles if you prefer!
The knitted fabric you create behaves a little differently when knitting in the round as opposed to knitting straight. When you knit straight, you are turning the work at the end of every row, so the right side of the work is facing you half the time, and the wrong side is facing you half of the time. But with knitting in the round, the right side of the work is always facing you. So to get stocking stitch you knit every row in the round, instead of alternating knit and purl rows as you do when knitting straight.
An easy way to jazz up a plain knit is to add stripes! But when you’re knitting in the round, since you are essentially knitting a giant spiral and the stitches at the beginning/end of the round don’t line up exactly, you get two stitches next to each other that aren’t the same colour, instead of a long, smooth colour line. Knitters call that a jog – you can see it in the photo below, at the tip of the needle.
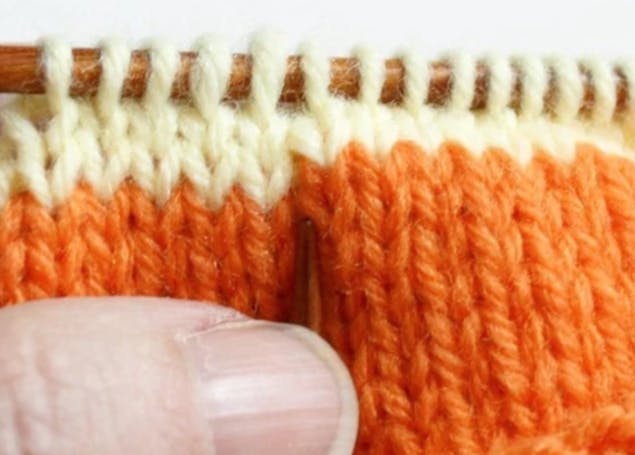
There are two different ways to get rid of that little jog, and we're going to show you both of them!
Both techniques are used on the second row of the new colour. When you want to switch colours, simply drop the old colour (we will talk about whether you want to cut the yarn or not in a little bit) and begin with the new colour about 15cm in from the cut end – you can weave it in later.
After you have finished knitting the first round of the new colour, you are simply going to slip the first stitch of the next round of the new colour purlwise, and leave it alone.
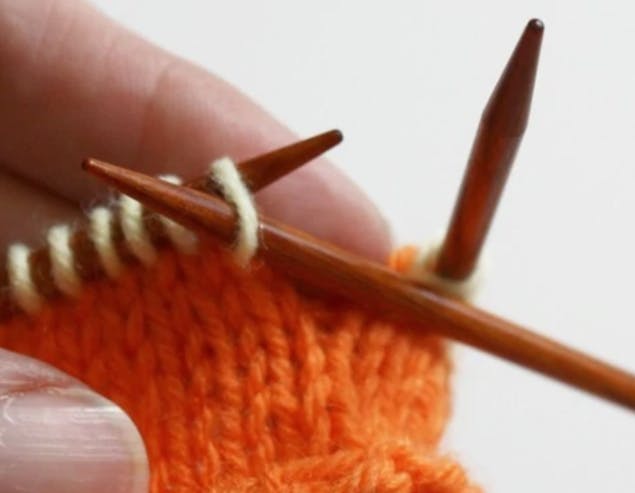
That’s all there is to it! When you knit the next round you knit that slipped stitch as usual.
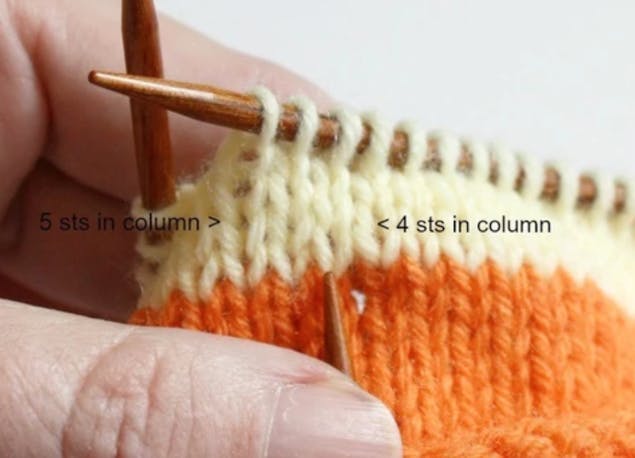
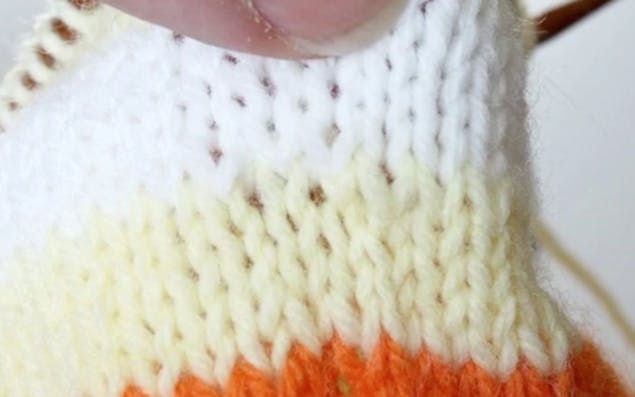
You can see in the photo that the jog is nearly invisible. You can also see that the first column of stitches, the one containing that slipped stitch, has one less stitch in it that all of the other columns of stitches. We were knitting 5 round stripes but in that one place, my stripe only shows 4 rounds. For this reason we prefer to use this method on projects with taller stripes.
The other method is slightly more complex, but doesn’t make as much difference in the height of the round as the slipped stitch method does. Knit the first round of the new colour as we did before, leaving a tail hanging that’s long enough to comfortably weave in later.
Bring the tip of the right needle back to front through the first stitch of the second round below (the last round in the old colour), and slip the right-hand leg of the stitch onto the left- hand needle (vice versa for left-handed knitters). You will have two stitches right next to each other, one in the old colour and one in the new. Knit those two stitches together as shown in the photos below.

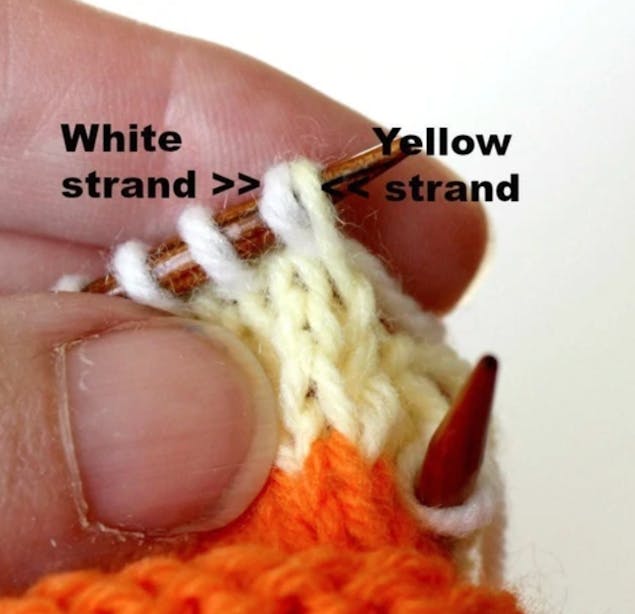
For all of the subsequent rounds in the stripe, just knit as you would usually. You can see that, once again, you have a nearly invisible jog!
