How to understand and use a sewing pattern
Published on 8 June 2019 By Emma 4 min readPaper sewing patterns are one of those things that can be really intimidating to the uninitiated. Once you have got it all laid out there are so many mysterious instructions and symbols that it may as well be written in Martian, and you need an advanced qualification in folding just to get it back in the packet. Never fear, help is here.
Our complete guide to how to use a sewing pattern will explain everything, and help you on your way to sewing like a pro (and maybe speaking a little Martian too).
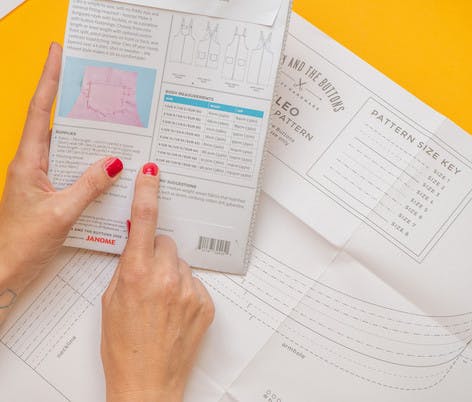
Sizing - first things first, you will need to take your measurements, and then look for the ‘finished measurements’ sizes on the back of the packet. Don’t worry if these don’t match up with your usual off-the-peg sizes, pattern sizes all vary. The great thing about learning how to use a sewing pattern to make your own clothes is that you can cut them so that they fit your unique measurements, and once you get confident using patterns, you’ll be able to do this really easily.
Lots of people ask how to use a sewing pattern with multiple sizes, and the answer is that most patterns will be multi sized, and any good pattern will be clearly labelled so you’ll know which of the lines on the pattern is your size and is the one you need to focus on.
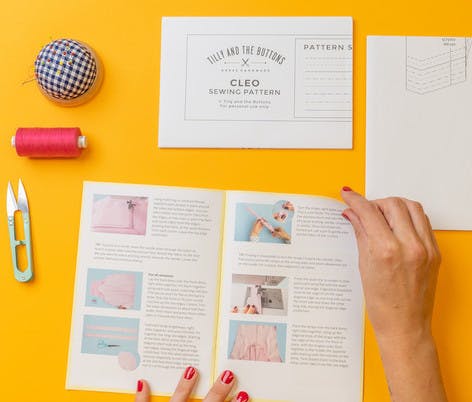
User Guide - always, always, always read the instructions in the user guide first! It will tell you all the important things that you need to know to understand how to use a sewing pattern and make a success of your sewing. It will include details like width of seam allowance, construction techniques and cutting info.
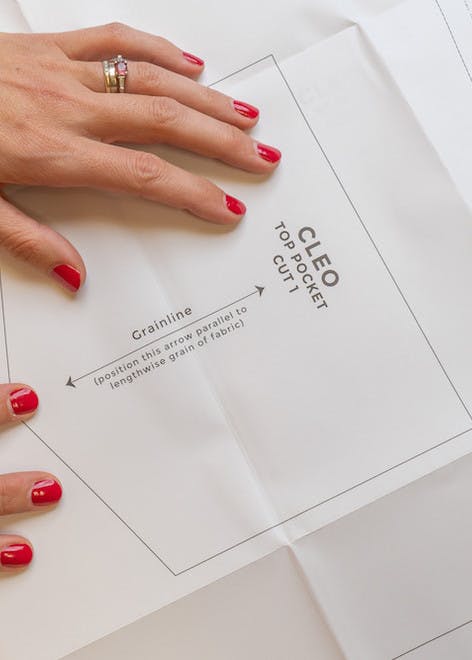
Seam allowance - usually around 1.5cm/ 5/8", this is the width from the edge of the paper pattern to the cutting line, and is the extra material that will allow you to sew everything together to the right size. Most paper patterns don’t include it so you’ll need to measure and mark your own.
Line up the arrows - the long straight arrows on a pattern are showing you how it should line up with the grainline of the fabric. So the arrows should line up with the grain of the weave. If you’re making something that wants a bit of flare like a skirt, these arrows will indicate that it should follow the bias line instead of the grainline.
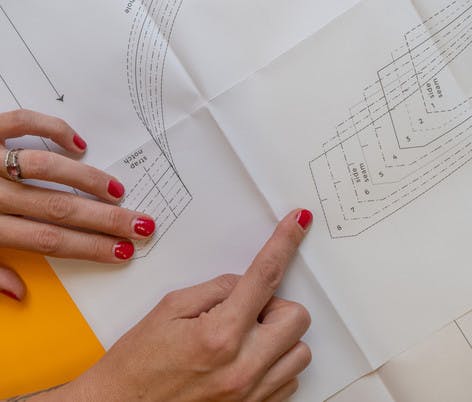
Cutting and Sewing Lines - the cutting line is usually indicated by the solid black line (although we still need to remember to check to see if we have to add the seam allowance). It’s not very common, but sometimes you also get a dotted line which is a sewing line.
Notches - notches are there to make sure that separate pieces go together in the right places. All you need to do is cut out those little triangles exactly where they are on each piece, and then line them up with their notch-buddy on a corresponding piece.
The Dots - these little circles will show you where a dart begins, and the two lines that come out of it are sewn together, just like a seam, to make the actual dart.
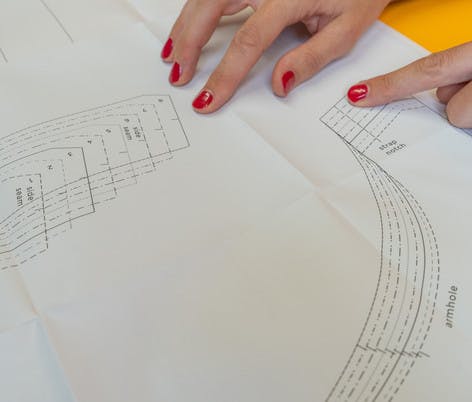
Zigzags - a zigzag line on a pattern shows you where a zipper will go. Easy.
X and (- no, we haven’t just started a spot of algebra, the X is the symbol for a button, while the ( is the symbol for a button hole.
Paper sewing patterns
How to use your paper sewing pattern
- Take your measurements
- Find your fit
- Cut out the patterns pieces
- Lay out the pattern following the user guide
- Check you have your seam allowance
- Mark and cut out the pattern
How to use your digital sewing pattern
Downloadable, pdf sewing patterns are now a staple of the sewing world, but the idea of working out how all those separate sheets go together can feel like a jigsaw puzzle. Learning how to use a PDF sewing pattern couldn’t be simpler. Once they are downloaded and printed out they are just the same to use as a traditional paper pattern, so grab yourself a glue stick, some paper scissors and some sticky tape and here’s our guide on how to use them.
- Download your pattern
- Set print to “print actual size” or “scale 100%”
- Turn off “2 sided printing”
- Find and print the page with the Test Square and check the size is right
- Print out pattern
- Trim off margins
- Match the paper pieces to each other - most patterns have little numbered triangles (just like the notches on a sewing pattern) for you to match the pieces together
- Glue or tape together
- Cut out pattern pieces and proceed as you would with a paper sewing pattern