How to sew a flat fell seam
Published on 13 November 2018 By Emma 1 min read
How to sew a what now? A felled seam or a flat fell seam is made by one edge of a seam being folded and stitched underneath another. This is a really sturdy, strong seam and is the one you’ll find on your denim jeans. If you’re at the level of Grand High Sewist and are ready to take on jeans then we salute you! If not, then increasing your sewing knowledge is never a bad thing either.
Unlike a regular seam, a flat fell seam is created on the outside of your work, so make sure you have your neat hat on to get that top stitching as pretty as possible.
Here’s our guide to how to sew a flat fell seam.
The trick to getting this right every time is in making sure you leave yourself enough seam allowance, and any pattern worth it's salt will have all that information in the sewing instructions.
1

Pin and stitch. Place the material so that the wrong sides are facing each other and pin in place. Make sure you have a good width for your seam allowance (your pattern will tell you, but we’d advise a minimum of 2cm) and stitch along the edge of your seam.
2

Cut a narrower seam. Fold one side of the seam edge so that it’s out of the way, and then trim the other down to around 5mm wide.
3
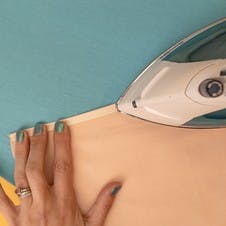
Fold and press the wider seam. Fold over and press the first 5mm of the wider seam edge, and then fold over so that it meets the seam line and press again.
4
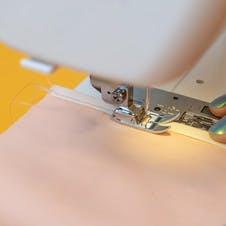
Stitch on the left and press. Stitch along the left seam edge, then open up the fabric
5
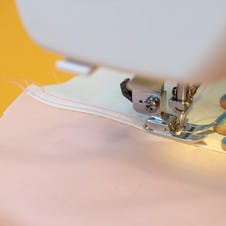
Stitch on the right. Now sew along the right of the seam edge, and that’s it.