Easy & simple DIY embroidery patch
Published on 22 June 2020 By Holly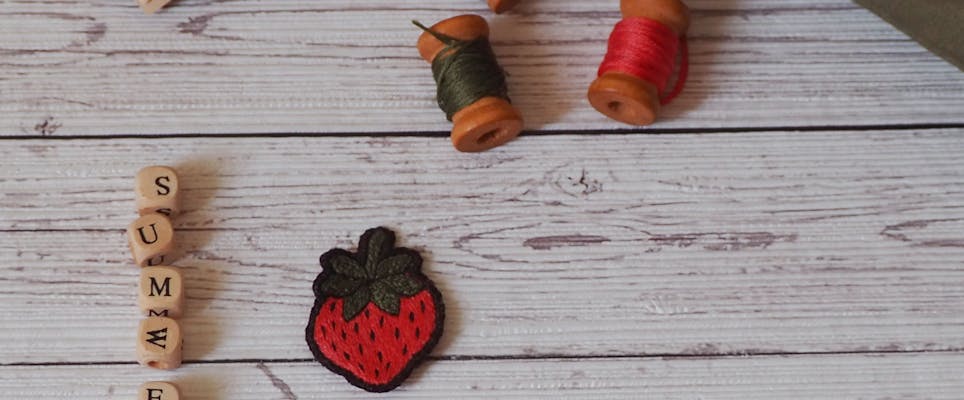
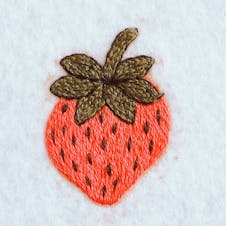
The amazing Amina from Stitch Floral has created a beautiful embroidery patch design to show you how to get started in making your own embroidery applique patches. You can turn these into iron on patches to add to all the clothing, totes and accessories you’d like! Once you’ve picked up the basics, you’ll be making all sorts of custom embroidered patches but let’s start with this cute strawberry patch design.
The most amazing thing about this kind of patch is that you can stitch it in a day or two, you don’t have to use any glue or Heat n Bond, and you can remove diy embroidered patches whenever you want and place it somewhere else!
Check the embroidery pattern to see several options, choose the motif you like the best, and let’s get started!
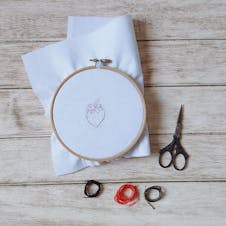
Materials
- Felt
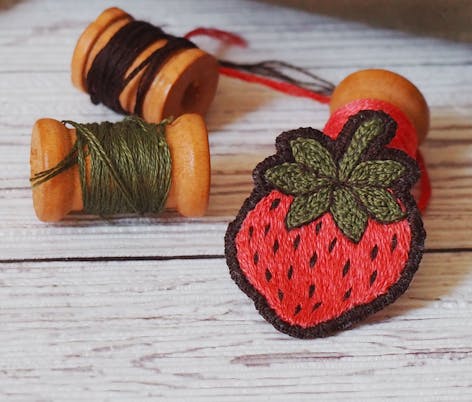
- Thread (I used DMC stranded cotton 3705, 3371, 936)
- Scissors
- Embroidery needle
- Embroidery Hoop (optional)
1
Transfer the pattern to the piece of felt and prepare the instruments and materials. Using an embroidery hoop is optional since felt is very unlikely to pucker.
2
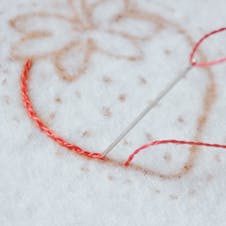
Outline the strawberry’s body in split stitch/split back stitch (or any other line stitch for that matter).
3
Use chain stitch to work the upper part (calyx). Bring the needle up through the fabric, and insert at the same point, then bring it up again a stitch length away. Tuck the thread under the needle and pull it through.
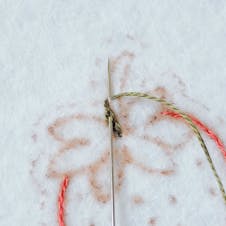
4
Continue doing this until the section is filled. The texture is going to be really lovely here!
5

Then fill the body with long and short stitching. Use one strand of thread and don’t shy away from working guiding stitches to make sure the overall direction is correct.
We need to cover this part very densely so keep your stitches shorter and place them very close to one another. No gaps in between!
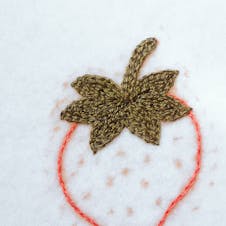
6
After you complete it, take the darker thread and add small lazy daisy stitches spreading them evenly across the body of the strawberry.
Lazy daisy stitch is worked the same way as chain stitch, except that after you pull the needle through, you make a tiny stitch to anchor the thread. Also, using the same thread and a line stitch, outline the calyx’s elements.
7
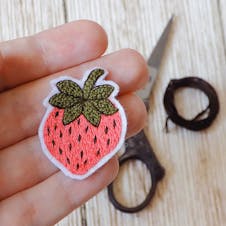
Cut the strawberry out leaving around 0.1 inch (~3mm) of felt around the edge.
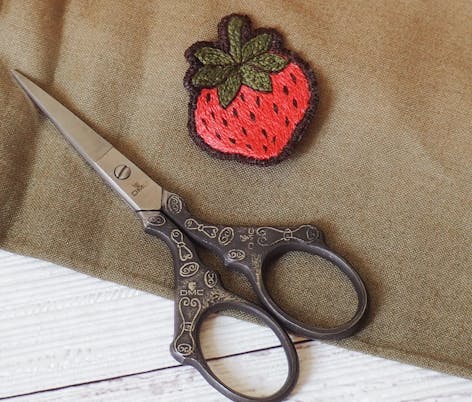
At this point, your patch is actually fit for using! Felt doesn’t fray, so if you need a pretty decorative element to use once in a while, you can leave it as it is (you can even cut it a little closer to the edge) and go to step 11.
However, if you want to use it regularly and wash together with your clothes (hand wash only!), then for better durability I would recommend to stitch around the edge it with a buttonhole stitch.
8

Start your thread at the front of the patch, at the point where the stitching ends, and insert the needle at the same point. Keeping the thread under the needle, pull the needle through.
9
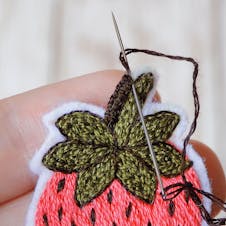
With every next stitch, insert the needle at the edge of stitching and tuck the thread under the needle before pulling through. Place your stitches very densely and avoid having any gaps in between.
10
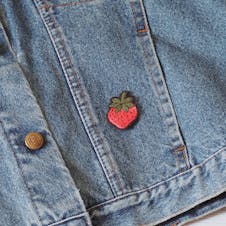
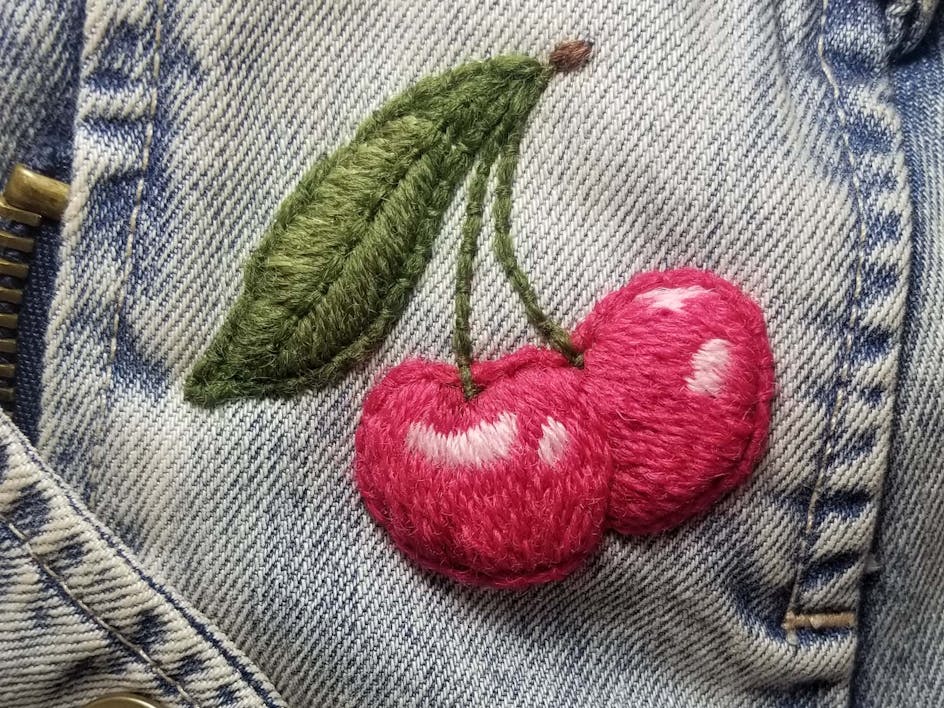
When your patch is finished, baste it to the clothing or accessory like a denim jacket that you like (be mindful of pockets though, don’t baste through them).
Now you can remove it whenever you want and switch it to another place or piece of clothing!
This simple strawberry embroidery patch tutorial is a real treat! Why not test your skills by creating your own embroidery patch designs?