Celebrate Mother's Day with Embroidery - a step by step tutorial by Sophie Long
Published on March 17, 2020 By Merion 1 min read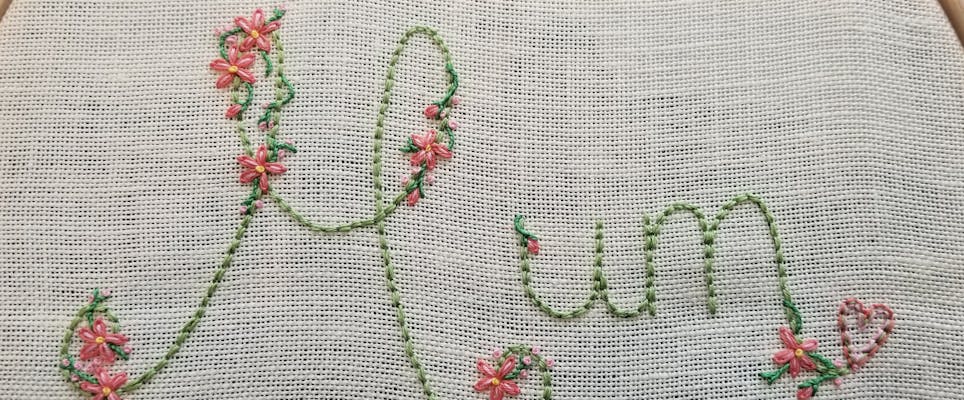
Stitch a surprise for your mother figures this Mother's Day! Whether it's your mother, your grandmother, your aunt, your sister or a family friend - whomever you want to thank for their kindness and support, this little motif will speak volumes of love in every stitch!
We're so excited to introduce you to Sophie Long, fabulous embroiderer, teacher and author. Since graduating from the Royal School of Needlework in 2008, she has presented an exhibition of her work; written two books - Mastering the Art of Embroidery and Ribbonwork Embroidery, been part of the team who embroidered the Duchess of Cambridge's wedding dress, and she's famous for her stunning instagram grid! Follow along with her easy step by step tutorial and sew something special for the moms in your life!
Materials
- Elbesee 8 inch (20.32 cm) Wooden Embroidery Hoop
- You will need five colours (two greens, a yellow, and two pinks - colours for flowers)
- DMC 12 Embroidery Needles (1-5)
- Klasse Stork Embroidery Scissors
- Zweigart 28 Count Cashel Linen 27in x 39in
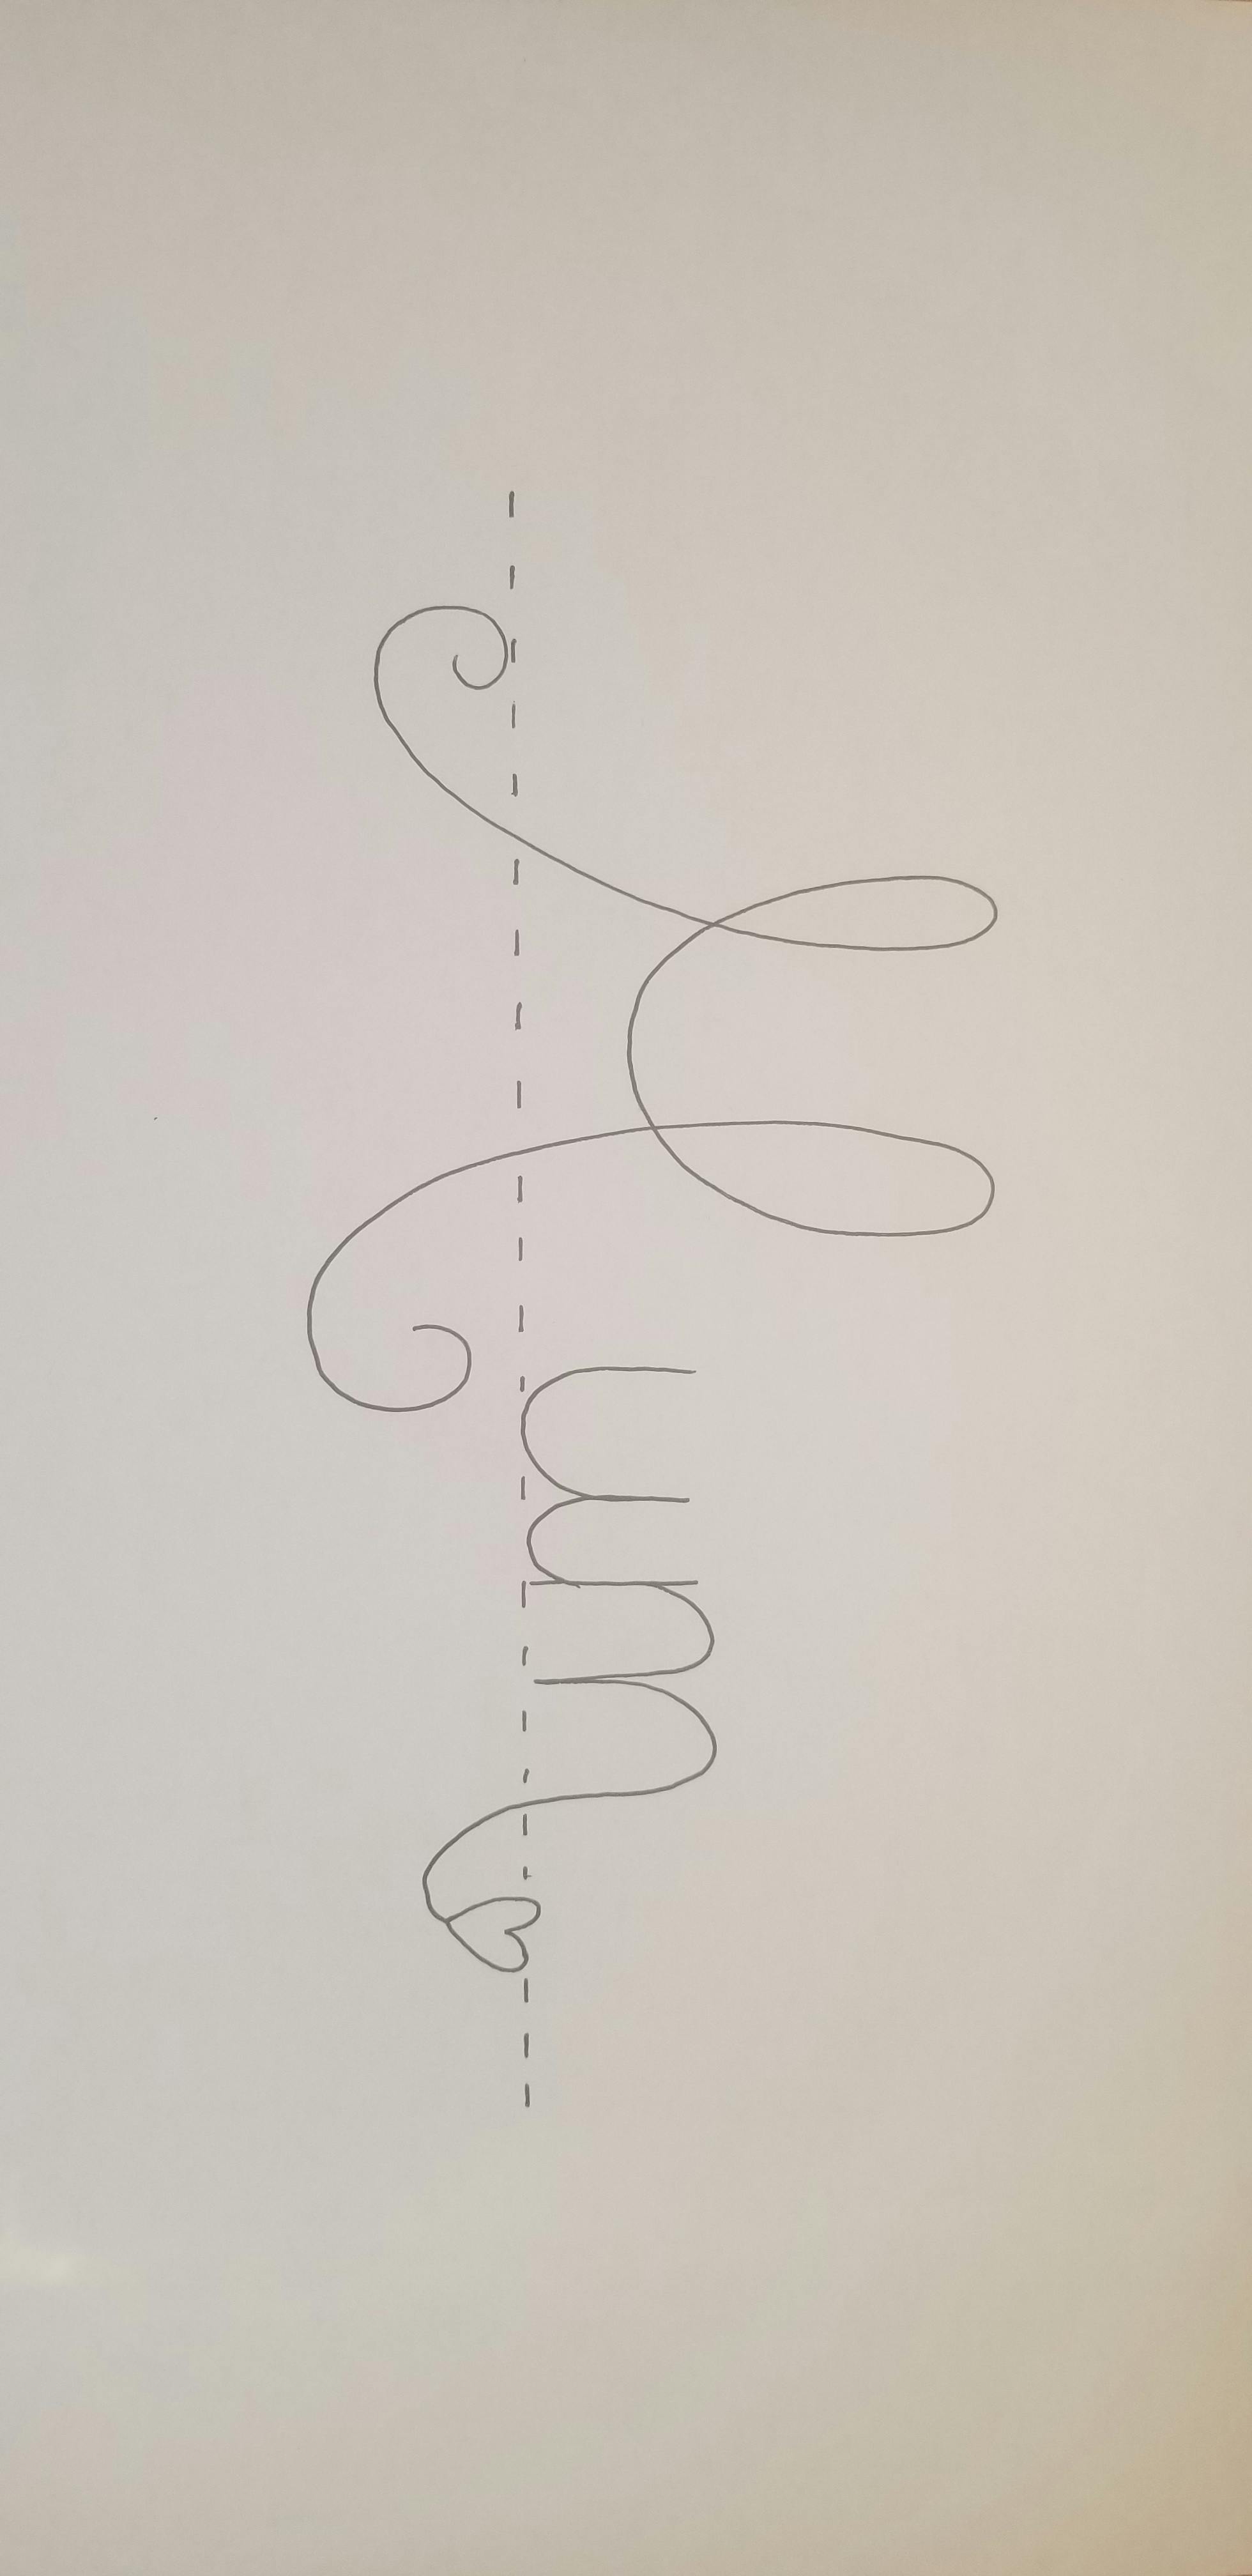
Download the templates
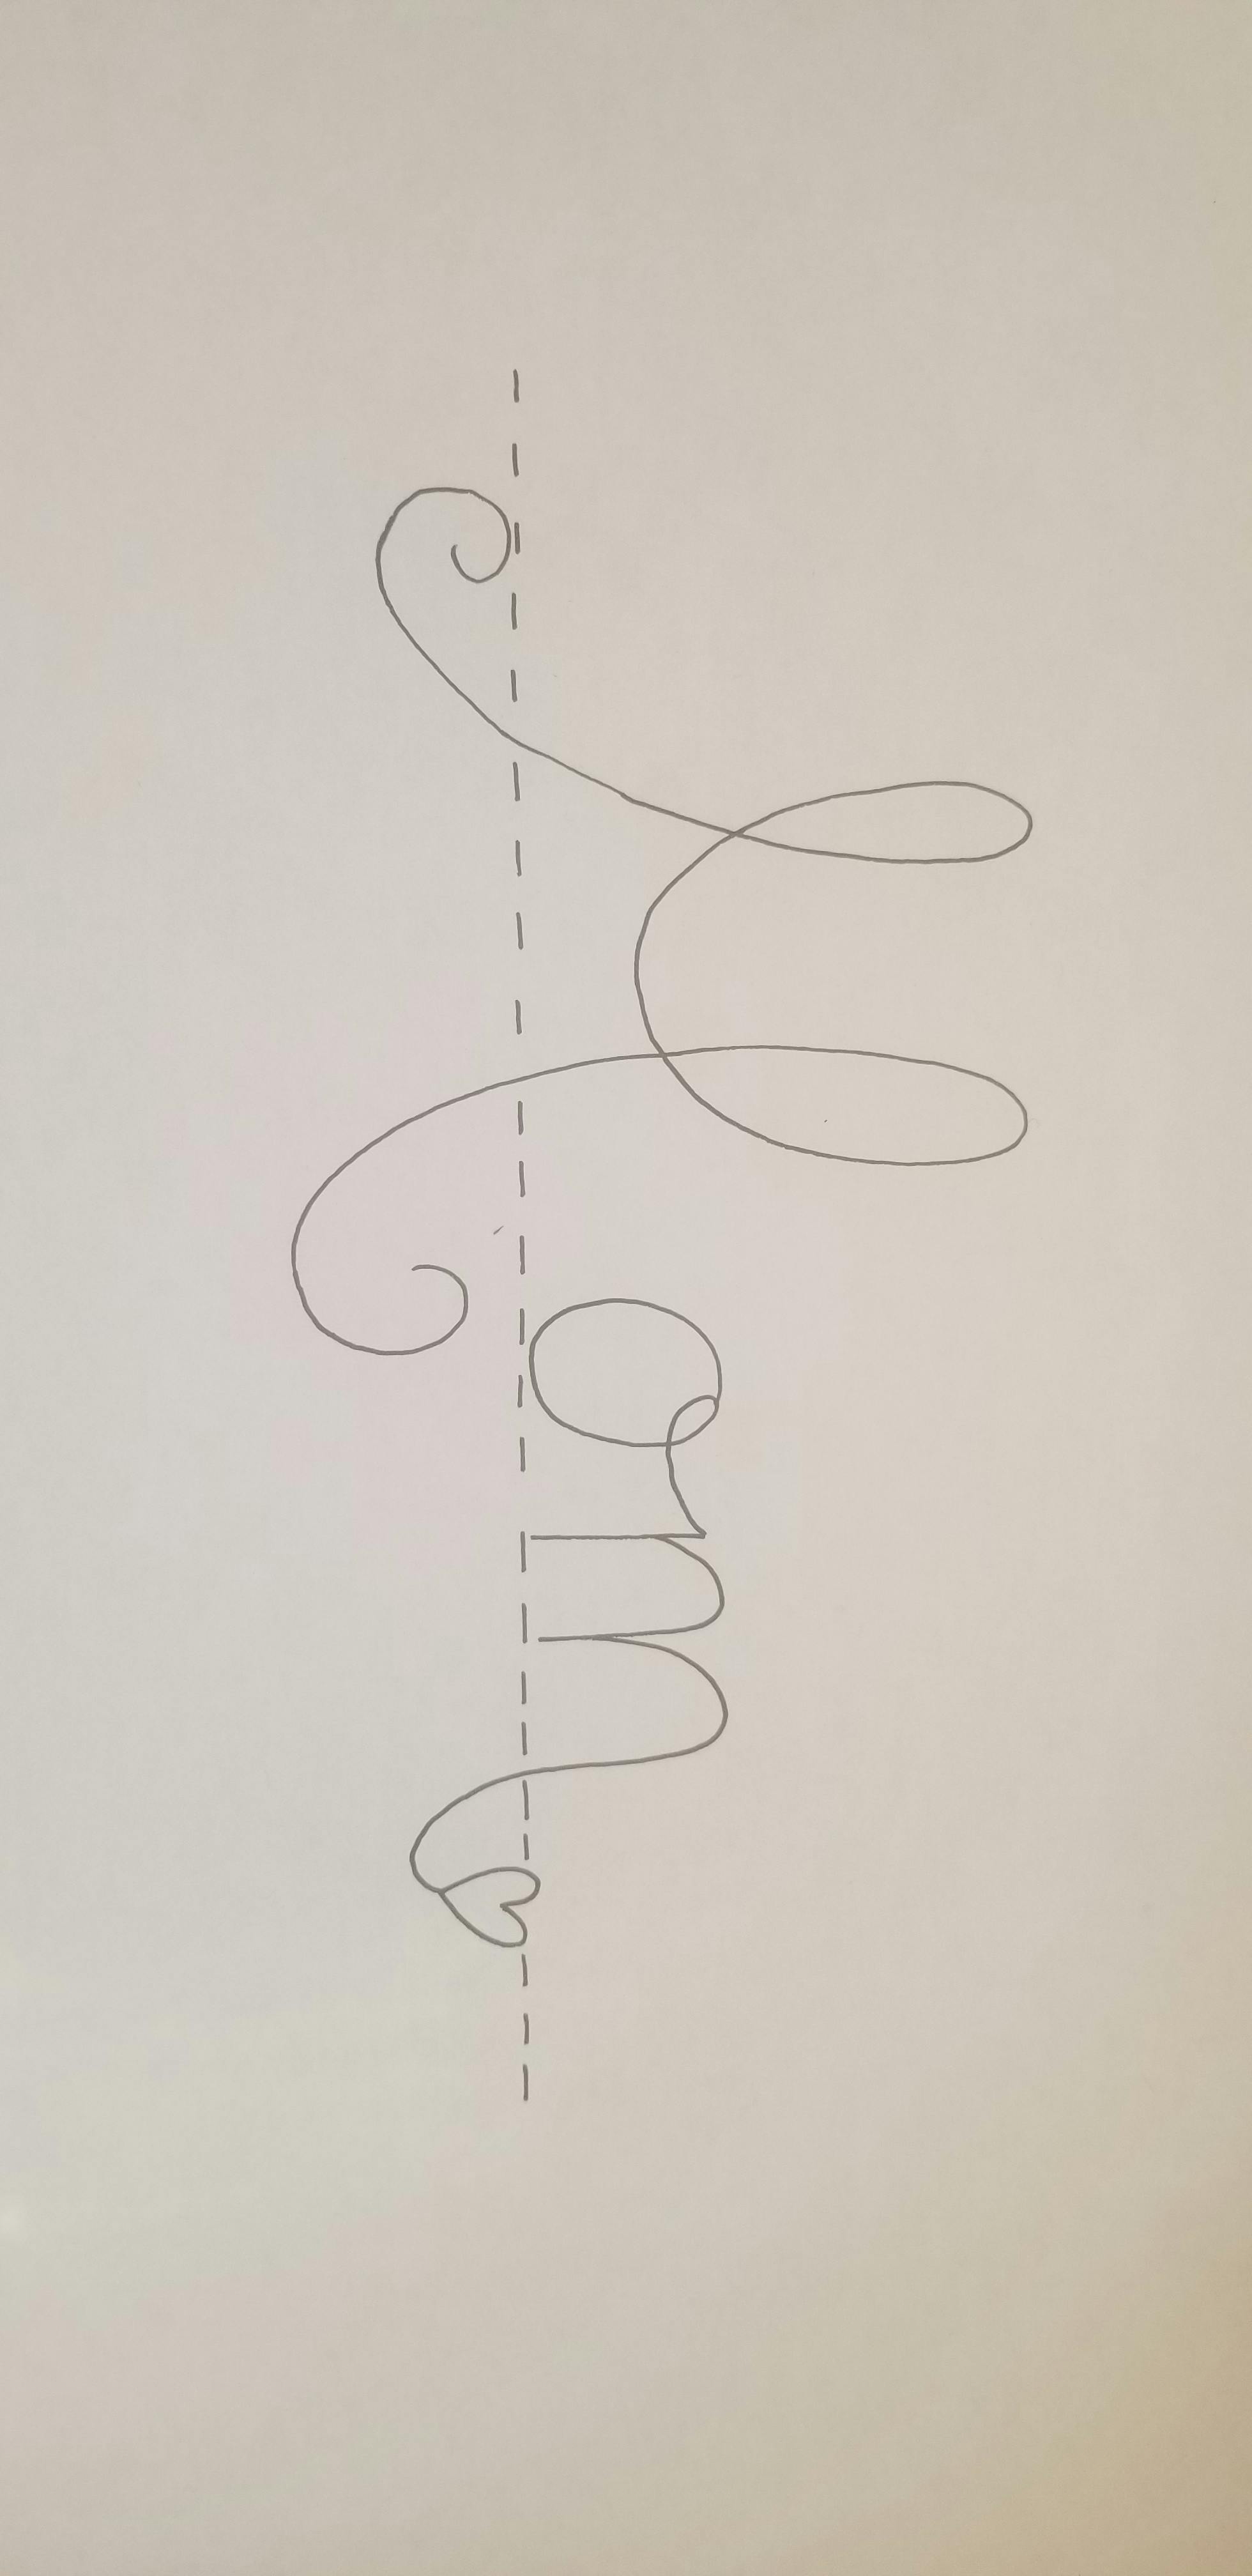
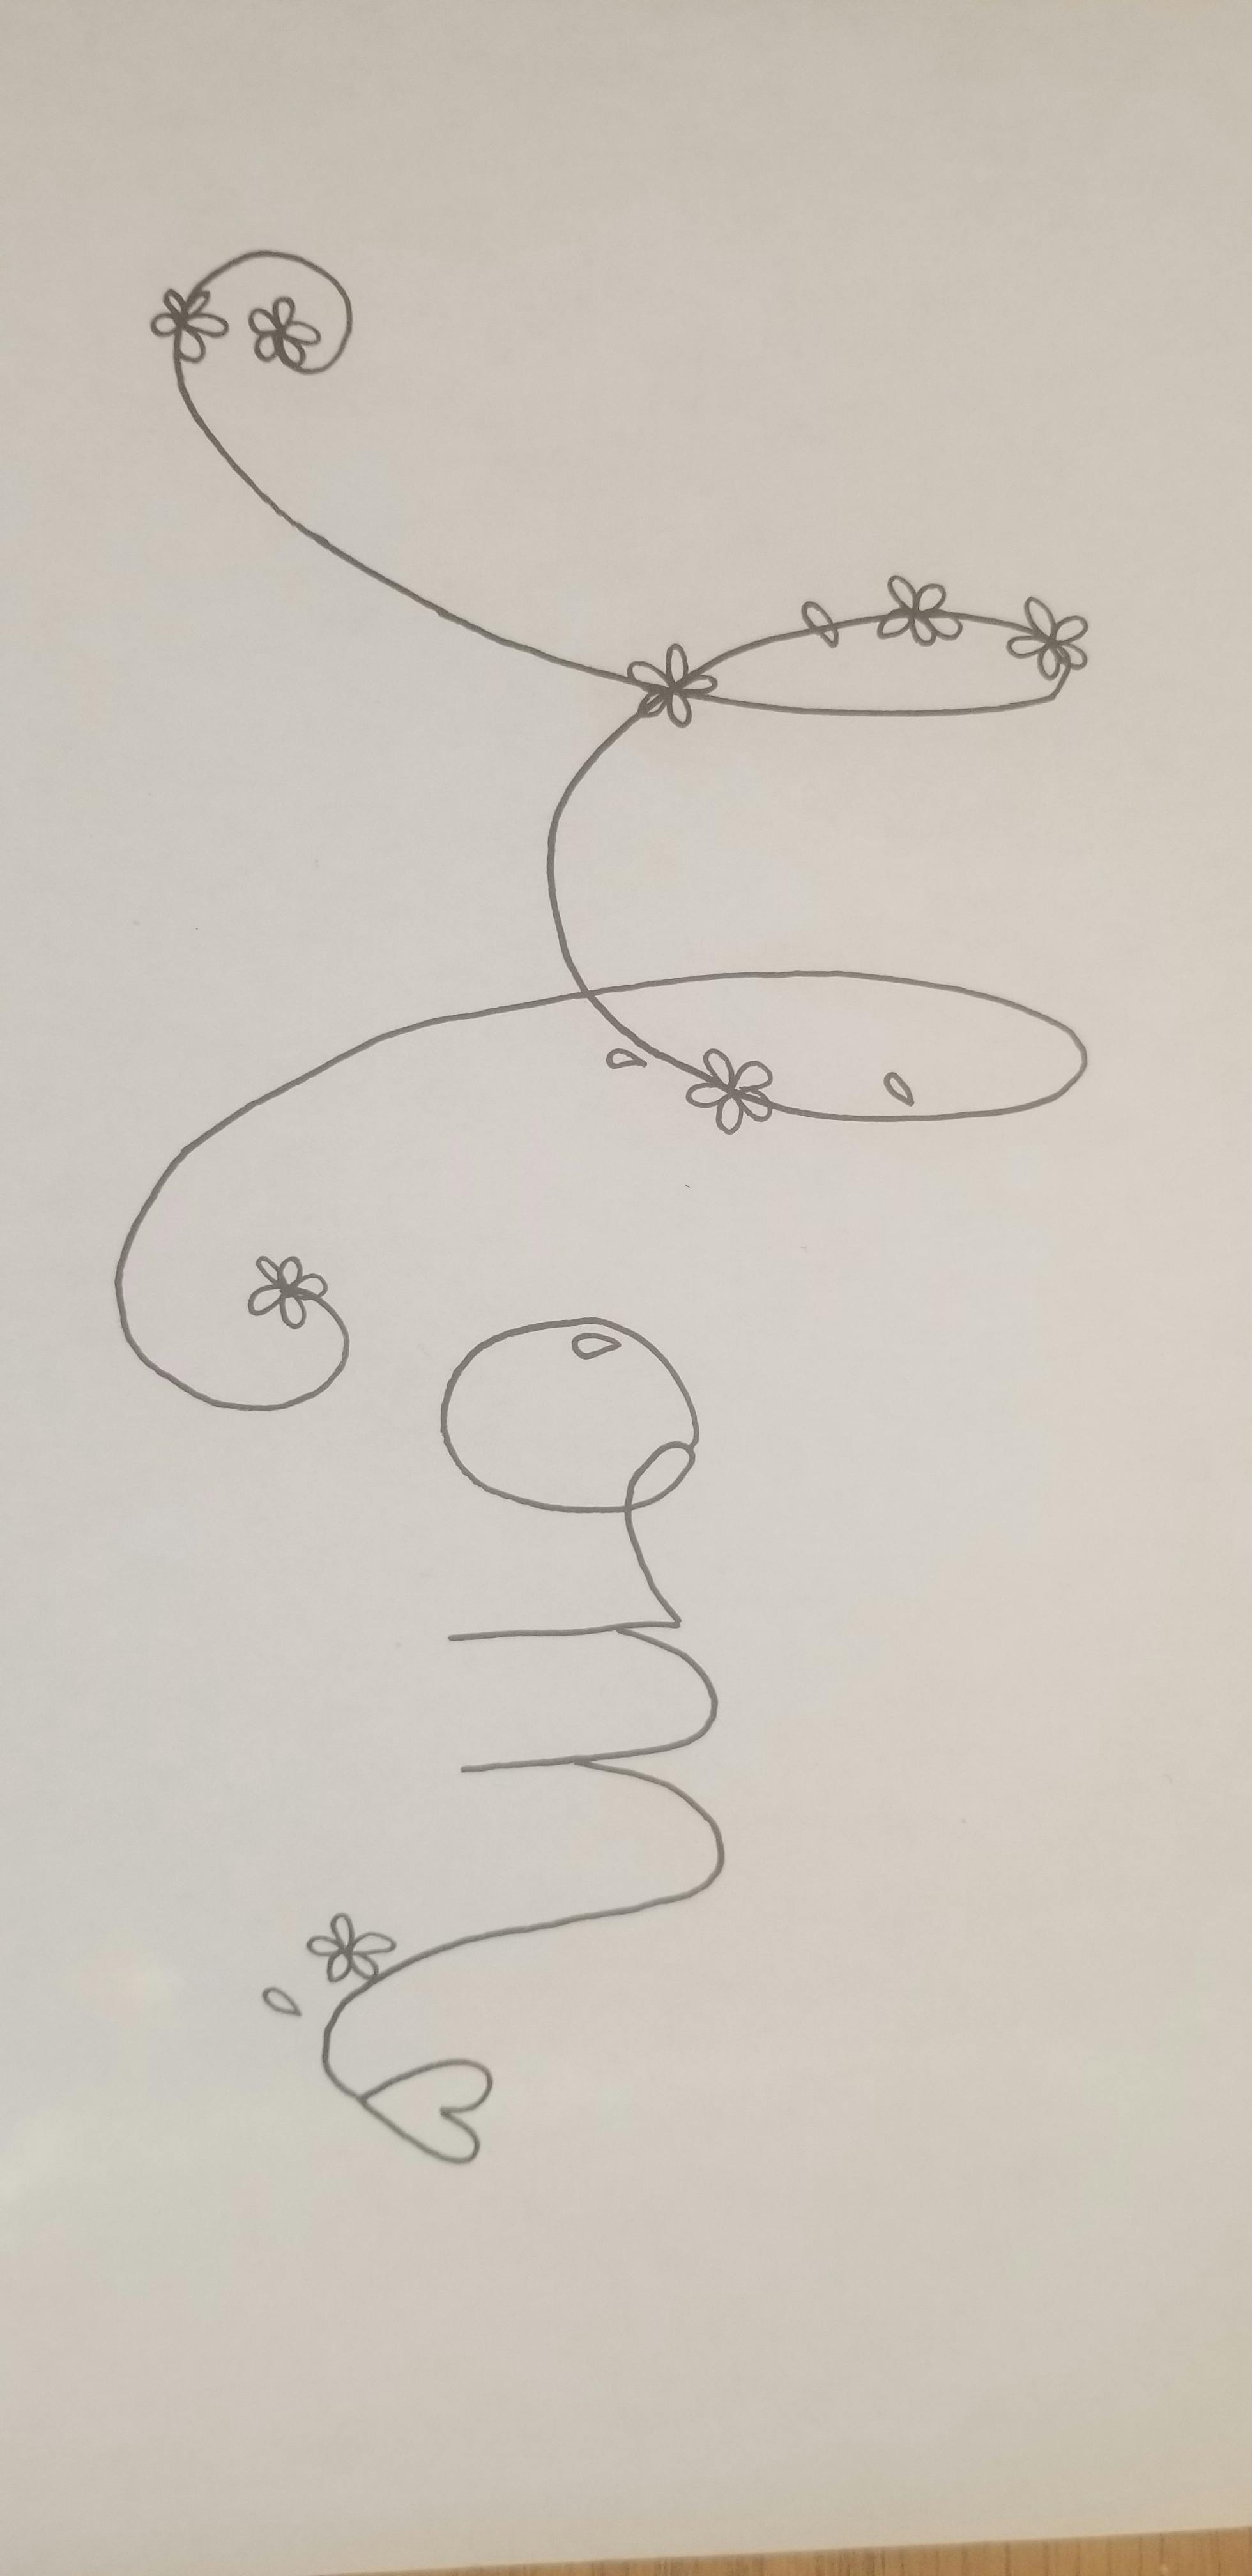
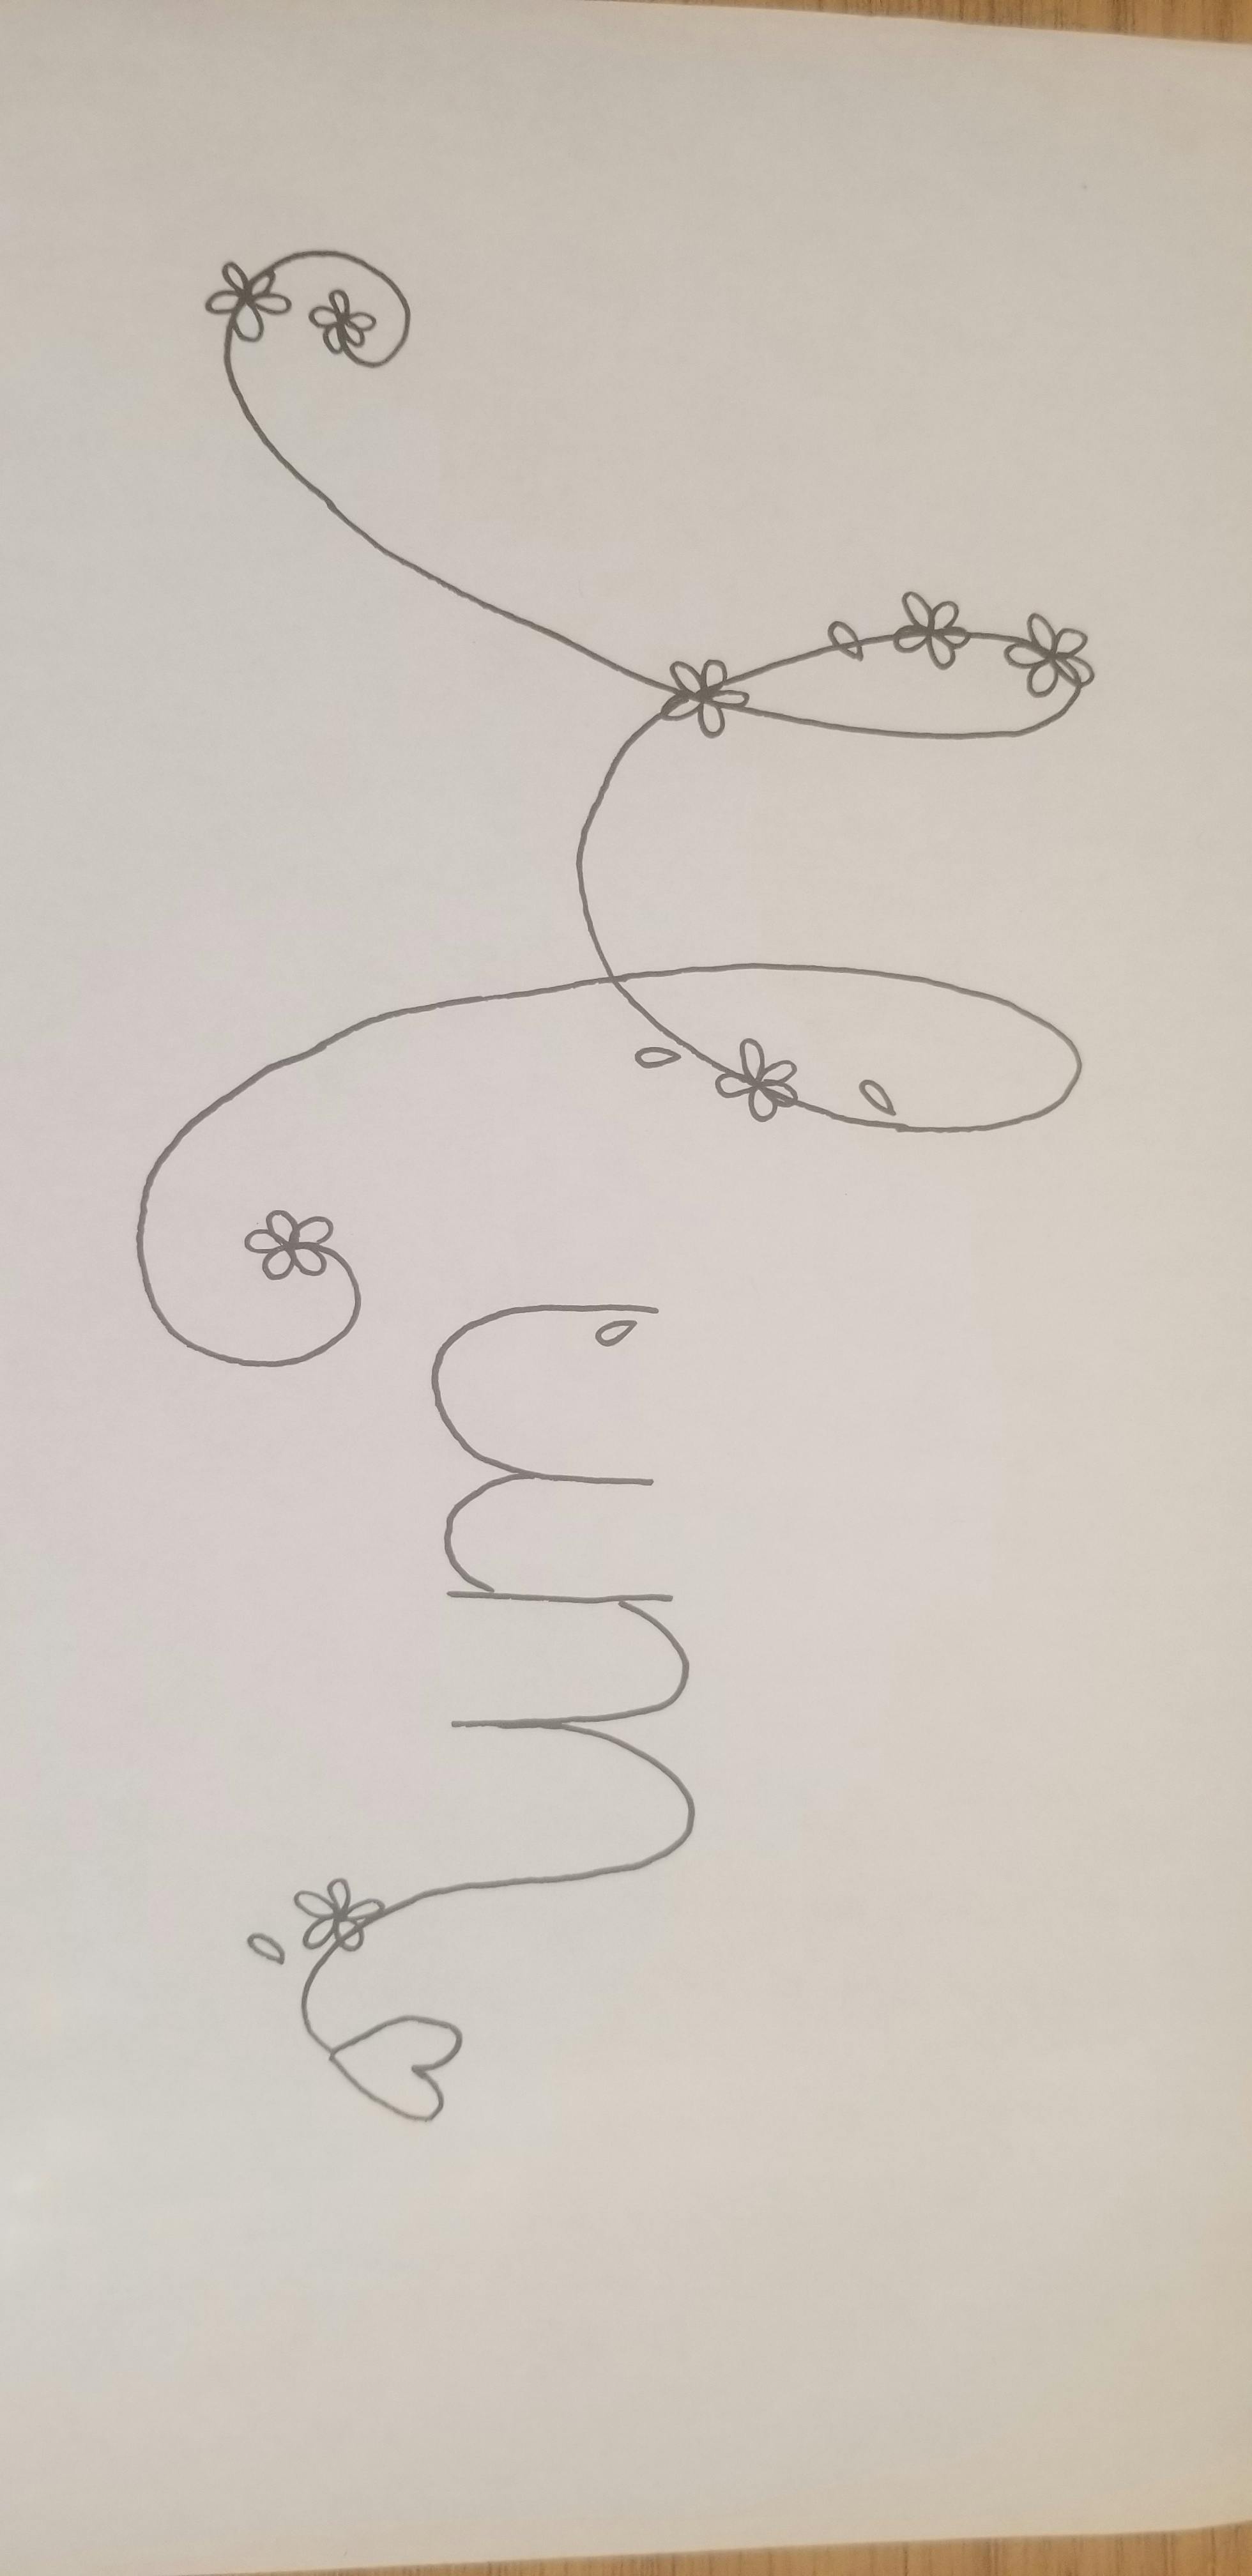
Sophie has created two simple templates for you to trace on to your fabric - one design transfer of mum or mom, and then a second flower placement plan template for each.
Click to download: Mom and Mom with flowers, Mum, Mum with flowers
1
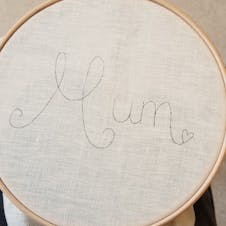
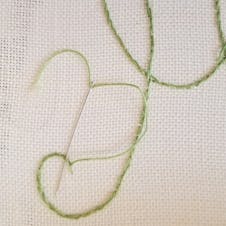
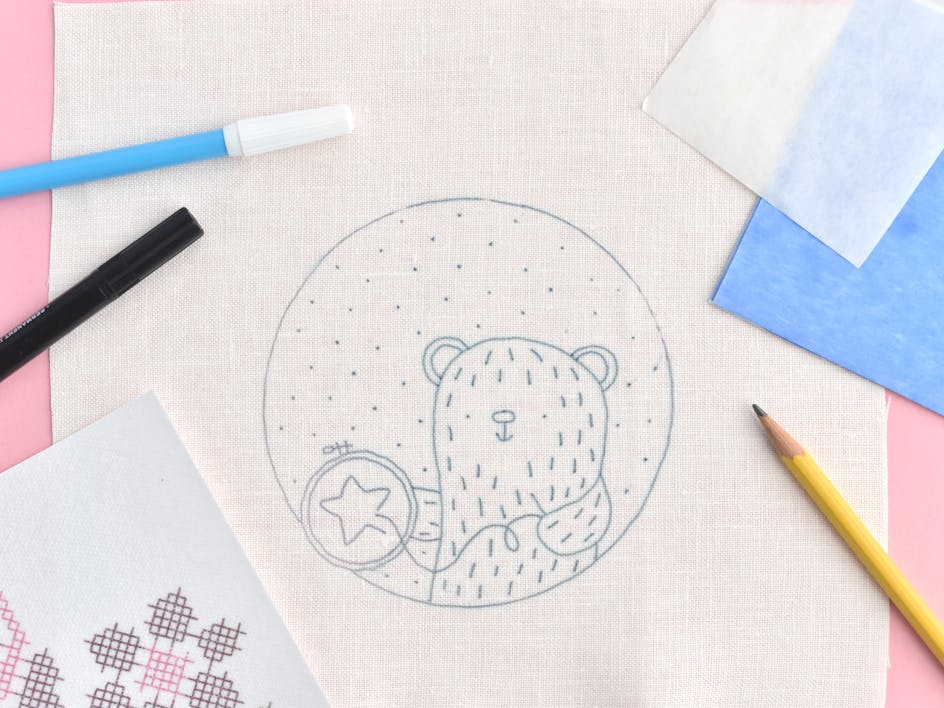
Draw the design onto the linen using the template, making sure that the lines are as fine as possible as these will need to be covered with your embroidery.
2
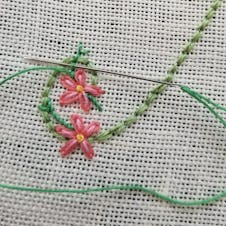
Work the two main outlines first, these are worked in back stitch (2 rows of back stitch worked side by side.) The first row of back stitch should be worked on the design lines.
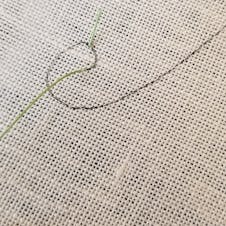
To start the thread off, place a knot in the end of the thread and take it down onto the design line just away from the start of the curl on the M. Then work two small stitches on the design line (these should be as small as possible but not touching one another, as this adds too much bulk to be able to cover with the embroidery stitches.) These two stitches work as anchoring stitches, the needle can then be brought up at the end of the curl ready to start stitching. When the thread is on the top, the knot can be cut off.
3
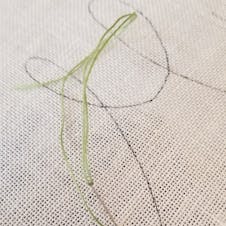
To work back stitch, work a small stitch on the line and then come up the same length as that first stitch further along the line. Then take the needle down to finish that second stitch by going into the end of the first stitch. The third stitch comes up further along the line and heads back down to the end of the second. These stitches are continued always coming up further along the line and heading down towards the last stitch. There should be no gaps in between the stitches. Continue to work the back stitch all the way around the M, trying to keep the stitches even in size and on the design line.
4
To finish the thread off you can turn the embroidery over and weave the needle and thread underneath some of the stitches. Then trim off the excess thread. The new thread can be started in the same way, with the knot on the top and two anchoring stitches worked on the design line.
5
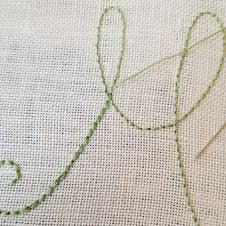
The second row of back stitch can then be worked, this should sit next to the first row, with no gaps or fabric showing. The new stitches should sit side by side to create a pair. Work the other letters in the same way.
6
With the main flower color now in the needle, you can start to work the flowers, these are worked in 5 detached chain stitches with a french knot in the middle. To work a detached chain bring the needle up and then take it back down close to where it came up. Gently take the needle though the fabric but ensure that you keep the loop of thread on the top. Now bring the needle up inside of that loop.
7
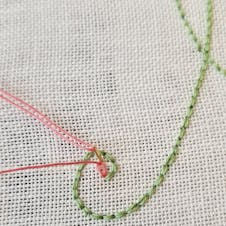
Pull the thread all the way through the fabric, until you get a loop that sits on top of the fabric with the needle and thread coming from the inside of the loop. Then take the needle down to the outside of the loop to secure that loop.
8
Aim to work 5 detached chain stitches around a circle to form a flower. Work all of the flowers.
9
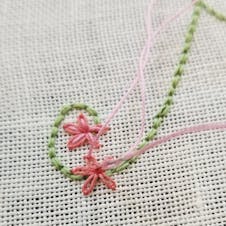
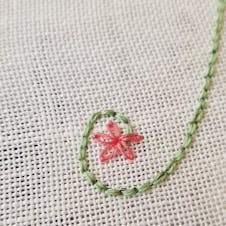
With the second flower color in the needle a small straight stitch can then be worked in the middle of each of the petals to ‘colour them in’. Bring the needle up close to the centre of the flower and work a straight stitch towards the tip of the petal. Continue for all of the flowers.
10
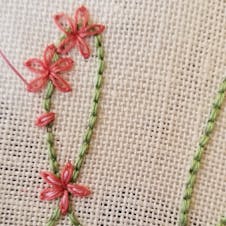
One detached chain on its own can be worked to create a bud, instead of five used to create the flowers.
11
The middle of the flowers can then be worked, these are worked in yellow and in french knots. Bring the thread up in the middle of the flower and wrap the thread once around the needle. Take the needle back down into the centre of the flower, ensuring that the wrap is kept tight.
12
Gently take the needle through the fabric so that the knot sits on the top of the fabric. Continue to work yellow french knots in all the flowers.
13

Once all the flowers are worked you can then start to work the stems. A small back stitch can be worked, often starting from one of the petals of the flowers.
14
Once the back stitch is finished, bring the thread to the top of the fabric and pass from left to right underneath the back stitch, at the next stitch, pass from left to right, continue to do so for all of the back stitches in that stem.
15
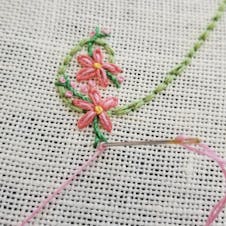
Once the stems are worked with the flower color used for the straight stitches you can then go and scatter some french knots onto the stems and around the flowers.
16
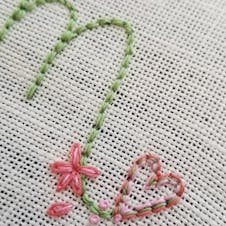
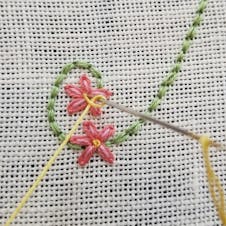
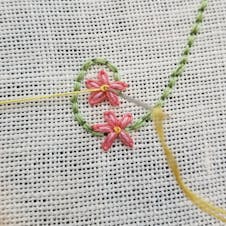
The heart at the end is worked in three rows of back stitch, start with the green used for the writing and then work each of the flower colours either side of that. Ensure that you keep the stitches small so that you are able to get around the curves of the heart neatly. (If the stitches are too long you will not a get a smooth heart shape).