How to make a patchwork quilt in just one weekend!
Published on March 11, 2021 3 min readAlways wanted to make a patchwork quilt but thought you didn't have the time? With this tutorial from The Weekend Quilter you can learn how to make a patchwork quilt in a weekend!
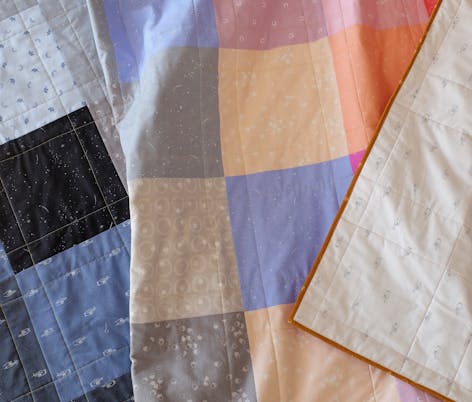
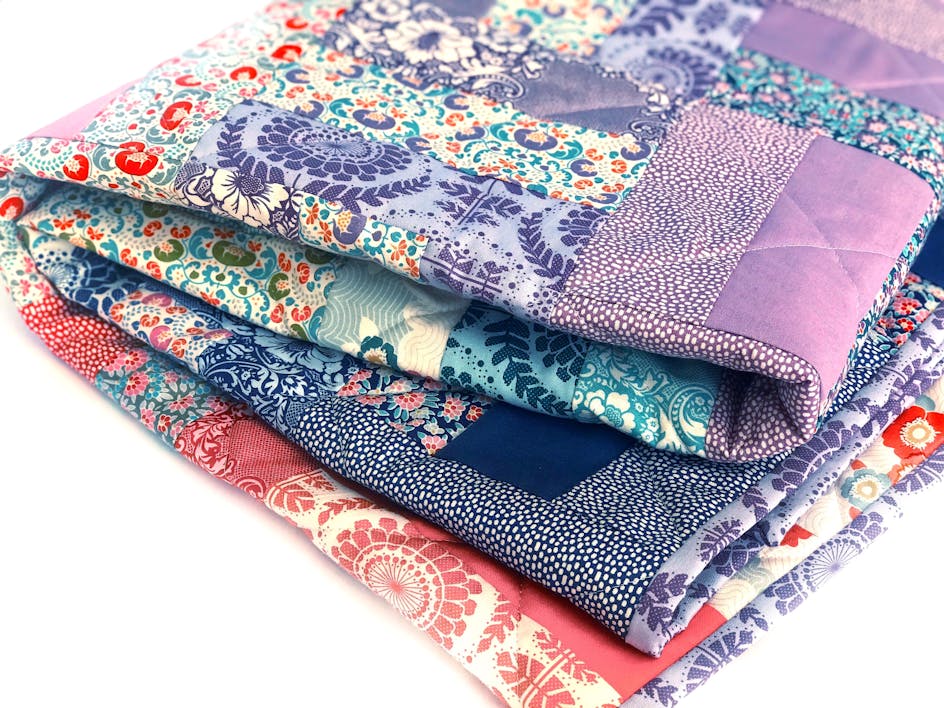
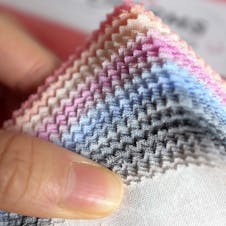
Thanks to pre-cut quilting fabrics, putting together a quilt has never been this easy or quick. My Quilt in a Weekend project is perfect for those that are new to quilting or after a quick make. It is also a great project to tackle random off cuts and scraps in your stash. With this particular tutorial, we’ll be using pre-cut layer cake fabrics.
Layer cakes in quilting are a set of pre-cut 10" x 10" squares. Usually, they come in a set of 42 squares and are made up of various prints from a fabric collection. Because they already come pre-cut, there is not a whole lot of preparation and cutting involved. This is why I’ve chosen to use this type of pre-cut fabric for our quilt in a weekend tutorial.
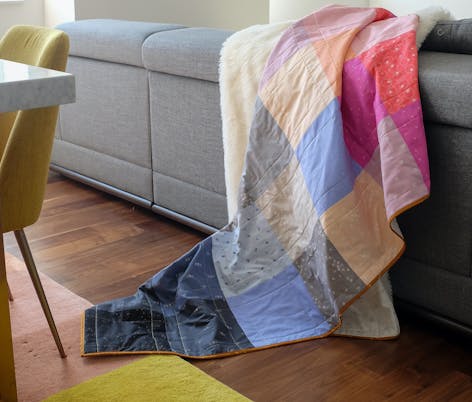
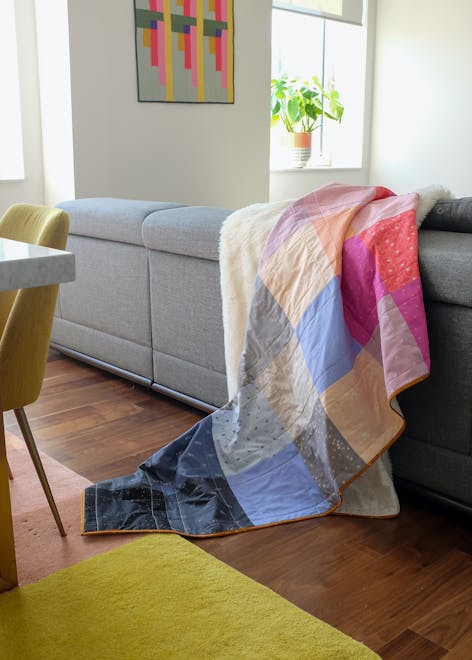
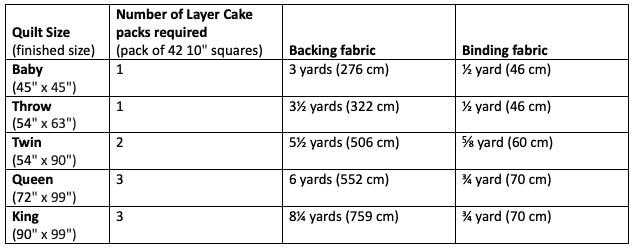
The tutorial provides the fabric requirements for baby (45" x 45"), throw (54" x 63"), twin (54" x 90"), queen (72" x 99") and king (90" x 99"). The bed sized quilts are going to take a little longer than a weekend but they are there for you if you choose to make something larger. The example used in this tutorial is a throw size quilt.
Like you would for a recipe, read through all the instructions before commencing your project to identify the tools and materials you’ll need, and understand what to expect.
Fabric requirements:
Fabric quantities are based on 42" WOF (width of fabric). Fabrics used in this tutorial are by Ghazal Razavi’s Lucky Charms collection for FIGO Fabrics.
Wadding requirements:
You'll need wadding (also known as batting) for this project – there needs to be at least 4" overhang on each side of the quilt top. For example, minimum wadding requirement for baby quilt is 53" x 53" of wadding (45" x 45" quilt finished size), throw size is 62" x 71" of wadding (54" x 63" quilt finished size), etc.
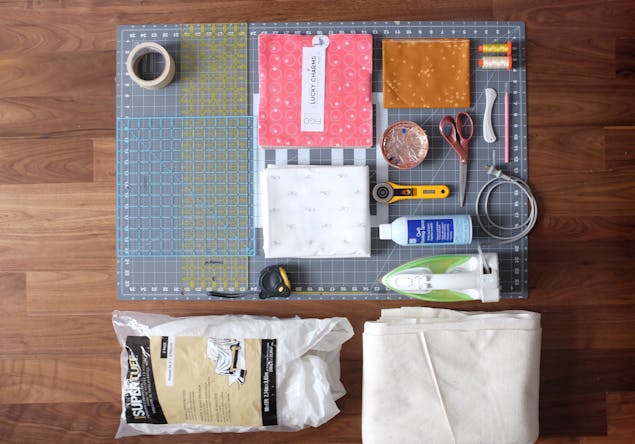
Materials
- Basic sewing machine
- Rotary cutter
- Quilting rulers
- in the sizes: 16½" x 16½", and 6" x 24"
- Measuring tape
- Cutting mat
- Fabric scissors
- Thick painter’s tape (optional) – approx. 2" wide (4½ cm)
- Sewing pins
- Iron
- Coordinating thread, 50wt cotton
- Newspaper, tarp or old bedsheets
- Basting spray
- Hera marker or blunt butter knife
- Walking foot or dual feel dog (optional)
- Machine-washable fabric pen or pencil
Cutting
1
Layer cakes or any other pre-cut quilting fabrics like charm packs and jelly rolls, come with zig zag edges. These edges prevent the fabric from fraying during transport and handling. Before any sewing begins, these edges need to be removed for accurate piecing.
2
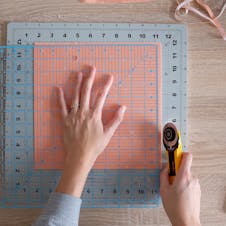
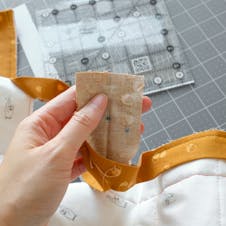
Line up and stack up 5-6 pieces of the Layer Cake squares on top of each other, and trim to 9½" squares. Repeat this and trim a total of:
Baby: Twenty-five (25) 9½" squares
Throw: Forty-two (42) 9½" squares
Twin: Sixty (60) 9½" squares
Queen: Eighty-eight (88) 9½" squares
King: One hundred and ten (110) 9½" squares
Pro Tip
Make sure the blade on the rotary cutter is sharp. A new, sharp rotary cutter blade should be able to make a clean cut through 6-8 layers of fabric at a time.
And don’t forget: measure twice, cut once.
Planning your layout
1
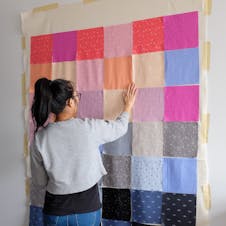
Okay! Arm workout is done. Let’s move on to the fun part.
This step involves laying out the squares and seeing how the quilt top looks like before sewing. Make sure you have plenty of space on the floor or on the wall to do this.
2
If you’re going with the wall route for planning and you don’t have a design wall, here’s a temporary solution. This involves using painter’s tape and tape wadding on to the wall.
From there, play around with different placements with trimmed squares. Depending on your space and the size of the quilt, this might not work due to how much weight your tape can hold. And of course, space on the wall!
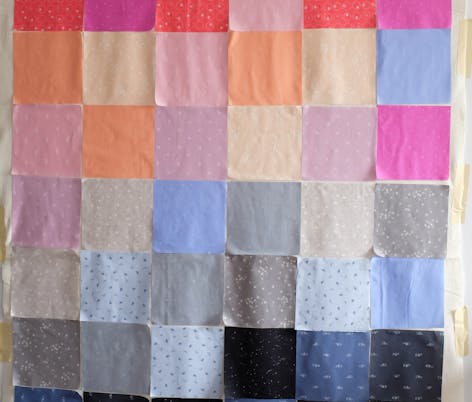
3
Now, imagine the quilt top as a grid. Here are the number of squares required across and down the quilt, by quilt size:
Number of squares going across the quilt:
Baby: 5
Throw: 6
Twin: 6
Queen: 8
King: 10
Number of squares going down the quilt:
Baby: 6
Throw: 7
Twin: 10
Queen: 11
King: 11
4
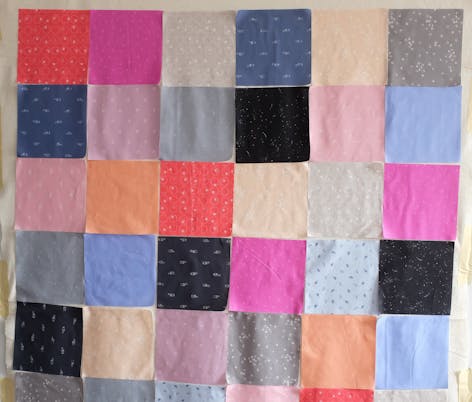
There are several different ways to arrange trimmed squares. Here are a couple of examples to get you inspired!
Gradient: Starting from one side of the quilt, place fabrics from the lightest to the darkest.
Randomised: This is the easiest layout. Place squares in any order or way.
Pro Tip
Once you have finalised your layout, take a picture of it on your phone in case the order gets mixed up while sewing.
Piecing together your pieces
1
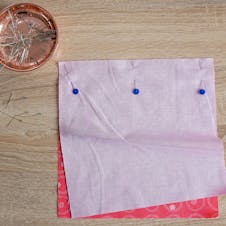
With right sides of the fabric facing each other, pin and using a ¼" seam allowance, sew squares together.
2
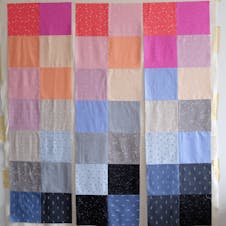
For ease and organization, tackle the squares in rows. Then sew the rows together.
3
As you’re putting each of the pieces together, don’t forget to use your iron to press the seams open or to the dark side. Pressing is important throughout the piecing process. This will ensure the seams are flatter for accurate piecing and reducing seam bulk.
Pro Tip
If you’re not sure whether to press the seams open or to the dark side, check out my blog post on the advantages and disadvantages of each method to assist with your decision.
Basting your quilt
When quilters talk about basting, it’s usually not related to basting meat for a meal. Basting in quilting means to temporarily secure the three layers of the quilt – top, wadding and back – while you incorporate permanent decorative quilting stitches. There are various basting methods including pinning, spraying, and stitching. For this tutorial, spray basting is shown. This is the fastest method out of the three.
Another alternative option is to completely skip the next two sections (Basting and Quilting) and send your quilt to a longarm quilter. Choosing the longarm quilter route is the easiest, especially for larger quilts like queen and king size. However, this service is an additional cost and depending on the longarm quilter’s workload, it requires additional time to complete the project.
1
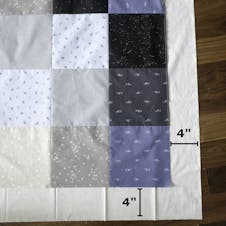
Before any of the basting happens, prepare the quilt back. For baby, throw, twin and queen size quilts, fold the backing fabric in half lengthwise and use a pair of fabric scissors to cut. For king size quilt, divide the fabric into thirds lengthwise.
A quilt back needs to be large enough to cover the quilt top with approximately 4" overhang on each side.
2
Adjust seam allowance from allowance from ¼'' to ½'' and sew together quilt back. The adjustment to the seam allowance will help to strengthen the quilt long-term. And press the seams open to reduce seam bulk.
3
Baste on a large, hard surface, for example, the floor or a large desk. Before spraying basting spray, protect your surfaces and workspace from getting sticky (for the most part) by laying newspaper, painter’s tarp or old bed sheets.
4
Lay wadding on the surface, followed by the quilt back. Spray basting spray between the wadding and quilt back. Use the long edge of the quilting ruler to push air bubbles. Preferably with the largest quilting ruler to cover more surface area at a time.
5
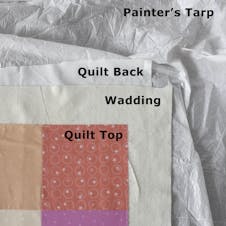
Turn the quilt over with the wadding facing up and repeat the previous step with quilt top.
Pro Tip
After laying and spraying each layer, go over it with a low heat iron to activate the basting spray glue, and push out any stubborn creases and air bubbles.
Quilting
1
Use hera marker or blunt butter knife and quilt ruler to mark decorative quilting guidelines as desired, and sew on the guidelines. Again, do this on a hard surface so the guidelines come out more distinct and clearer.
To prevent the quilt from puckering, adjust the seam width on the sewing machine to 2.8-3.2, and use a walking foot extension or activate dual feed dog function on sewing machine.
Pro Tip
To keep this as a fast finish, opt to marking simple, straight guidelines and less detail. In this example I have used the seams for each square as a guide and marked 1½" on either side of the seam.
2

Once all quilting is complete, with a long quilting ruler and rotary cutter, square and trim off excess fabric and wadding. Quilt should measure approx.: baby (45½" x 45½"), throw (54½" x 63½"), twin (54½" x 90½"), queen (72½" x 99½") and king (90½" x 99½").
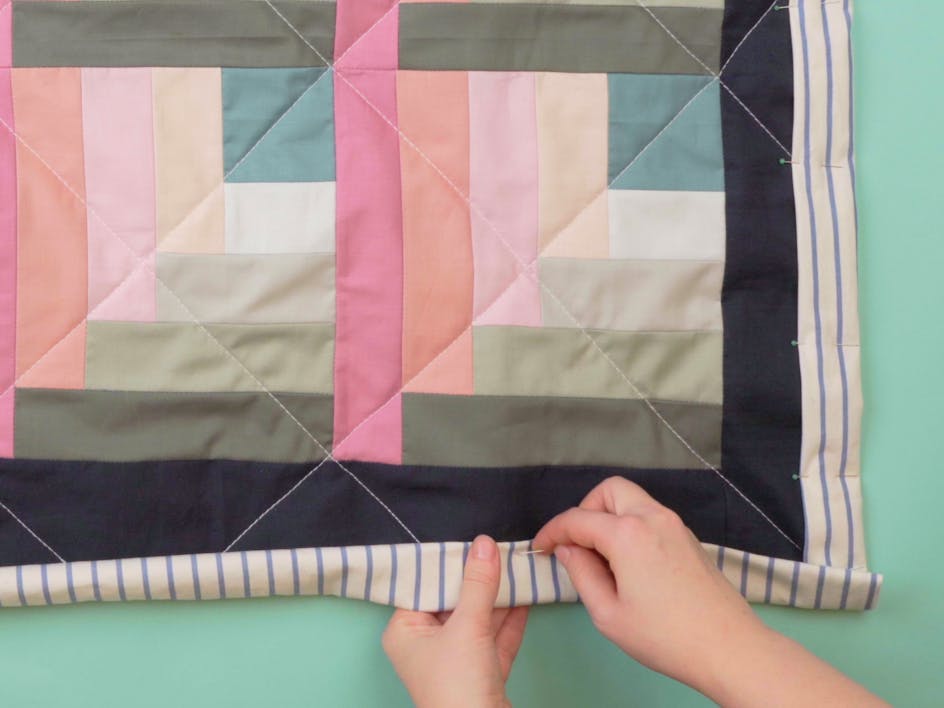
Binding and finishing
1
When you see the word “binding” in a quilt pattern or tutorial, generally, you know you’re at the home stretch!
From the binding fabric, cut the following number of 2½" x WOF strips for binding:
Baby: 5
Throw: 6
Twin: 8
Queen: 9
King: 10
2
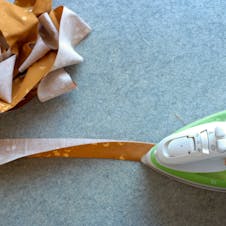
Join each of the strips at the shorter ends to create one long continuous strip to wrap around the edge of the quilt. At each joint, press the seams open. Then fold and press the strip lengthwise to create binding strip.
3
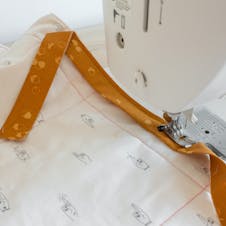
There are a couple of ways to attach binding on to a quilt – machine and hand bind. For this particular tutorial, machine binding will be shown. This is the fastest method when it comes to binding.
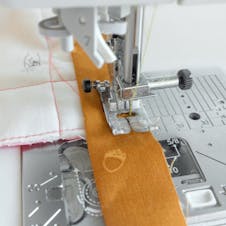
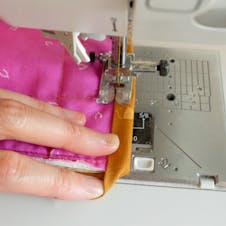
Start with the back of the quilt facing up. Align the raw edge of the binding with the raw edge of the quilt. If you haven’t yet, switch the needle position back to a ¼" seam allowance. Start sewing at about 4" from the start of the Binding and ¼" from the raw edges.
4
Keep sewing until your needle hits ¼" from the corner. Stop here and backstitch. Then remove the quilt from the sewing machine.
5
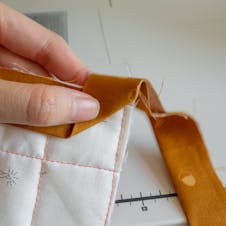
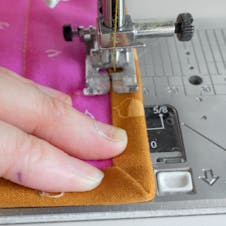
Turn the quilt 90 degrees, with the raw edge of the quilt on the right. Fold the binding at a 45-degree angle and then fold the binding back down so the raw edge is aligned with the raw edge of the quilt.
6
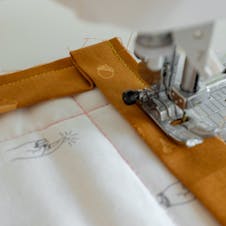
Continue attaching the binding until you reach approximately 6″ to 8" from the start of the Binding. Then remove the quilt from the sewing machine.
7
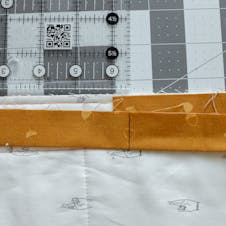
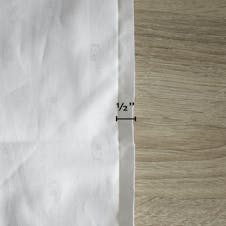
Lay the quilt flat with the quilt back and the two ends of the binding strip is facing up. Place the end of the binding on top of the start of the binding. Use a quilt ruler to mark ½" past the start of the binding, so the two ends overlap each other. Cut on the marked guideline.
8
With the right sides together, sew the two ends together using ¼" seam allowance and press the seams open. Attach the rest of the binding to the back of the quilt.
9
Turn the quilt the other way around with the quilt top facing up. Fold the finished edge of the binding over to the top and sew to secure it. When you reach approximately 2" from the corner of the quilt, stop and leave the needle and presser foot down.
Gently fold and hold down the finished edge of the binding on the quilt so there is a 45-degree angle overhang of binding at the corner of the quilt.
10
Fold the binding perpendicular to the edge you have just attached, toward the center of the quilt, to form the corner of the quilt. You can secure the corner with your hands, pins, or a clip.
Congratulations! You did it! Share your quilt in a weekend project moments by tagging @the.weekendquilter #theweekendquilter and #quiltinaweekendquilt, and @lovecraftscom and #lovecrafts on social media.