Make a huggable pumpkin
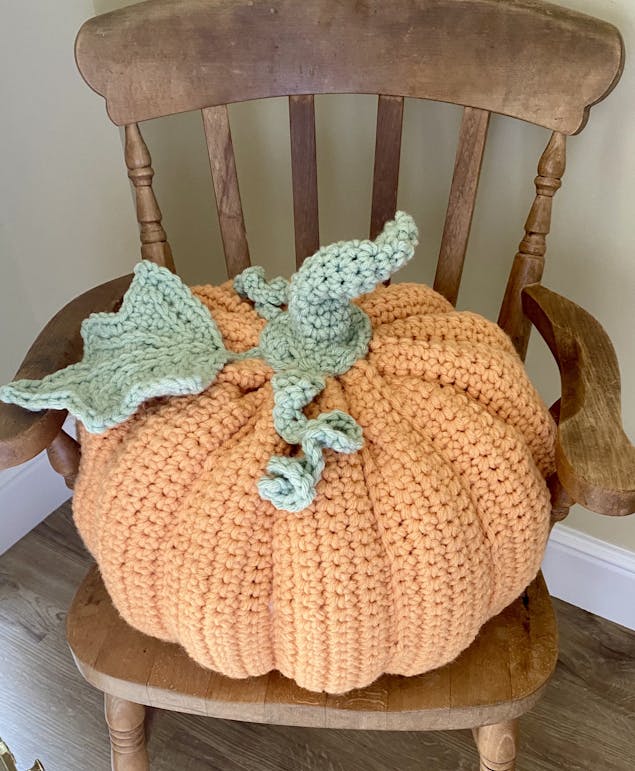
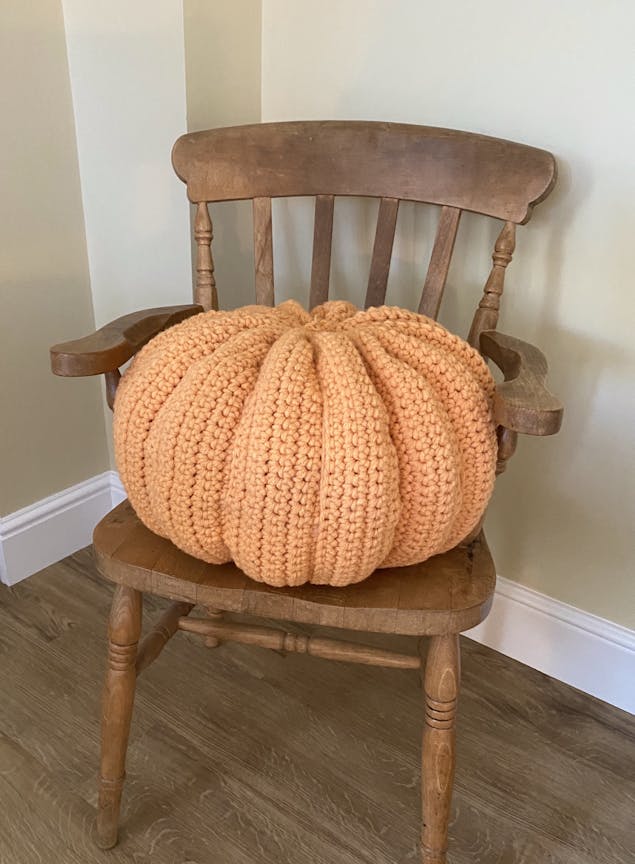
Published on October 2, 2020 2 min readCrochet the squidgiest giant pumpkin with this easy step-by-step tutorial by Kate Eastwood. Perfect for making a homemade pumpkin patch for Halloween or Thanksgiving, this huggable gourd is sure to make your home cozy this Fall. All you'll need is a few simple tools and the snuggliest super bulky shades to make this irresistibly squishy pumpkin crochet pattern. Gourdgous!
Made in Paintbox Yarns Wool Mix Super Chunky not only does this hook up in no time at all but you have a wonderful choice of pumpkin shades to choose from. You'll need a 10mm crochet hook to make your huggable pumpkin!
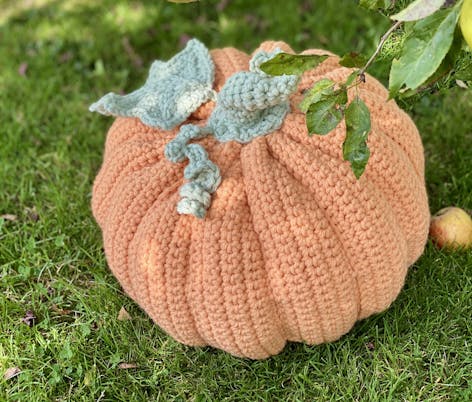
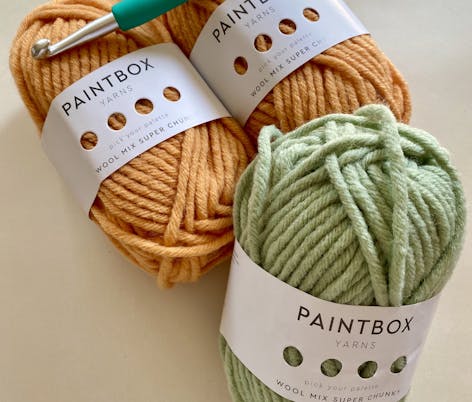
I used 12 x balls of Melon Sorbet and 2 x balls of Pistachio Green. I also used 4 x 250g bags of toy stuffing but you could use stuffing from old pillows/duvets too.
Materials
- 10 mm crochet hook
- Pony Bamboo Crochet Hook
- Paintbox Yarns Wool Mix Super Chunky
- 12 x Balls of Melon Sorbet
- 2 x balls of Pistachio Green
- A large sewing needle
- Pony Gold Eye Sewing Needles
- Stuffing
- Trimits Toy Stuffing - 200g
- 4 x 30cm pipecleaners for the stalk
This cushy pumpkin is made by crocheting a long rectangle, which is then folded in half so that the two short edges can be joined together and then it is gathered top and bottom.
The leaf, stalk and tendrils are added afterwards.
The pumpkin is worked in UK double crochet (dc) which is a US single crochet (sc). This pattern uses UK terms.
Abbreviations
ch - chain
st - stitch
sts - stitches
sl st - slip stitch
dc - double crochet (US single crochet)
How to make your pumpkin
1
Row 1: Using a 10mm crochet hook and the melon sorbet chain 46. Starting in the second chain from the hook work 1 dc in each chain to the end. 45 sts. Chain 1 and turn.
2
Rows 2 to 8: Work 1 dc in to each st. 45 sts. Chain 1 and turn.
3
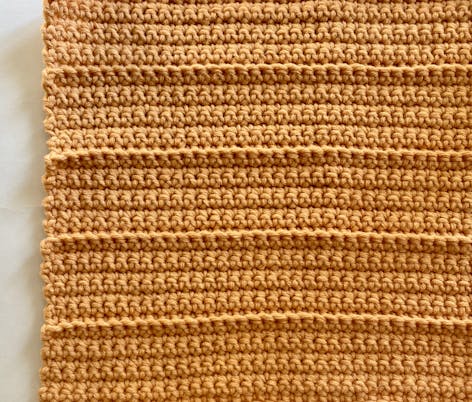
Row 9: Working in to the back loops only (BLO), work 1 dc in to each st. 45 sts. Chain 1 and turn. By working in to the BLO you will create a ridged effect.
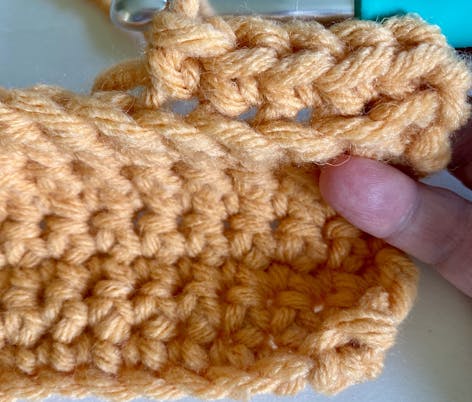
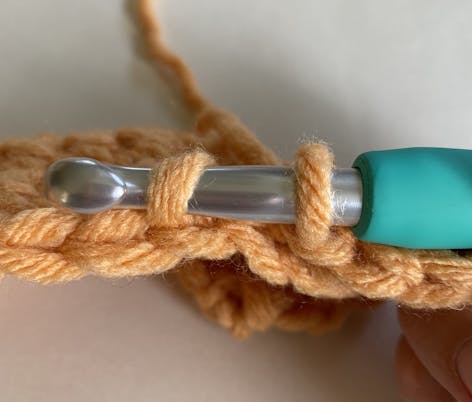
Chain 1 and turn. By working in to the BLO you will create a ridged effect.
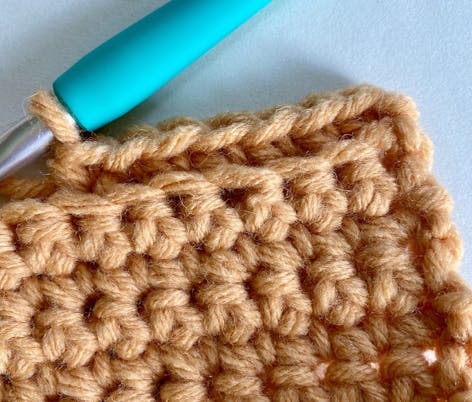
4
Row 10: Now working in to the stitch as usual, work 1 dc in each st. 45 sts. Chain 1 and turn.
5
Rows 11 to 16: Work 1 dc in to each st. 45 sts. Chain 1 and turn.
6
Now repeat Rows 9 to 16 a further 12 times. This will give you a rectangle of approx. 120 cm in length. Finish off and sew in the ends.
7
Lay the rectangle on to a flat surface wrong side down.
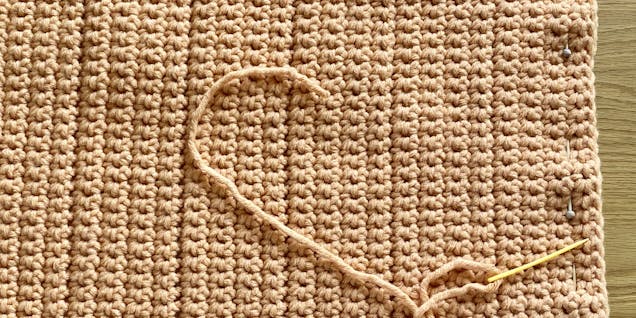
Fold the rectangle in half so that the two short edges are on top of each other, with the right sides together. Pin in place.
8
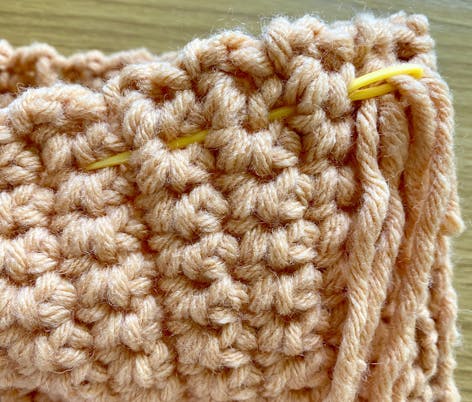
Starting at the seam run a gathering thread all the way around one of the edges of the pumpkin, approx 1 cm in from the edge.
I found it helped to pull up the gathering thread as I worked my way around, to ease the gathers equally around.
9
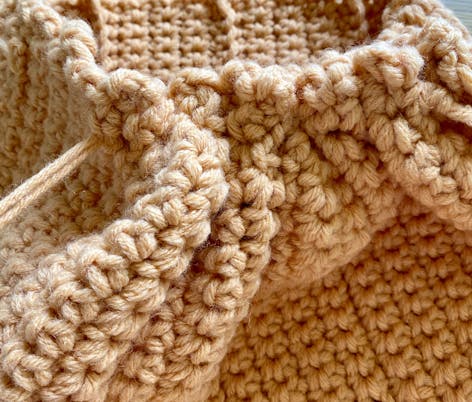
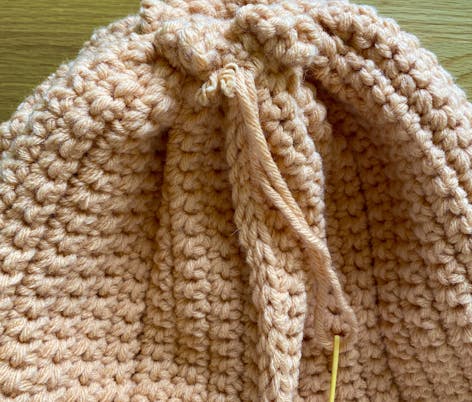
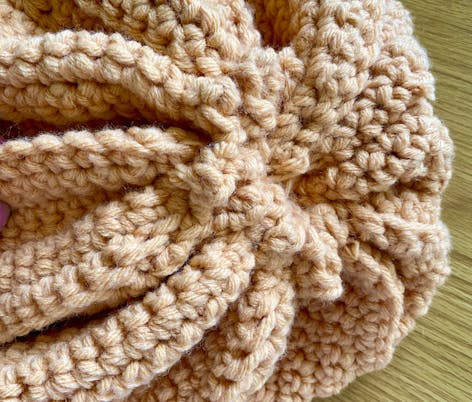
Keep pulling the gathering thread tightly and when you get back to the seam fasten off as securely as possible. You should be able to close the hole up completely but if not, stitch a few threads backwards and forwards across the remaining opening and pull closed. This will be the bottom of the pumpkin so it is not essential for it to look particularly neat.
10
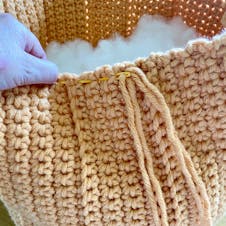
Stuff the pumpkin about three quarters full.
11
Now thread another long double length of yarn and sew another gathering thread around the top edge of the pumpkin in exactly the same way as before.
12
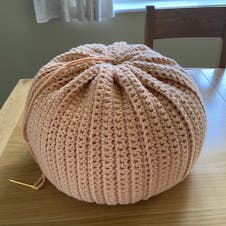
Just before you close the top of the pumpkin finish adding the stuffing. Close up the rest of the opening, and finish off.
Pro Tip
To add extra definition to the pumpkin ridges, starting at the centre top of the pumpkin tie long pieces of yarn all the way around the pumpkin, following the line of the ridges, pulling them tight to create indents in the pumpkin sides and then secure the end back at the top. In total I wrapped about 8 pieces of yarn around the pumpkin.
How to crochet your pumpkin leaf
1
Row 1: Using a 10mm crochet hook and the Pistachio chain 6. Starting in the second chain from the hook work 1 dc in each chain to the end. 5 sts. Chain 1 and turn.
Row 2: Work 2 dc in to the first st, 1 dc in to each of the next 3 st and then work 2 dc in to the last st.7sts. Chain 1 and turn.
Row 3: Work 2dc in to the first st, 1 dc in to each of the next 5 st and then work 2 dc in to the last st. 9 sts. Chain 1 and turn.
2
Row 4: Work 2dc in to the first st, 1 dc in to each of the next 7 st and then work 2dc in to the last st. 11 sts. Chain 1 and turn.
Row 5: Work 2dc in to the first st, 1 dc in to each of the next 9 st and then work 2dc in to the last st. 13 sts. Chain 1 and turn.
3
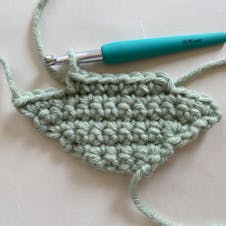
Row 6: Work 2dc in to the first st, 1 dc in to each of the next 11 st and then work 2dc in to the last st. 15sts. Finish off.
With the right side of the leaf facing, join the yarn back in with 1 sl st into the 5th stitch from the right. Work 1 dc in to the same st and then work a further 6 dc. 7 sts. Chain 1 and turn.
4
Row 7: Work 2dc in to the first st, 1 dc in to each of the next 5 st and then work 2dc in to the last st. 9sts. Chain 1 and turn.
Row 8: Work 2dc in to the first st, 1 dc in to each of the next 7 st and then work 2dc in to the last st. 11 sts. Chain 1 and turn.
Row 9: Work 2dc in to the first st, 1 dc in to each of the next 9 st and then work 2dc in to the last st. 13 sts. Finish off.
With the right side of the leaf facing, join the yarn back in with 1 sl st into the 5th stitch from the right. Work 1 dc in to the same st and then work a further 4 dc. 5 sts. Chain 1 and turn.
5
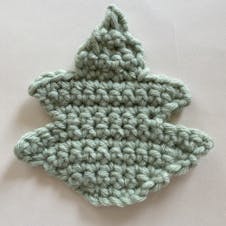
Row 10: Work 1 dc in each st. 5 sts, Chain 1 and turn.
Row 11: Decrease, 1 dc , decrease. 3 sts. Chain 1 and turn.
Row 12: Decrease, 1 dc. 2 sts. Chain 1 and turn.
Row 13: Decrease. Finish off.
To edge the leaf
1
With the right side facing, starting at the bottom centre of the leaf, join in the yarn with a sl st and then dc up to the first leaf tip. In to the tip stitch work 1 dc, chain 2, sl st back in to the 2nd chain and then continue dc around to the next leaf tip.
2
At the second leaf tip work 1 dc, chain 2, sl st back in to the 2nd chain and then continue dc up to the top of the leaf.
3
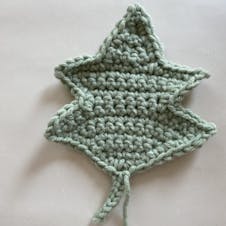
In the stitch at the top of the leaf work 1 dc, ch 2, sl st back in second chain and dc back in to the same st.
Continue dc down the other side of the leaf , working the same pattern at the leaf tips as for the first side.
When you get back to the beginning of the edging chain 9 to make the stalk.
4
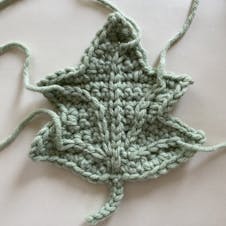
Starting in the second chain from the hook, sl st back up to the base of the leaf and finish off.
To add veins to the leaf work top stitch by working a chain of sl st from the top of the work through to the bottom. Sew in ends.
Making your pumpkin stalk and tendrils
Make your pumpkin patch-ready with a crocheted stalk and curly tendrils. The stalk is worked in a continuous spiral. And as for the tendrils, there a two lengths to make, one shorter one longer, that are fabulous finishing embellishments for your gourd. Both features are made with your Pistachio shade of chunky yarn using a 10 mm hook.
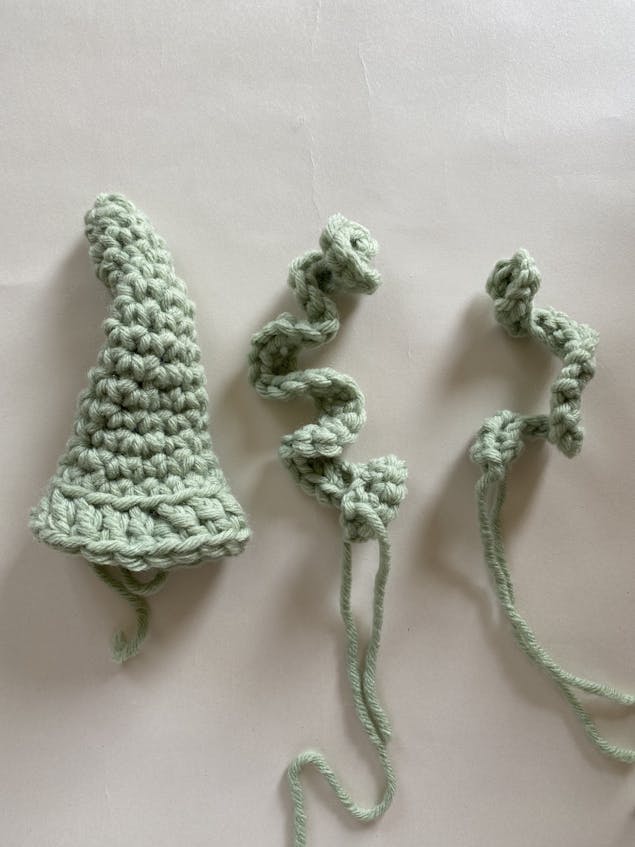
How to make the pumpkin stork
1
Round 1: Using a 10mm crochet hook and the Pistachio chunky yarn make a Magic Ring and work 3 dc in to the ring.
Round 2: 1dc, work 2dc in to the next st, 1 dc. 4 sts.
Round 3: (1 dc, 2 dc in to the next st) x 2. 6 sts.
2
Rounds 4 and 5: Dc. 6 sts.
Round 6: (1 dc in each of the next 2 sts, 2 dc in to the next st) x 2. 8 sts.
Rounds 7 to 9: Dc. 8 sts.
3
Round 10: (1 dc in each of the next 3 sts, 2 dc in the next st) x 2. 10 sts.
Rounds 11 and 12: dc. 10 sts.
Round 13: (1 dc in each of the next 4 sts, 2dc in the next st ) x 2. 12 sts.
4
Round 14: (1 dc in each of the next 3 sts, 2 dc in the next st) x 3. 15 sts.
Round 15: dc. 15 sts.
Round 16: Now working in tr and in to the back loops only, ( 1 tr in the next st, 2tr in the next st) x 7, 1 tr in last st. 22 sts. Sl st back to the beginning to join. Finish off.
How to make your pumpkin tendrils
1
For your long tendril:
Chain 25. Starting in the second chain from the hook work 2 dc in to each chain to the end. Finish off.
2
For your short tendril:
Chain 20. Starting in the second chain from the hook work 2 sl st in to each chain to the end. Finish off.
To finish your pumpkin
To give the stalk some body and to enable you to give it a bit of a twist, fold the 4 x 30xm pipecleaners to the same length as the stalk and carefully push them in to the stalk.
Stitch the stalk to the top of the pumpkin, stitching in the leaf and the two tendrils as you work your way around. And there you have it. The coziest huggable pumpkin ready for Thanksgiving!
