Make a beautiful Mother’s Day crochet floral wreath
Published on March 11, 2021 By Zoe Bateman 1 min readLearn to make a beautiful handmade spring flower wreath just in time for Mother’s Day. It would make a thoughtful gift for someone special!
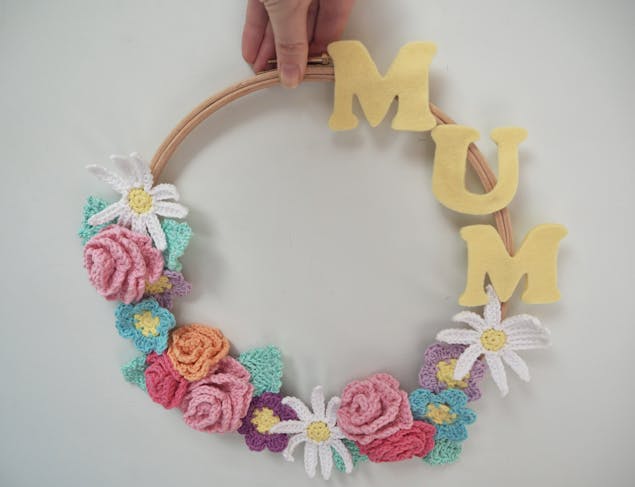
What better way to say ‘I think you’re awesome’ to the mother figure in your life than with a handmade gift they can treasure forever? This floral wreath will add a touch of springtime colour to their lives, and the best part is the flowers will never die so they can keep it forever!
Crochet flowers are so much fun to make as they work up quickly once you’ve got the hang of the pattern, and you can use them to decorate and embellish all sorts of projects.
Materials
- Embroidery Hoop 25cm
- Scissors
- Felt
- Hot Glue Gun
- Pencil
- Paintbox Yarns Cotton DK
- Tea Rose
- Peach Orange
- Washed Teal
- Paper White
- Light Yellow
- Candy Pink
- Dusty Rose
Download the patterns
How to make your wreath
1
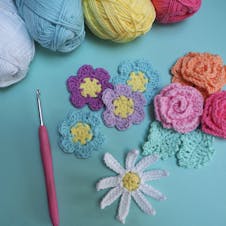
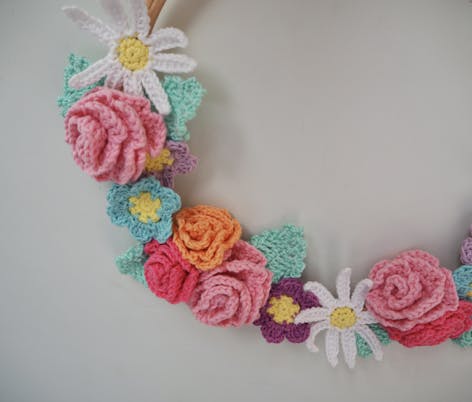
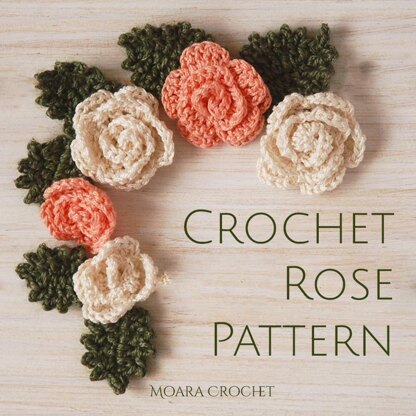
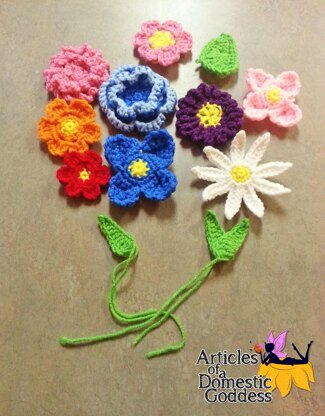
Start by crocheting your flowers - LoveCrafts has lots of amazing flower patterns. I used this rose pattern and leaf pattern by Moara Crochet , as well as the daisy and flower pattern from this pack by Articles of a Domestic Goddess.
Think about making different sizes and styles of flowers so your wreath has lots of interest, and play around with different colour combinations to make it personal to the recipient.
2
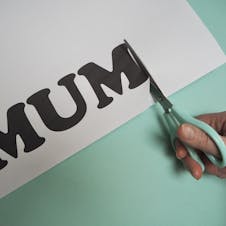
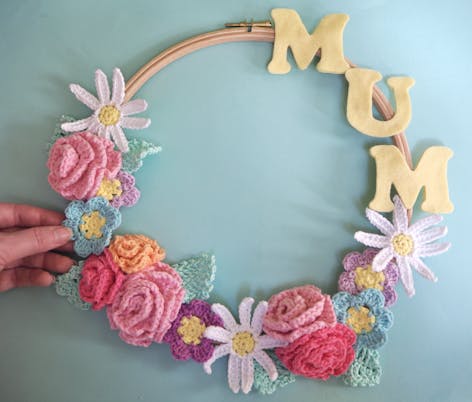
Print out your ‘MUM’ letters (or whatever letters you would like to use on your wreath.)
Carefully cut out the letters - remember you only need one of each letter to use as a template!
3
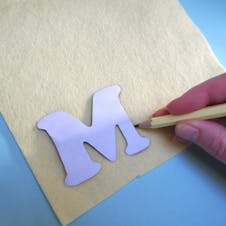
Place your template face down on your felt and drawn around the edge with a pencil.
4
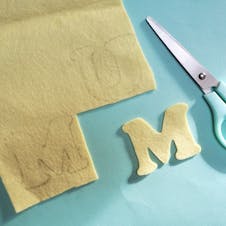
Carefully cut out your felt letters. As my felt was quite thin I cut out two of each letter and glued them together to give them a bit more stability.
5
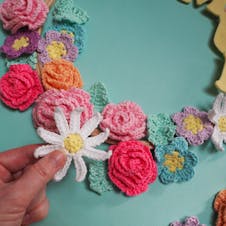
Arrange your letters and crochet flowers and leaves on your embroidery hoop. Layer your flowers and leaves so they overlap each other slightly as this will make it look more natural.
Try to balance your wreath so you don’t have all the same size or style of flowers in one area. I made my wreath slightly asymmetrical by placing the letters off to one side of my wreath rather than in the centre. Try out different layouts until you are happy with how your wreath looks.
Pro Tip
Before you start glueing your wreath in place take a photo so that you will remember where everything goes!
6
Glue all your wreath components in place, making sure you glue anything that is underneath other pieces down first.
As well as glueing your pieces on to the actual hoop you may want to glue some pieces to each other to help hold them in the right position and give your wreath a more 3D look.
And there you have it! One beautiful Mother's Day wreath, perfect for gifting to your mum.