Crochet a Glitzy Granny Square Blanket for Christmas!
Published on December 10, 2020 By Merion 3 min readWe've never seen Granny so glitzy and glam! Welcome to the easiest, fastest and sparkliest granny square blanket ever - one big granny square just bursting with vintage swish! Our inspiration comes from retro Christmas decorations of the 50s and 60s, where lametta mingled with glass baubles and trees were weighed down with tinsel and pastels. Follow Merion's easy video tutorial for a granny blanket you'll love bringing out year after year!

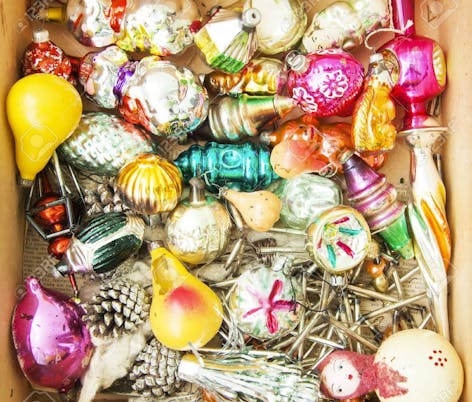
A giant granny square is a thing of beauty - it's easy to make, and you can be as creative as you like with the yarn you use. Use up your stash, and add sparkle and glitz with tinsel yarns and different textures - as long as you stick to the same weight yarn, your blanket will look fabulous! Leave behind all thoughts of sophistication and jump straight into that deliciously retro pool of sparkle and shine - our grandparents and great grandparents knew a thing or two about how color schemes and glitter!
Materials
- KnitPro Waves Crochet Hook
- Paintbox Yarns Simply Chunky
- King Cole Tinsel Chunky
Our Glitzy Granny Blanket uses chunky weight yarn, so you'll need a 6mm hook which will be perfect for the square itself and the candy cane edging. Keep working in rounds until the blanket is as big as you like, and then add any edging you love! Even a few rows of single (US) or double (UK) crochet will look great, or a last round of tinsel yarn is fun!
Merion's yarn choices for the Glitzy Granny:
For the mid-century palette, we used: Paintbox Yarns Simply Chunky in Pillar Red, Grass Green, Mustard Yellow, Pale Pink and Paper White; Sirdar Temptation in Sky Blue and King Cole Tinsel Chunky in Gold.
For the Nutcracker colour palette we used: Paintbox Yarns Simply Chunky in Marine Blue and Pale Pink, Sirdar Temptation in Sky Blue and Magenta and King Cole Tinsel Chunky in Frozen and Plum.
Before you start: Merion's pro tips!
I recommend joining your yarn for each round using a knot, and leaving a long tail to weave in, because this is a blanket and may get some quite rough useage, so those ends need to be really secure! The best way to do it, is to stop every few rounds and sew those ends in as you go, weaving them back and forth until they are really buried. If you leave them all to the end, it will take forever! Longer ends are far easier to weave in than short ends, just weave them back and forth a few times and then snip!
This is contraversial amongst crocheters, but I prefer to join new rounds into a side space, rather than into a corner. This avoids having to match up a corner with a chain 3, which can end up looking messy, not to mention annoying to do!
Choose colors that sing! Don't be scared of sparkle, this is the point of this glitzy granny - to celebrate those glorious colorways of the 50s and 60s! I have used a mid-century vibe in one of the examples, and then gone all out pink and blue for a Nutcracker theme too! Work in just blue and silver, or just gold and rose pink - go bright, or go pastel, it's up to you! I loved changing texture and adding in some chunky mohair, but you can add anything at all, eyelash yarn, funky fur, anything you love.
Our Retro Glitzy Granny Square, step by step:
1
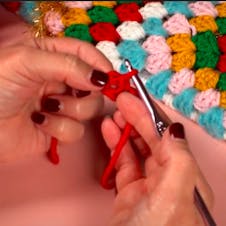
Chain 4, and join with a slipstitch to the first chain to form a ring.
2
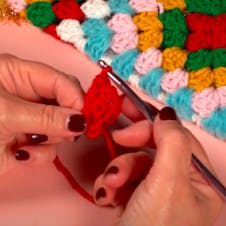
Chain 3, and then work 2 double crochet (US), trebles (UK) into the ring. Chain 1. This is your first cluster.
3
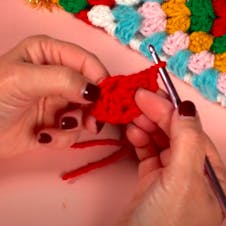
Work another cluster into the ring - 3 double crochet (US), trebles (UK) into the ring, and ch1. You now have two clusters.
4
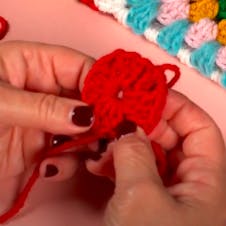
Work two more clusters of 3 x dc, ch1 (3 x tr, ch1 UK) and slip stitch into the last chain of the ch3 used a the beginning to join the round. Snip the yarn and fasten off.
5
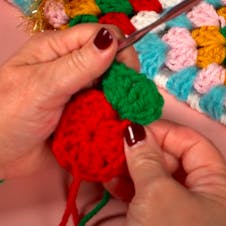
Attach the new color into one of the corner spaces, and ch3. Work 2 dc US (2 tr UK) into the space, ch1, and then 3 dc US (3 tr UK). This creates your first corner.
6
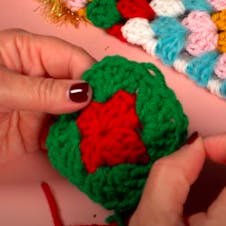
Move to the next chainspace, and add another corner as before, and repeat until you have four corners, and you are ready to join with a slip stitch into the ch3 at the beginning of the round. Cut and fasten off.
7
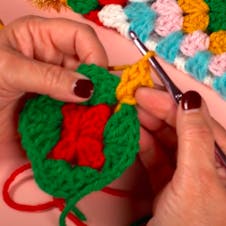
Join your new color for round 3 into a side chain space. Ch3 and work 2 dc US (2 tr UK) into the space - this forms your first cluster.
8
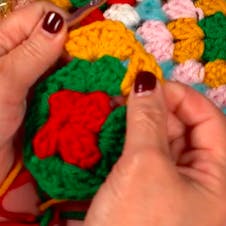
Work 3 dc US (3 tr UK), ch1, 3 dc US (3 tr UK) into the corner space to form a corner. Work your way around the square adding single clusters into the side spaces, and corners into the corner spaces.
9
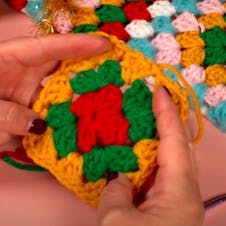
Slip stitch into the beginning ch3 to join, and fasten off the color.
10
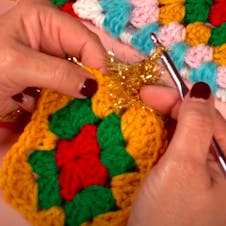
Keep working rounds until your Glitzy Granny Square is as big as you want it to be! Remember, when you work with tinsel or fur yarns, you can't really see the stitches - so don't worry!
The Candy Cane Edging
1
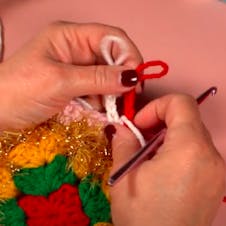
To start your candy cane edging, join the two colors of yarn into two stitches next door to each other on the edge of your square. Ch4 in each, and pull the loops nice and big so that they don't unravel.
2
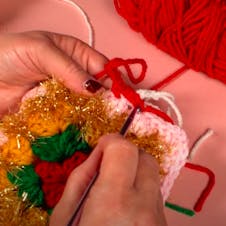
Tighten the loop on the first color (red in this picture), and take the yarn over the other color, working a sc (dc UK) into the stitch after the second color. Ch4, and make the loop large again.
3
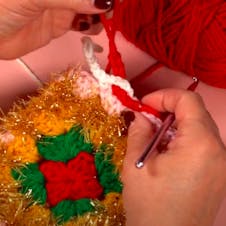
Tighten the loop on the second color (white in this picture), and take it over the red, into the next stitch. Work a sc US (dc UK) into that stitch, and ch4, then make the loop larger.
4
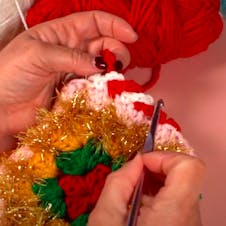
Keep working each color, stitch by stitch, overlapping the colors. Remember to untangle the balls of yarn every few stitches!


