How to design a cross stitch chart on your computer
Published on July 24, 2019 1 min read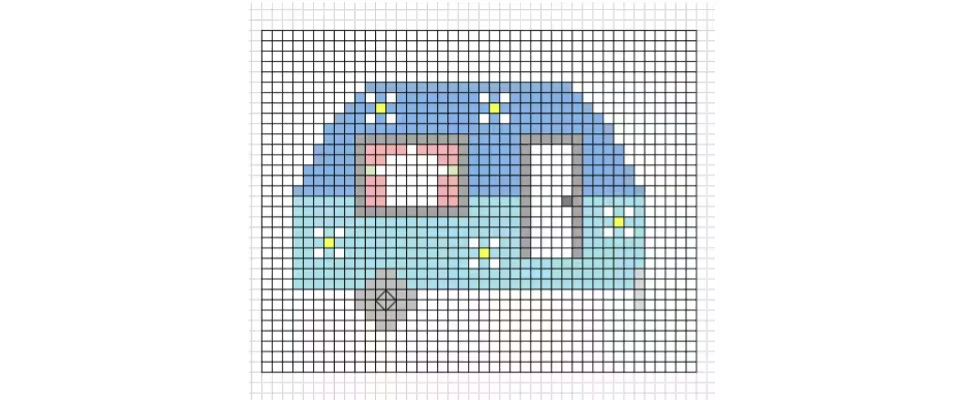
Have you ever wanted to make your own cross stitch chart, but don’t know where to start? We are going to show you a cross stitch pattern maker that’s probably on your computer right now — Excel! Yes, you heard correctly! Forget about spreadsheets, Excel has lots of fab features to help you start making simple cross stitch pattern charts straight away to take your stitching to the next level!
Below you’ll find a step-by-step guide on how to create a small chart. Then you’ll learn about the advantages and disadvantages of using this cross stitch pattern maker method. Time to get creative!
How to use Excel as a cross stitch pattern maker
1
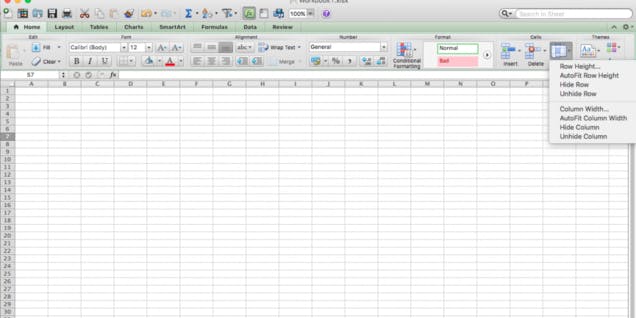
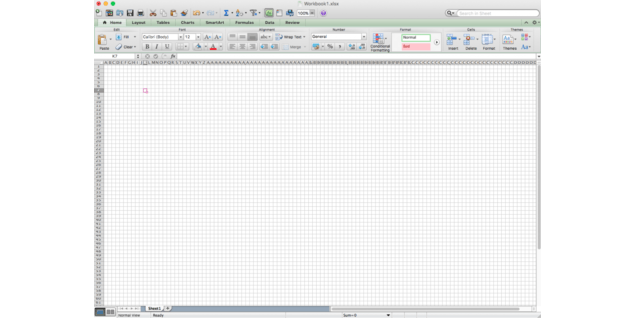
Start by opening a new workbook in Excel with a standard Excel sheet. Now, you’ll need to create a grid to work from. To do this, click the tab above row 1 and left of column A, which will highlight the entire sheet. Go to the top right-hand corner, and click Format, as shown below.
2
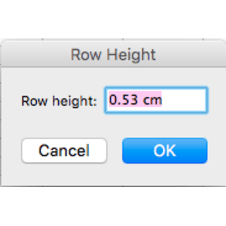
Create your chart. Click on row height, and change that number to 0.4cm. As you use this program more and start to make larger charts, you can change it to as small as 0.1cm; however, 0.4cm is a good size to start with. Click ‘Okay,’ and then go back to the format button and click ‘column width’ this time. Change that size to 0.4cm, as well.
3
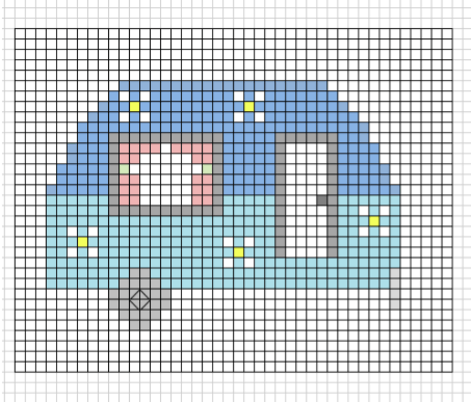
Now your cross stitch pattern maker sheet is ready. Each square will represent a stitch.
4
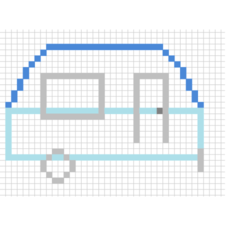
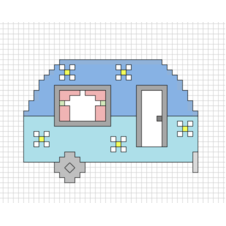
Start designing your own chart. For this example, I am going to be showing you how to design a cross stitch caravan.
To start off, select the colour of the base of your caravan. Using the fill tool to do this. Highlight all the cells that you’d like to fill. I tend to do the outline first and then fill in everything else.
5

Continue to create your image outline. You can carry on playing with the colors and creating your picture. Don’t worry about making a mistake. The great thing about using Excel is that you can always highlight the bit you don’t want and click ‘no fill’ in the fill drop down menu.
6
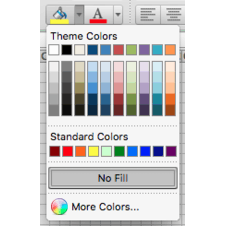
Create a basic outline. You then end up with a basic outline of what you are trying to create. This may take a bit of fiddling around with, changing your colors and positioning. One helpful tip includes having a picture of what you’re trying to create next by your side for reference. Don’t forget that you can choose a wider variety of colours by going into the fill tool and click ‘more colours’.
Pro Tip
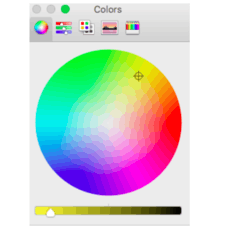
Don’t forget that you can choose a wider variety of colours by going into the fill tool and click ‘more colors’. You can also create a color palette of your favorite colors so you don’t have to keep going in and finding them. To do this, simply click the color you want and then drag it into the pallet box.
7
Now you can go in and fill the color. It may look somewhat box-like, but never fear, you can add the details in at the end. You fill the color in in the same way you did the outline: highlight the cells you wish to fill in, and use the fill tool to select your colour.
8
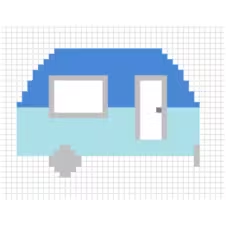
Add details! Now the caravan is taking shape. But it looks a little plain, doesn’t it? So you can now go in and add detail.
9
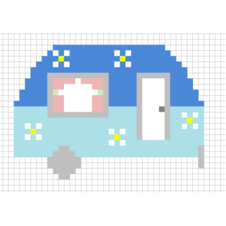
Review! It looks a little block-like, but you can start to see how the finished design will look.
10
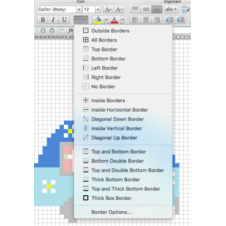
Outline your chart. If you wish, you can use the line tool to go around the outline of your design. To do this, click on the border tab. You can then choose which sides of the cell you are in you wish to have an outline. If the outlines you want are not in the preset list you can click border options at the bottom and you will be able to add a custom border.
This part takes some time, however, it isn’t always necessary to do it. You can use it to show your back stitches though, which is helpful. It also helps to be able to see fractional stitches.
11
The reason I say it isn’t always necessary to add in the borders is because if you are printing your design to work off of, you will have to use the border tool to create a graph so you can count your stitches. To do this you simply highlight your entire design, click the border tool and select ‘all borders’. This will give you your graph to print from.
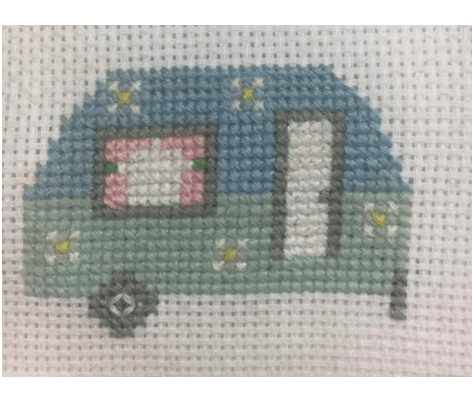
Not to bad for a first time cross stitch designer if we do say so ourselves!