How to crochet a baby blanket
Published on December 2, 2019 2 min read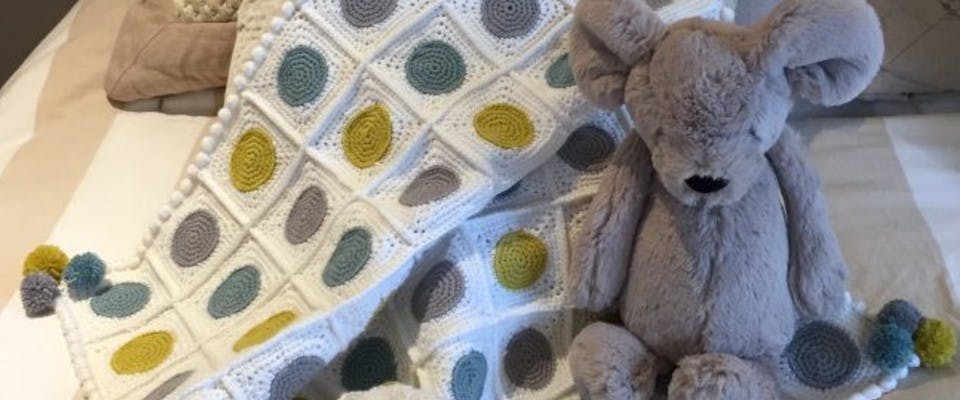
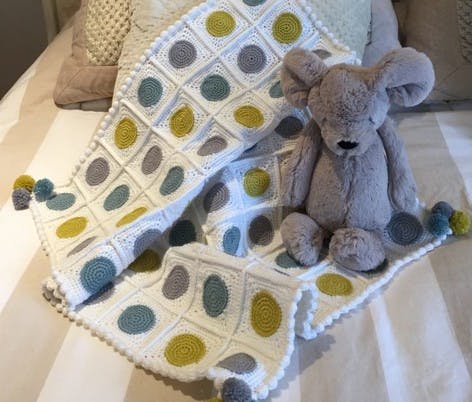
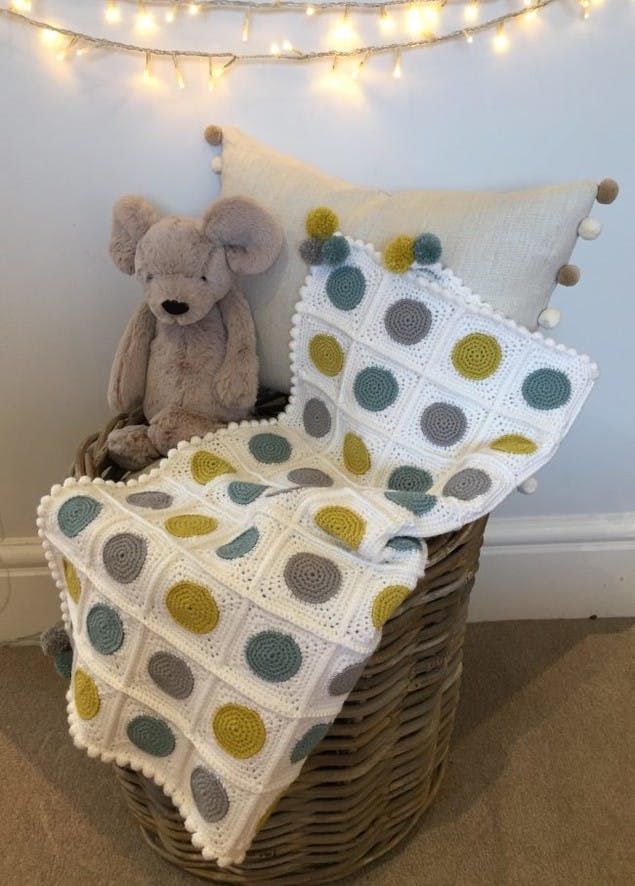
A homemade blanket is the perfect gift for any new baby. Kate Eastwood's blanket is not only bright and colorful, but will teach them all about shapes before they know it! With a bobbly border and pom poms added at the corners there’s lots of lovely texture for those little fingers to explore. This pattern uses UK terms.
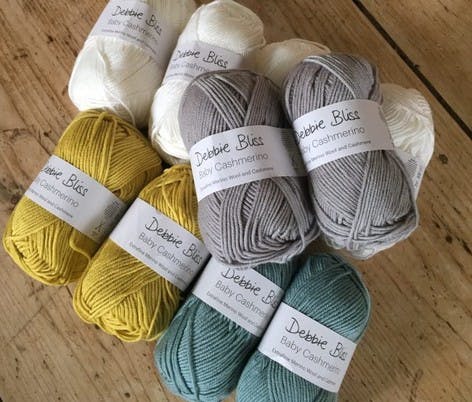
I made my blanket in Debbie Bliss Baby Cashmerino as it gives the softest of finishes and there is a wonderful array of colors to choose from, and for my blanket I used 6 x balls of White 340100, and 1 x ball each of Duck Egg 340026, Slate 340009 and Acid Yellow 340091, working with a 3mm hook.
Materials
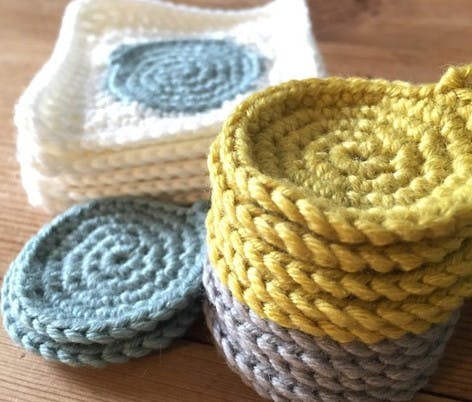
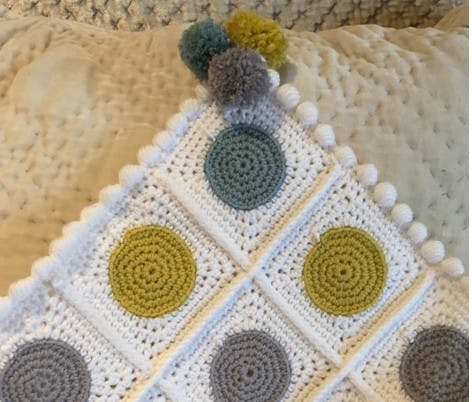
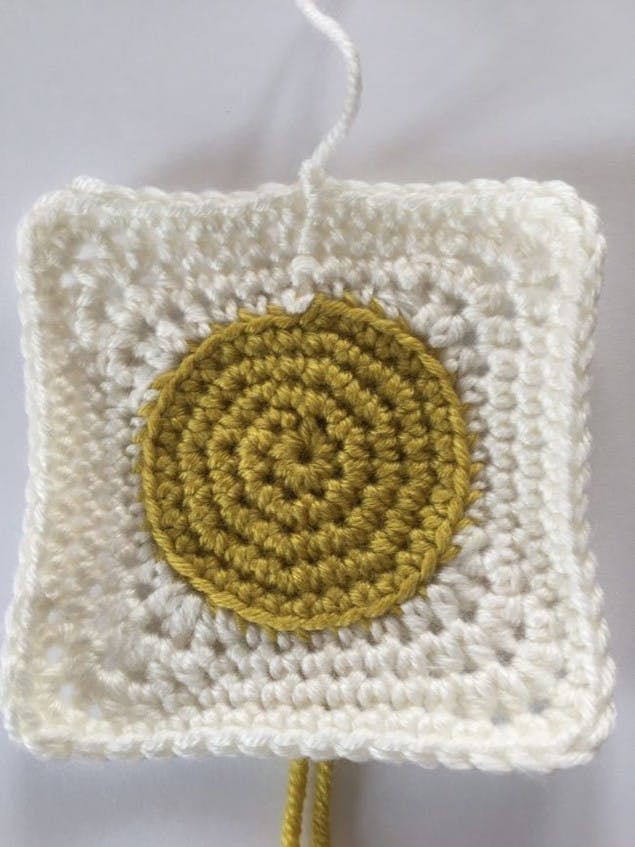
Each square is made up of a central circle in one of the three colours, bordered by the white yarn building a square around the circle and then to join all the squares together.
In total I made 21 squares in each of the three different colorways. Once all the squares were joined together I added a bobble border all the way around the blanket and finished it off by adding three small pom poms, one in each color, at each corner of the blanket.

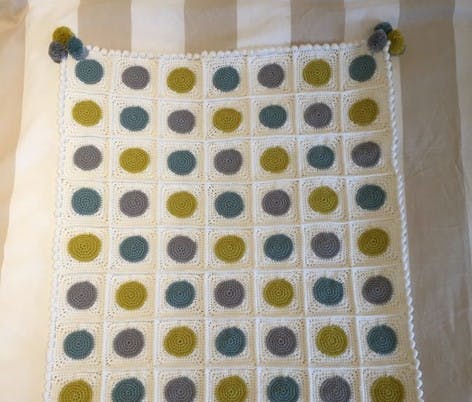
The finished blanket measures approx. 60cm x 50cm.
How to crochet a circle
1
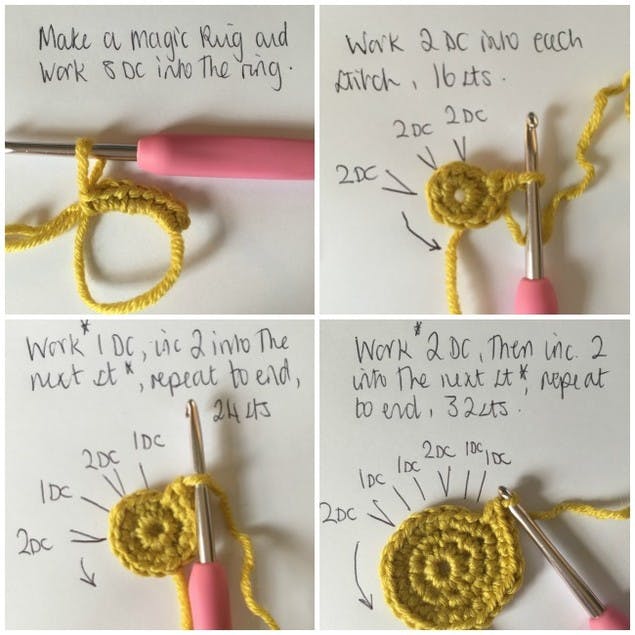
Round 1: Make a Magic Ring and work 8 DC in to the ring.
2
Round 2: Work 2 DC in to each stitch from Round 1, 16 sts.
3
Round 3: *Work 1 DC in to the next stitch and then work 2DC in to the following stitch*. Repeat from * to * all the way around, 24sts.
4
Round 4: * Work 1 DC in to each of the next 2 stitches and then work 2DC in to the next stitch*. Repeat from * to * all the way around, 32 sts.
5
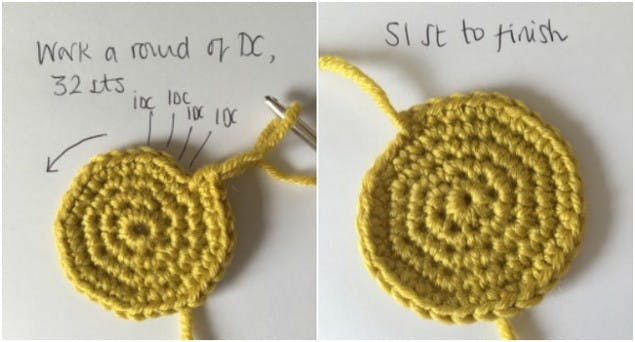
Round 5: Work a round of DC, 32 sts. Slip stitch to join, finish off and sew in the ends.
How to make your circle into a square
1
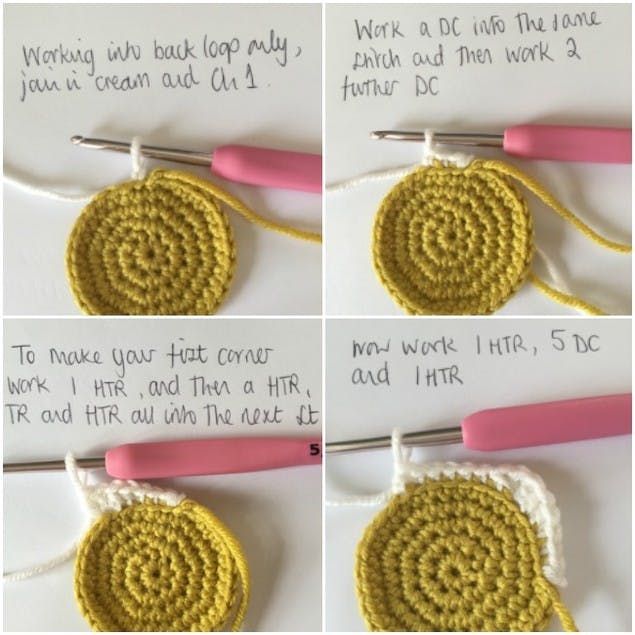
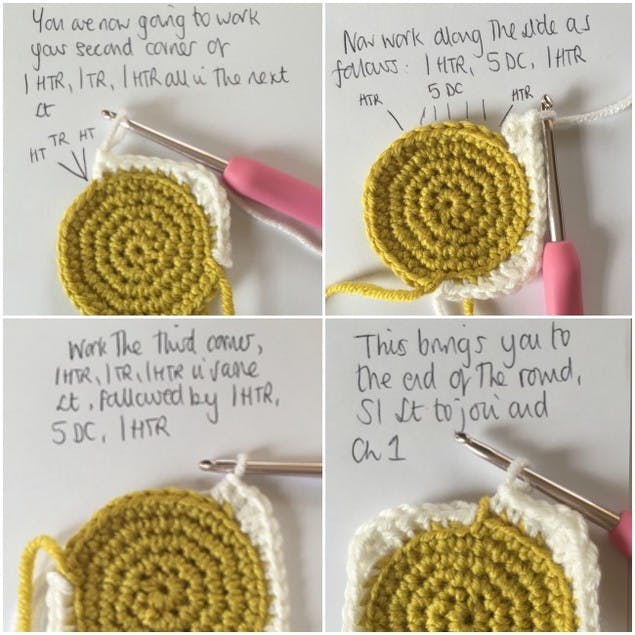
Round 1: Working in to the back loops only, join in the white yarn with a Sl St. Work 1 DC in to the same stitch and then work 2 further DC. You are now going to make your first corner:* work 1 HTR, and then in to the next stitch work 1HTR, 1TR and 1HTR. Work 1 HTR in to the next stitch.*
2
Now work 5 DC to make the next side and repeat from * to * to make your second corner.
3
Continue working around the circle so that each side has 5DC and each corner is worked as for * to *. After your 4th corner work 2 DC. This will bring you back to the beginning of the round, Sl St to join and chain 1.
4
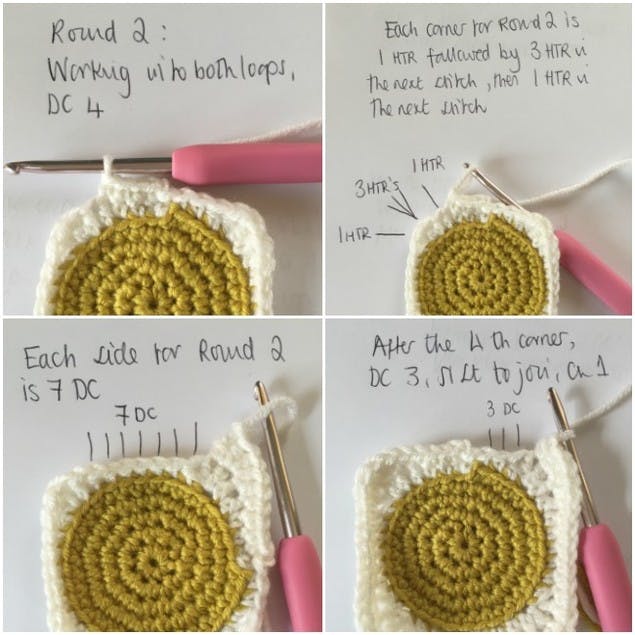
Round 2: Now working in to both loops as usual, work a DC in to the same stitch as the chain at the end of your last round and then work a further 3DC. *Work 1 HTR in the next stitch, followed by 3 HTR all in to the next stitch. Work 1 HTR.*
5
Now work along the next side with 7 DC, and repeat from * to * to make your second corner. Continue on around the square in this way working 7 DC along each side and repeating the corner 4 times.
6
After your fourth corner, work 3 DC, Sl St to join and chain 1.
7
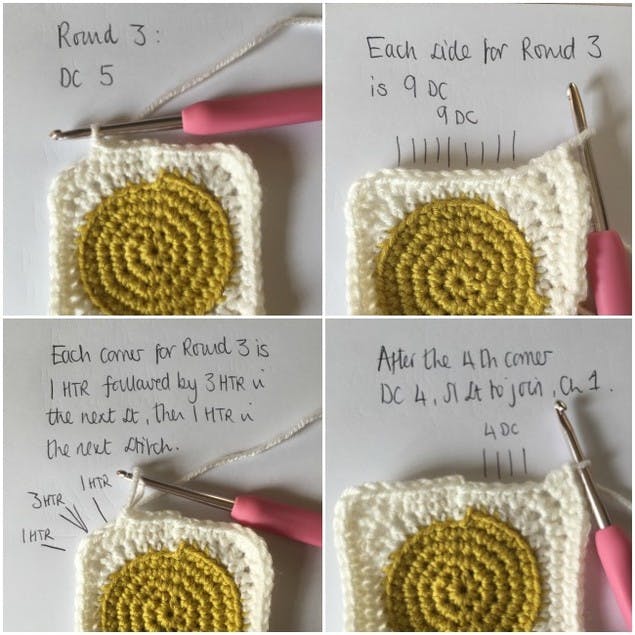
Round 3: Work a DC in to the same stitch as the chain at the end of your last round and then work a further 4DC. *Work 1 HTR in the next stitch, followed by 3 HTR all in to the next stitch. Work 1 HTR.*
8
Now work along the next side with 9 DC, and repeat from * to * to make your second corner. Continue on around the square in this way working 9 DC along each side and repeating the corner 4 times.
9
After your fourth corner, work 4 DC, Sl St to join and chain 1.
10
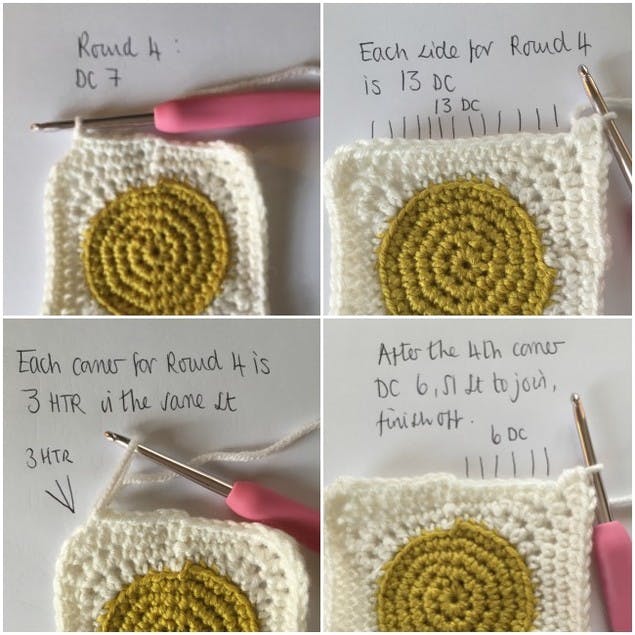
Round 4: Work a DC in to the same stitch as the chain at the end of your last round and then work a further 7DC. *Work 3 HTR all in to the next stitch.*
11
Now work along the next side with 13 DC, and repeat from * to * to make your second corner. Continue on around the square in this way working 13 DC along each side and repeating the corner 4 times.
12
After your fourth corner, work 6 DC, Sl St to join and finish off. Sew in the ends.
Joining the blanket together
Once you have completed all 63 squares lay them out onto a flat surface in the pattern that you want the finished blanket to be in. I find the best thing for pinning the squares together is safety pins as you can easily pick up the blanket and work with it without all the squares moving about.
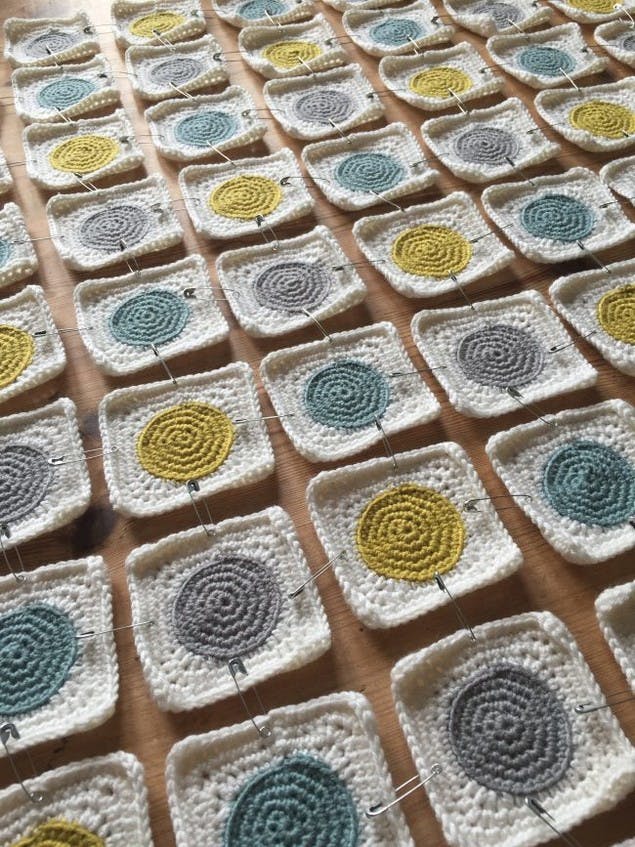
To get a neat finish to your blanket work all of your joining seams in the same direction. I started by joining all the long seams first and I joined the squares together by working in Sl St all the way along.
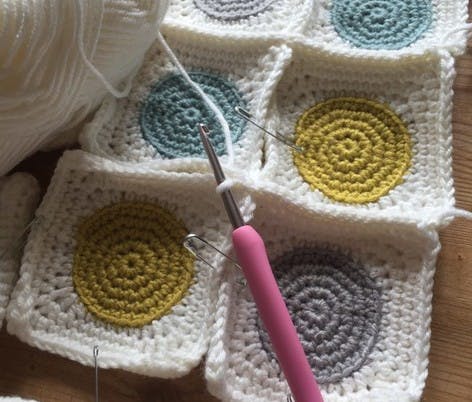
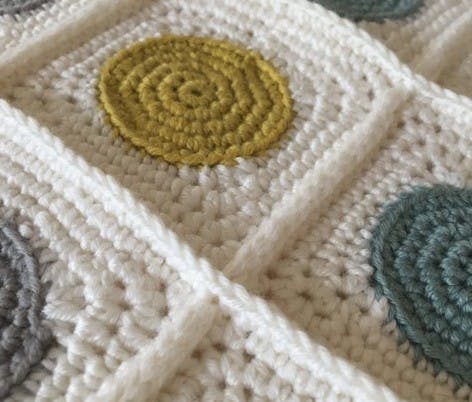
To add a little bit of extra texture I used DC to join the shorter seams.
How to add the border
1
Round 1: Work a round of DC all the way around the edge of the blanket, working 2 stitches in to two of the corner stitches as you go round, to stop the blanket losing its shape.
2
Round 2: This round is the bobble edging. With the wrong side of the blanket facing you, *yarn over and pull through to approx. TR height. Repeat the yarn over and pull up 5 more times. Yarn over and pull through all the loops on your hook.
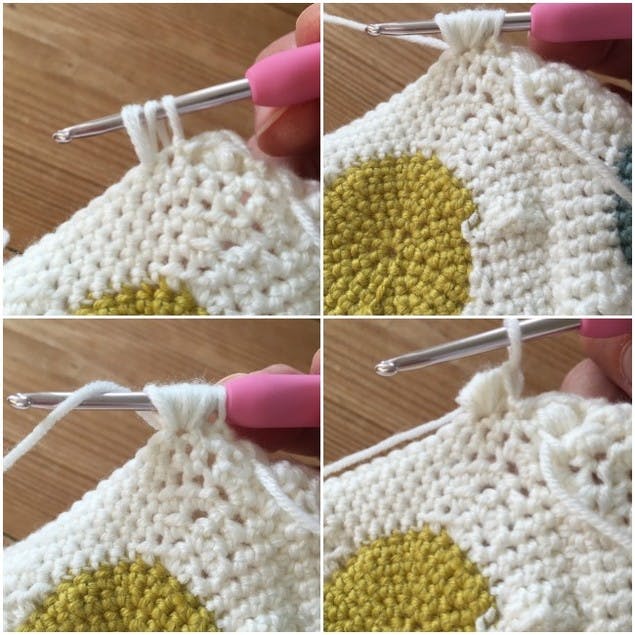
3
Work a Sl St to hold the bobble together *and Sl St in to the next stitch. Sl St in to the next stitch and then repeat from * to * in the next stitch. Work 2 Sl St after each bobble. Continue this pattern all the way around the edge of the blanket and Sl St to join at the end of the round. Finish off and sew in the ends.

To finish off your blanket make a small pom pom in each of the three colors and secure them firmly to each corner. And voila, welcome your new baby blanket into the world!
