
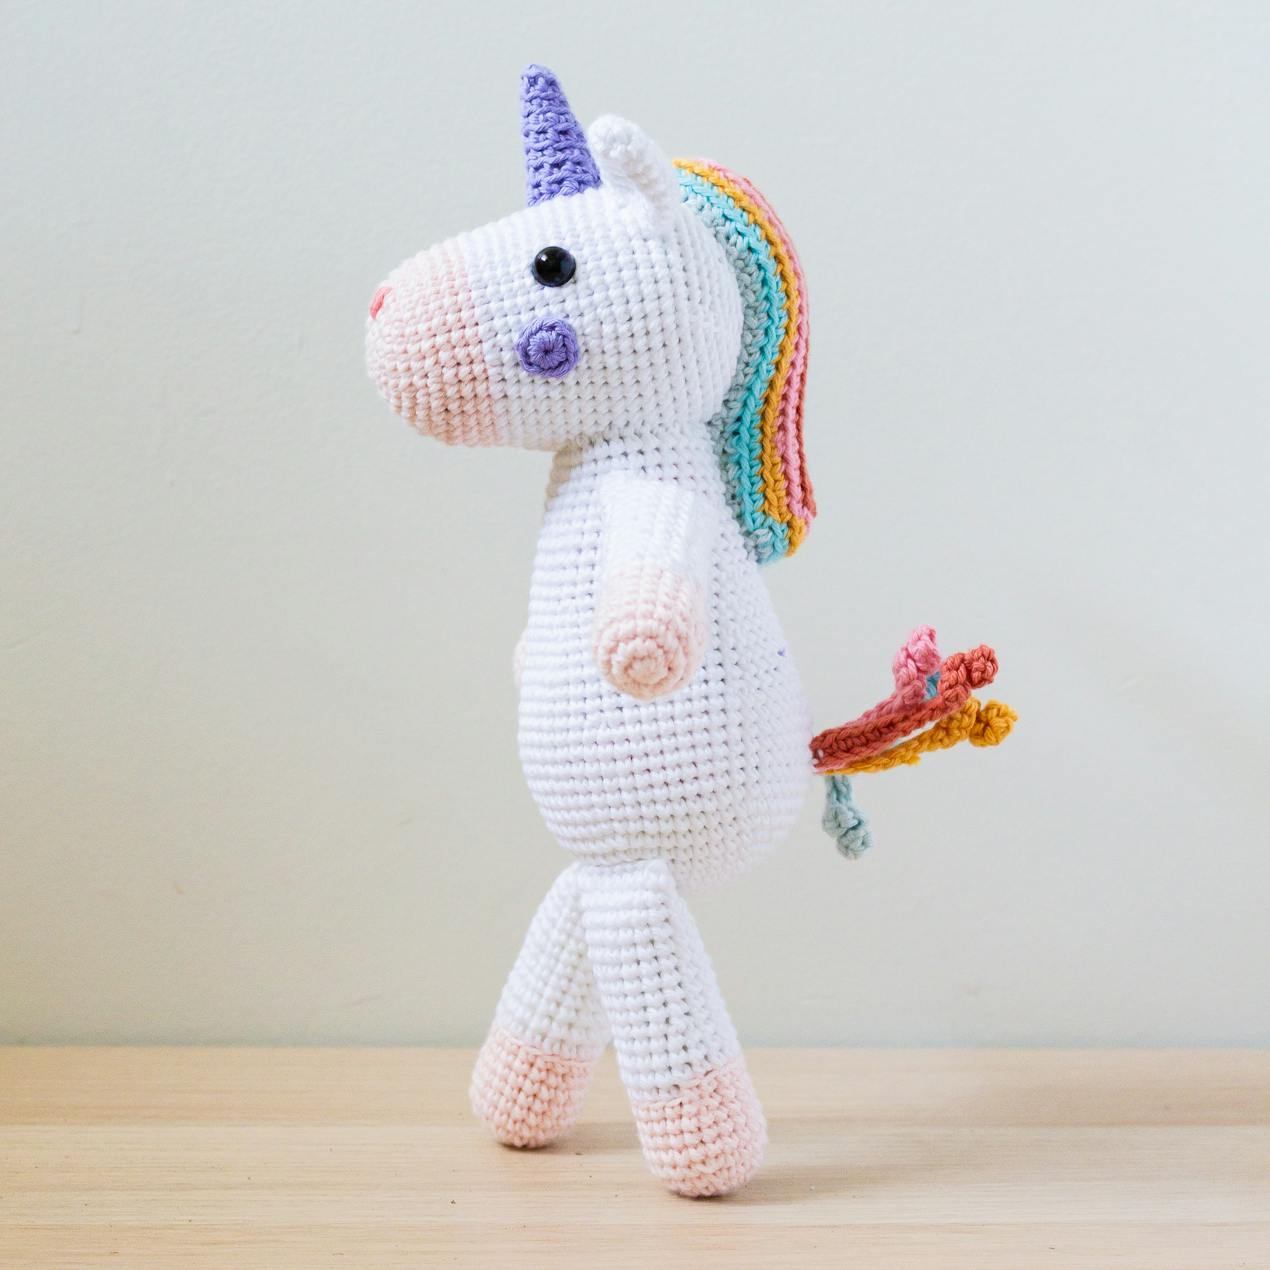
Sprinkle some unicorn magic with this cute amigurumi toy!
Published on September 8, 2026 by Yaz Joy Vigus
If you love unicorns, you'll adore Sprinkle! The most dashing amigurumi unicorn to trot this side of the rainbow. Perfect for gifting, playing and displaying for all to see, this adorable free amigurumi pattern by Rupinder Kaur is crammed with enchanting detail using the zingy shades of Paintbox Yarns Cotton DK. So what are you waiting for? Grab your hook and let's get making!

- Paintbox Yarns Cotton DK
- Body made in shades of Paper White (1 x 1.8 oz), Ballet Pink (1 x 1.8 oz).
- Following colors for mane, horn and tail in small amount (5g approx): Vintage Pink, Blush Pink, Melon Sorbet, Washed Teal, Seafoam Blue and Pale Lilac
- Hook - 2.75 mm:
- Susan Bates Silvalume Crochet Hook
- Fiber Fill:
- Fairfield Soft Touch Stuffing (8 oz.)
- 8 mm safety eyes
- Tapestry needle:
- Pony Gold Eye Sewing Needles
- Stitch marker:
- Clover Locking Stitch Markers
- Pink embroidery thread for nose:
- DMC Stranded Cotton - Neutrals
This is a great pattern for amigurumi beginners looking for a step up. This pattern will break down how to make Sprinkle step-by-step!
Measurements
The Unicorn is approximately 9.5 inches tall. The size of the toy may vary depending on the size of hook and yarn used.
This pattern uses US terminology.
Terminology
MR - magic ring ch(s) - chains Inc - increase sl st - slip stitch F/O - fasten off ( ) - repeat the steps in brackets [ ] - total no. of sts per round sc - single crochet st(s) - stitches dec - decrease BLO - back loop only
A few notes before you start making Sprinkle:
Sprinkle's body is worked from bottom to top. The head, ears, arms, tail, feet, mane and horn are made separately and then attached to the body.
This pattern is worked in continuous rounds, without joining the round with a slip stitch. Do not turn at the end of each round unless directed to.
I advise using a stitch marker to keep track of the beginning of each round. I'd recommend using invisible decrease to avoid the gap in the stitches.
Firmly stuff as you work and overstuff slightly before finishing the section you are working on. This will allow for the stuffing to fill out the shape after the crocheting is done.
How to make the head
Using the Ballet Pink yarn:
Round 1: 6 sc in MR [6]

Round 2: (inc) x 6 [12]

Round 3: (sc, inc) x 6 [18] Round 4: (2 sc, inc) x 6 [24]

Round 5: (3 sc, inc) x 6 [30] Round 6: sc in each st around [30]

Round 7: (5 sc, inc) x 5 [35] Round 8-10: sc in each st around [35]

Change to color Paper White.
Round 11: (6 sc, inc) x 5 [40]

Round 12-13: sc in each st around [40]

Round 14: (7 sc, inc) x 5 [45] Round 15-17: sc in each st around [45] Round 18: (8 sc, inc) x 5 [50] Round 19-24: sc in each st around [50]

Use a pencil to mark where the safety eyes will be placed. Counting up from the center of the magic ring, eyes are placed between rounds 16 and 17, 16 sts apart.

Round 25: (8 sc, dec) x 5 [45] Round 26: (7 sc, dec) x 5 [40] Round 27: (6 sc, dec) x 5 [35] Round 28: (5 sc, dec) x 5 [30]
Start stuffing the head with Fiber Fill as you work along.

Round 29: (3 sc, dec) x 6 [24] Round 30: (2 sc, dec) x 6 [18] Round 31: (dec) x 9 [9]
Fill the head with Fiber Fill firmly. F/O and thread tail end of yarn onto a tapestry needle, insert the needle in and out of the front loops of the remaining sts, pull tight to close and weave in the end.


How to make the body
Using the Paper White yarn:
Round 1: 6 sc in MR [6] Round 2: (inc) x 6 [12] Round 3: (sc, inc) x 6 [18]

Round 4: (2 sc, inc) x 6 [24] Round 5: (3 sc, inc) x 6 [30] Round 6: (4 sc, inc) x 6 [36]

Round 7: (5 sc, inc) x 6 [42] Round 8: (6 sc, inc) x 6 [48] Round 9: (7 sc, inc) x 6 [54]

Round 10-16: sc in each st around [54] Round 17: (7 sc, dec) x 6 [48] Round 18-20: sc in each st around [48] Round 21: (10 sc, dec) x 4 [44] Round 22: sc in each st around [44] Round 23: (9 sc, dec) x 4 [40] Round 24: sc in each st around [40] Round 25: (8 sc, dec) x 4 [36]

Round 26-29: sc in each st around [36] Round 30: (4 sc, dec) x 6 [30] Round 31-35: sc in each st around [30] Sl st into next st and F/O leaving a very long tail for sewing. Firmly stuff the body with Fiber Fill.

How to make the arms (x 2)
Using the Ballet Pink yarn:
Round 1: 6 sc in MR [6] Round 2: (inc) x 6 [12] Round 3: (sc, inc) x 6 [18] Round 4-6: sc in each st around [18] Round 7: (4 sc, dec) x 6 [15] Round 8: sc in each st around [15]

Change to color Paper White:
Round 9: sc in each st around through BLO [15] Round 10-20: sc in each st around [15]

Stuff the arm with Fiber Fill.

Flatten the top of the arm in half and sc in next 7 sts through both sides. F/O leaving a tail for sewing.


How to make the legs (x 2)
Using the Ballet Pink yarn:
Round 1: 6 sc in MR [6] Round 2: (inc) x 6 [12] Round 3: (sc, inc) x 6 [18] Round 4: (5 sc, inc) x 6 [21] Round 5-7: sc in each st around [21] Round 8:(5sc,dec) x3 [18] Round 9: sc in each st around [18]

Change to color Paper White.
Round 10: sc in each st around through BLO [18] Round 11-12: sc in each st around [18] Round 13: (7 sc, dec) x 2 [16] Round 14-22: sc in each st around [16]

Stuff the leg with Fiber Fill firmly.

Flatten the top of the leg together, and sc in next 8 sts through both sides. F/O leaving a tail for sewing.


How to make the ears (x 2)
Using the Paper White yarn.
Round 1: 6 sc in MR [6] Round 2: (sc, inc) x 3 [9] Round 3: sc in each st around [9] Round 4: (2 sc, inc) x 3 [12] Round 5: (3 sc, inc) x 3 [15] Round 6-8: sc in each st around [15] Round 9: (3 sc, dec) x 3 [12] Round 10: (2 sc, dec) x 3 [9]
Sl St into the next stitch and F/O leaving a tail for sewing. Don't stuff the ears!

How to make the mane
Using Vintage Pink yarn, ch 23.
Beginning from the 2nd ch from the hook.
Round 1: inc, sc in next 20 chs, 3 sc in last ch.

Working on the other side of the foundation ch, sc in next 20 chs, sc in last ch where you started from [46].

Change to color Blush Pink and work through BLO.
Round 2: 3 sc in next st, sc in next 22 sts, 3 sc in next st, sc in next 22 sts [50]

Change to color Melon Sorbet and work through BLO.
Round 3: 1 sc, 3 sc in next st, sc in next 24 sts, 3 sc in next st, sc in next 23 sts [54]

Change to color Washed Teal and work through BLO.
Round 4: sc in each st around [54]

Change to color Seafoam Blue and work through BLO. Round 5: sc in each st around [54]
Sl st into the next st and F/O leaving a very long tail for sewing.

How to make the horn
Using the Pale Lilac yarn, working through BLO.
Round 1: 6 sc in MR [6] Round 2: sc in each st around [6] Round 3: inc, 5 sc around [7] Round 4: inc, 6 sc around [8] Round 5: inc, 7 sc around [9] Round 6: sc in each st around [9] Round 7: inc, 8 sc around [10] Round 8: sc in each st around [10]
Sl st into the next st and F/O leaving a tail for sewing.

How to make the cheeks (x 2)
Using the pale lilac yarn: Round 1: 9 sc in MR [9]
Sl st into the next st and F/O leaving a tail for sewing.

How to make the unicorn tail (x 5)
Using the same colors as mane, ch 15, beginning from the 2nd ch from hook.

Round 1: inc in next 7 chs, sc in next 7 chs [20]

F/O and weave in the end. Using the white yarn, join the tail pieces together prior to sewing.


How to assemble Sprinkle
Position the head on the body using bobbin pins and sew it neatly. Put some Fiber Fill inside the neck before you finish sewing if needed.

Gently stuff the mane with Fiber Fill.

Position the mane in the back centre of the head beginning at round 22 and towards the back of the body.

Sew the mane to the body using a whip stitch.

Sew the ears to the head on each side of the mane.
Sew the arms on the sides of the body using the head as the centre point.
Legs are sewn flat to the underside of the body, 4 sts apart.

Sew the horn to the forehead on rounds 16 to 20.

Sew the furry tail ends to the bottom of the body.

Sew the cheeks on each side of the head and embroider nostrils using Blush Pink yarn.



Yaz Joy Vigus is a Copywriter at LoveCrafts. She loves creating inspiration pages, roundups and content for the LoveCrafts community. She’s experienced first-hand how crafting can help practice mindfulness and wellbeing. One of her fave ways to unwind is curling up with her latest crochet project and a good movie!


