
Learn how to make a hexagon quilt with our tutorial
Published on September 8, 2026
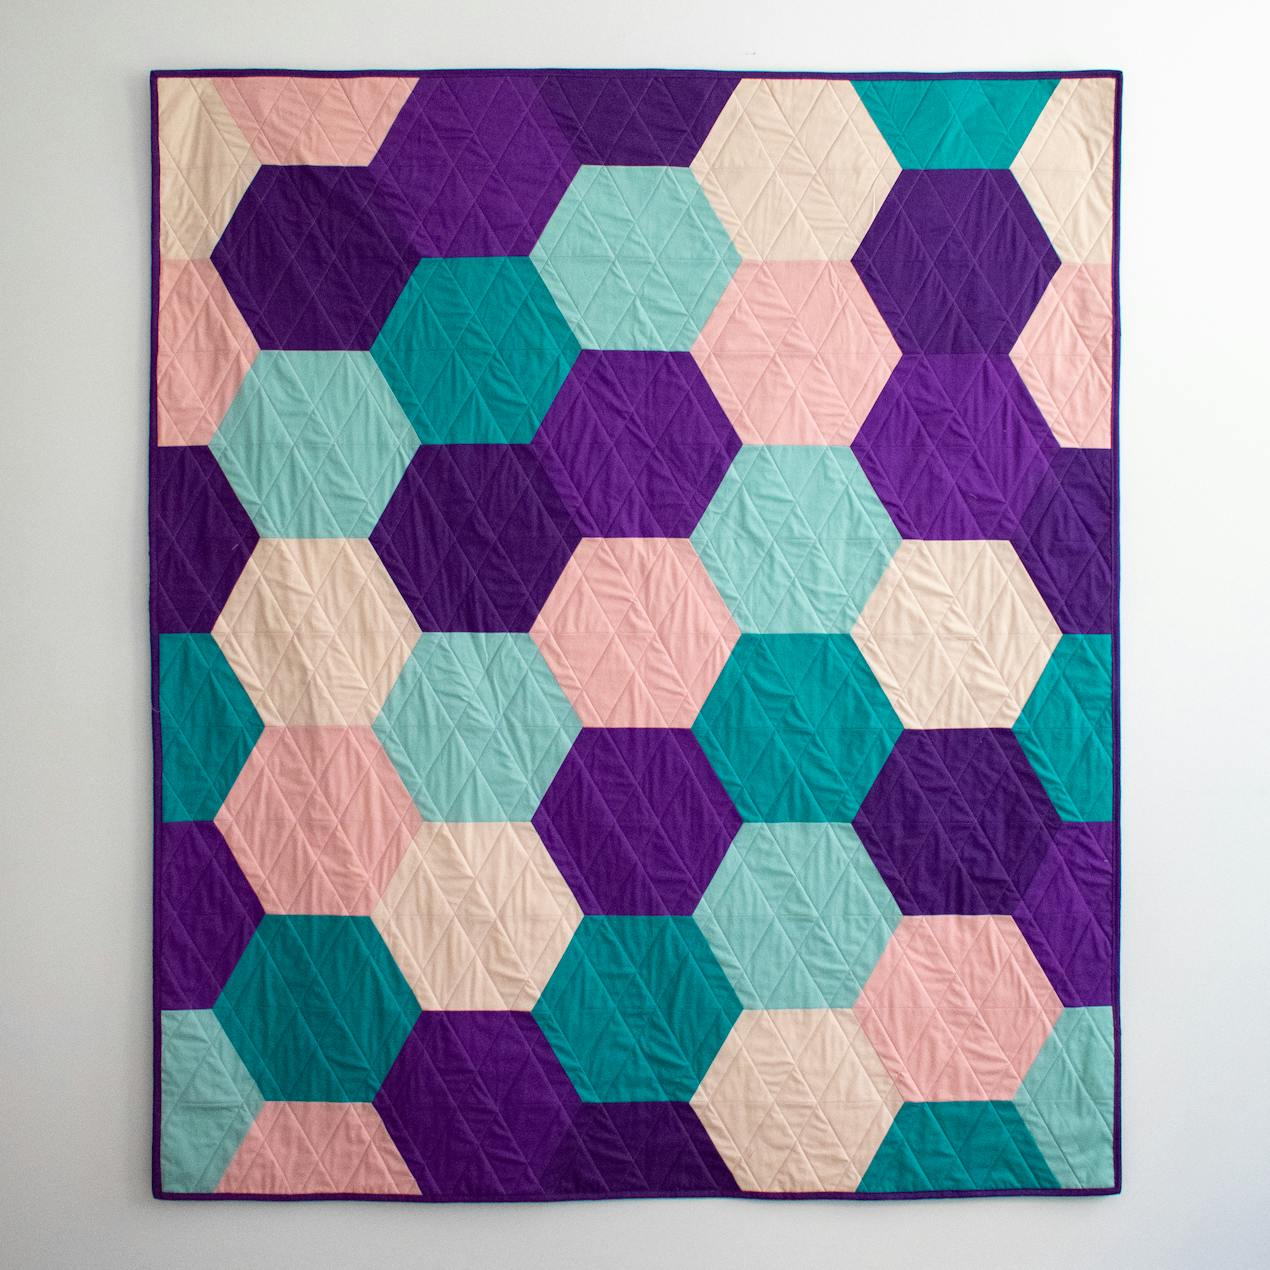
Shake up your patchwork projects and learn how to quilt a hexagon patchwork quilt! With this hexagon quilt pattern by Amanda at Broadcloth Studio, we’re going to get down to the basics and assemble our hexagons by sewing together two trapezoids. Follow along to create a modern hexagon quilt!
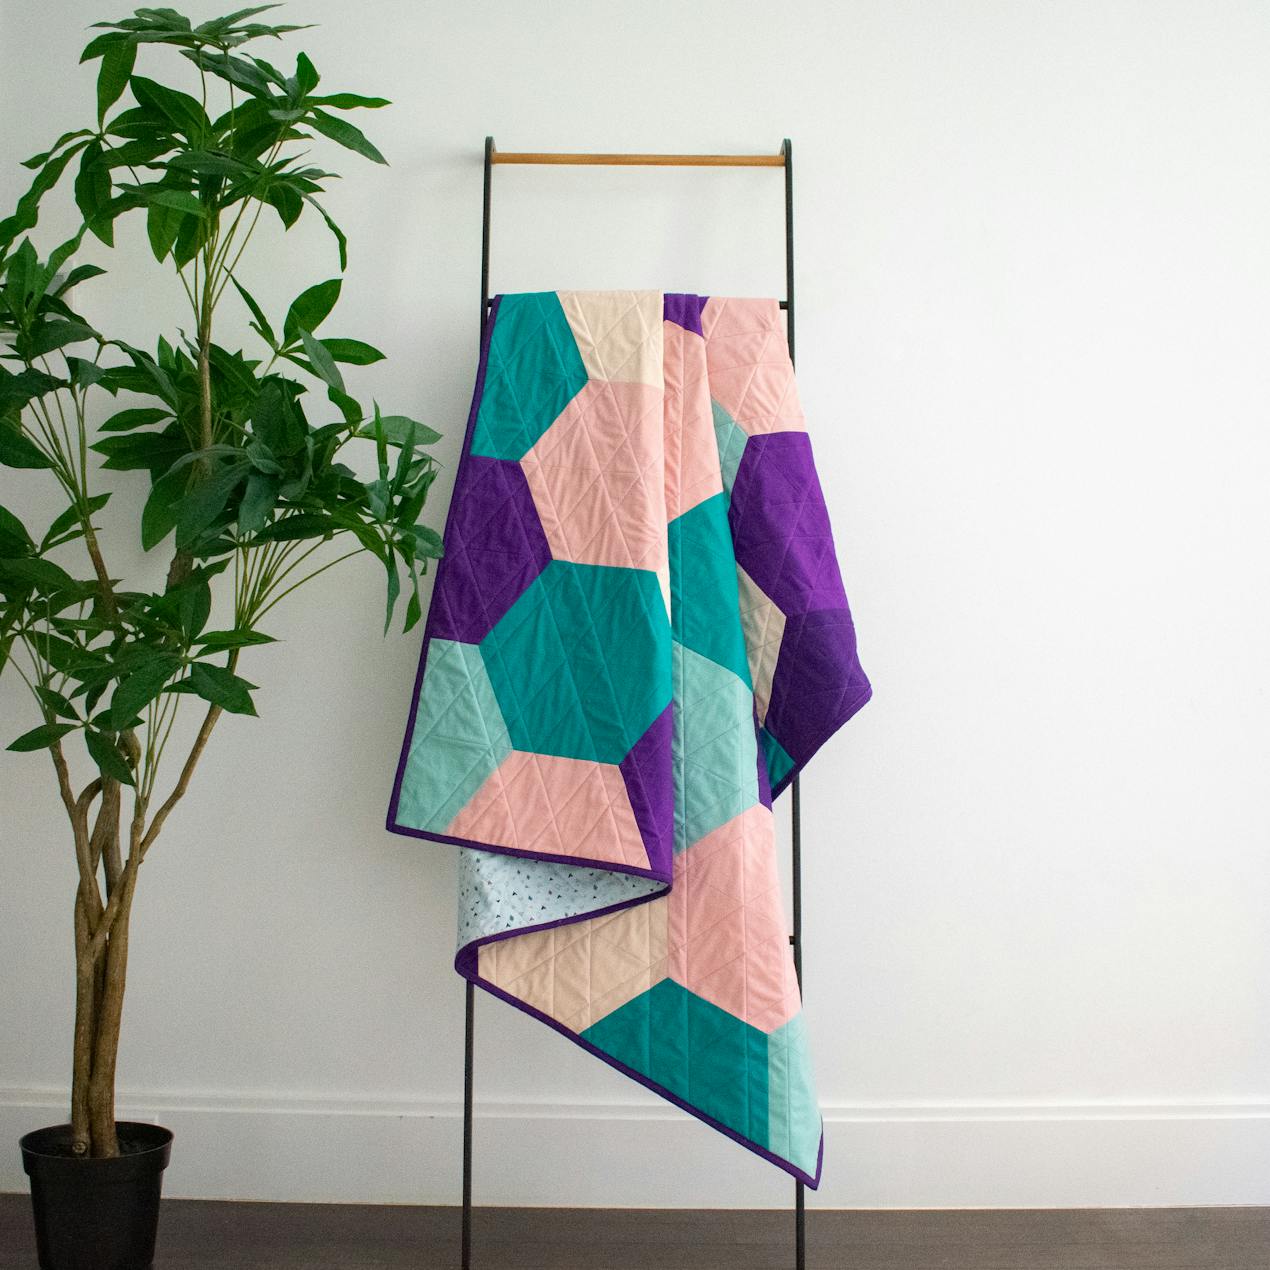

Whether you're having a picnic in the warm summer sunshine, or cosying up on the sofa with a hot chocolate in the cooler months, quilts are an essential homeware accessory! This hexagon quilt tutorial is the perfect project to get you excited about quilting, forget your grandma's dated moth-eaten quilt and reimagine it with a contemporary twist! Switch out the colours and play with patterns while creating your very own hexagon quilt.
Finished Size: 54” x 63”
Width of Fabric (WOF): assumed to be 42”
Seam Allowance: all cutting instructions factor in a ¼" seam allowance.
- Quilting ruler with a 60-degree guide
- Hexagon fabrics: (6) ¾ yds
- Michael Miller Fabrics Cotton Couture
- Binding fabric: ½ yd
- Michael Miller Fabrics Cotton Couture
- Backing: 4 yds
- Batting: enough to cover 62” x 71” (this gives you 4” overhang)
Cutting your fabric
From each of your hexagon fabrics cut: (4) 5¾” x WOF strips.
From your binding fabric cut: (7) 2½” x WOF strips and set aside.
Cutting the trapezoids
Follow the diagrams and instructions to cut the following from each of your hexagon fabrics:
(10) Half Trapezoids
(2) Quarter Trapezoid A
(2) Quarter Trapezoid B

Cutting trapezoids isn’t hard, but it does require a little bit of extra focus!
When cutting, you’re going to line up the edge of your ruler with your mark, then align your 60-degree guideline with the top or bottom long edge of the strip before cutting.
Each quilting ruler is going to have different guide lines, some will have them in both directions, some might only have them in one. Sometimes, to get the line you want you just have to spin the ruler around or flip the ruler upside down!
Use the diagrams as a guide and don’t get frustrated if you have to try spinning and re-spinning your ruler to get the correct shape, it’s all part of the process. And if you make a mistake, don’t worry! The fourth WOF strip provides extra fabric in case you need to recut!

From your first and second 5¾” x WOF strips, cut (1) Quarter Trapezoid A, (3) Half Trapezoids, and (1) Quarter Trapezoid B (from each WOF strip). Follow the diagram to cut the necessary shapes.

Trim off your selvage for a clean edge. Mark 6¾” from the left corner along the bottom edge of the strip.
Following the diagram, line up your 60-degree guide on your ruler with the edge of your strip (depending on your ruler, this could be the top or bottom edge) and the mark. Cut.
Mark 13” from the leftmost corner along the top edge of your strip. Line up your ruler so the 60-degree guide lines up with the edge of your strip and the ruler edge lines up with the mark. Cut.
Mark 13” from the leftmost corner along the bottom edge of your strip. Line up your ruler so the 60-degree guide lines up with the edge of your strip and the ruler edge lines up with the mark. Cut.
Mark 13” from the leftmost corner along the top edge of your strip. Line up your ruler so the 60-degree guide lines up with the edge of your strip and the ruler edge lines up with the mark. Cut.
Mark 6 ¾” from the left corner along the bottom edge of the strip. Following the diagram, line up your ruler with the mark and make a 90-degree cut.
Repeat steps 4-8 with your second strip.
From your third 5¾” x WOF strip, cut (3) half trapezoids. Follow the diagram to cut the necessary trapezoids.

Line up your 60-degree guide on your ruler with the top or bottom edge of your strip (depending on your ruler) at a point just beyond the selvage as illustrated in the diagram above. Cut.
Mark 13” from the leftmost corner along the bottom edge of your strip. Line up your ruler so the 60-degree guide lines up with the edge of your strip and the ruler edge lines up with the mark. Cut.
Mark 13” from the leftmost corner along the top edge of your strip. Line up your ruler so the 60-degree guide lines up with the edge of your strip and the ruler edge lines up with the mark. Cut.
Mark 13” from the leftmost corner along the bottom edge of your strip. Line up your ruler so the 60-degree guide lines up with the edge of your strip and the ruler edge lines up with the mark. Cut.
From your fourth 5¾” x WOF strip, cut (1) Half Trapezoid. Follow the diagram to cut the necessary shapes.

Line up your 60-degree guide on your ruler with the top or bottom edge of your strip (depending on your ruler) at a point just beyond the selvage as illustrated in the diagram above. Cut.
Mark 13” from the leftmost corner along the bottom edge of your strip. Line up your ruler so the 60-degree guide lines up with the edge of your strip and the ruler edge lines up with the mark. Cut.
Repeat with your five remaining hexagon fabrics.
A note on sewing at a 60 degree angle
Before we dive into assembling our rows, a quick note about sewing 60-degree angles. The thing to remember is that the corners won’t line up as they would with 90-degree or 45-degree angles (think squares, rectangles, and half square triangles etc.). To make up for this missing “built in” guideline, mark a ¼” from the corner of the 60-degree angle (the pointier one) along the angled edge of your pieces (not what was the top or bottom of the original WOF strip).
Use these guides to line up the pieces so that the corners overhang by a ¼” on either end. This way, when the seams are sewn and pressed, the bottom and top edges of the pieces will line up perfectly!

How to assemble your rows
Assign each fabric a letter, A through F. Assemble each of your rows following the layout guide.
When pressing, I like to press the seams on all my odd rows to the left and my even rows to the right. This makes it easy to line up the edges of the hexagons when I sew the rows together, but isn’t necessary, press as you like!

To assemble your quilt top you need to sew your rows together.
Use lots of pins to make sure the edges of the half hexagons line up nicely (if you’ve pressed all your even rows one way and odd rows the other way, the edges of the half hexagons should “notch” into place).
Assemble and trim the backing fabric to size.
The quickest way to do this is to cut your 4 yds. of backing fabric into two 2 yd. pieces. On each piece, trim off one of the selvages (I make a small cut right past the selvage and rip it off: it’s super speedy, easy, and with a quick iron to flatten any wobbly edges, a straight edge!).
Sew the two pieces together with a ½” seam allowance along the trimmed edges. Iron the seam to one side and trim down to size. I like to lay down by batting and quilt top first before trimming: this way, I leave enough overhang without having to overthink it (I like 4” all around).
Place your backing wrong side up on a hard flat surface. Lay the batting on top and trim down as needed to the size of the backing. Centre the quilt top right side up on top of the batting.
Baste using your preferred method and quilt as desired. Square up the quilt, trimming the excess batting and backing.
Make the binding tape by joining the strips right sides together on the diagonal. Fold the tape in half lengthwise with wrong sides together and iron flat.
Line the raw edges of the binding tape to the front edge of the quilt and sew together. Fold the tape over to the back and either whipstitch the binding by hand or machine stitch to attach it.
Step back and admire your awesome new quilt!



15 free Christmas crochet patterns to make this year
15 free Christmas crochet patterns to download today: ornaments, wreaths, amigurumi toy...
Continue reading 15 free Christmas crochet patterns to make this yearHow to knit a hat: two methods, one evening
Learn to knit a hat from scratch — flat on straight needles or in the round. Cast-on nu...
Continue reading How to knit a hat: two methods, one evening


