Crochet these fabulous star mittens
Published on October 15, 2019 2 min read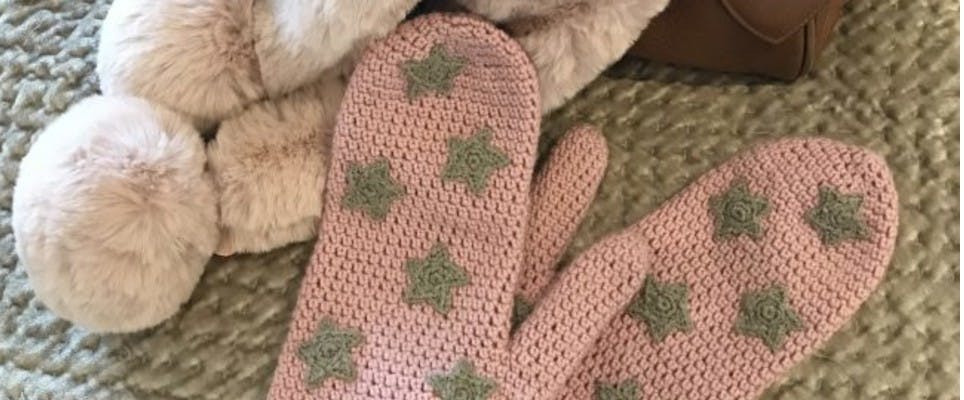
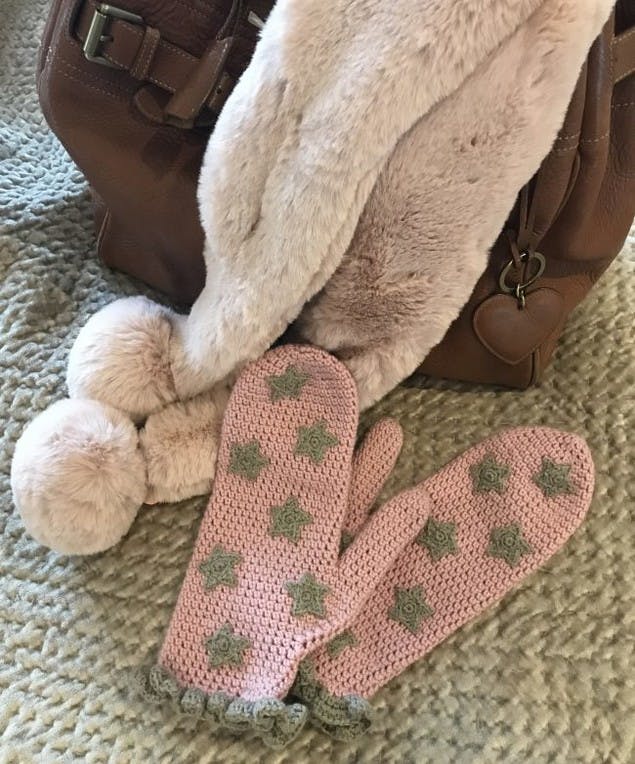
These cozy crochet mittens will put stars in your eyes! Made in scrummy Rose and Truffle shades, Kate Eastwood's fabulous star mittens are ideal for keeping hands toasty in the frosty weather. They also make magical Christmas gifts. The best bit? You can whip up these little beauties in a weekend!
The finished mitten measures approximately 9.4" / 24cm from the bottom of the cuff to the top of the mitten, approx. 4.3" / 11cm at the widest part of the hand ( under the thumb) and the thumb measures approx. 3" / 7.5cm.
For my mittens I used Willow & Lark Ramble: 2 x balls of Rose and 1 ball of Bark.
For the main part of the mittens I worked with a 3.5mm hook and for the stars I worked with a 2mm hook.
Just a heads up, this tutorial is written in US crochet terminology, but you can pop over into our Crochet Conversion Tables. Worked in a continuous round, you may find it handy to have a stitch marker for marking the end/beginning of each round.
These cozy mittens are worked in extended single crochet (ESC), which is extended double crochet in British terms, an creates a slightly longer stitch than a SC but a slightly more solid stitch than a DC. If you've never tried your hand at the ESC, I'll show you in the steps to follow.
Before starting, you'll need a few essential tools and supplies.
Materials
- Willow & Lark Ramble
- KnitPro Waves Crochet Hook
- Pony Safety Stitch Markers Assorted
- KnitPro Tapestry Needle Set
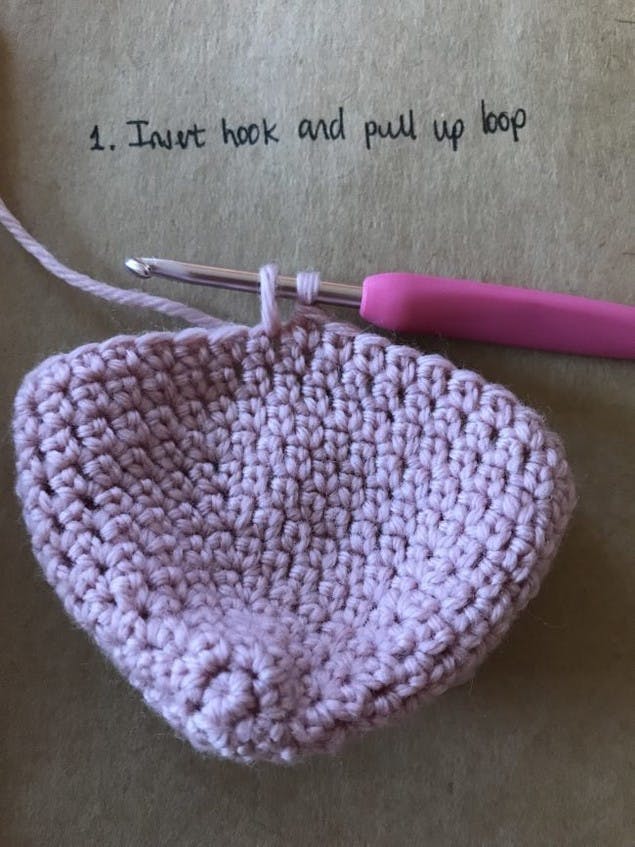
How to work an ESC
1
Insert your hook in to the stitch and pull up a loop.
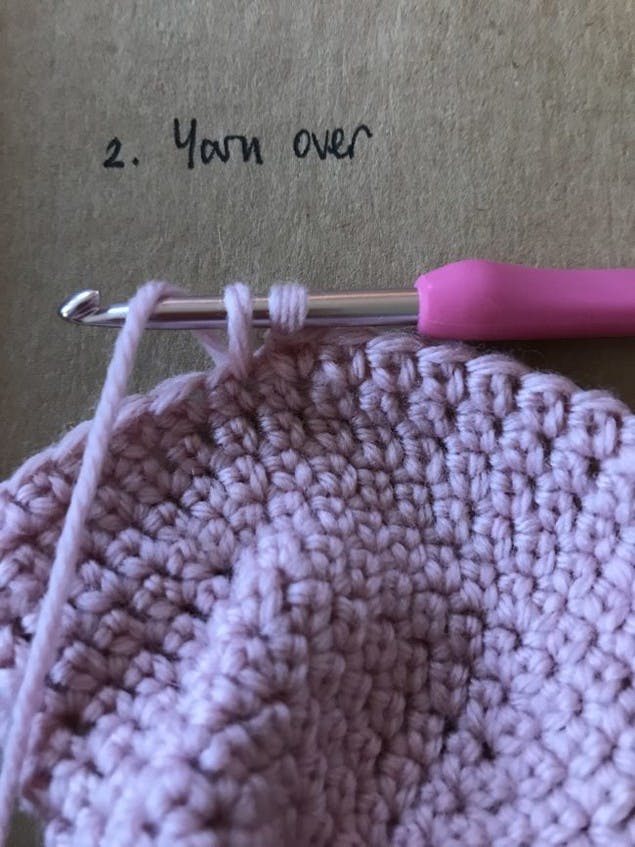
2
Yarn over.
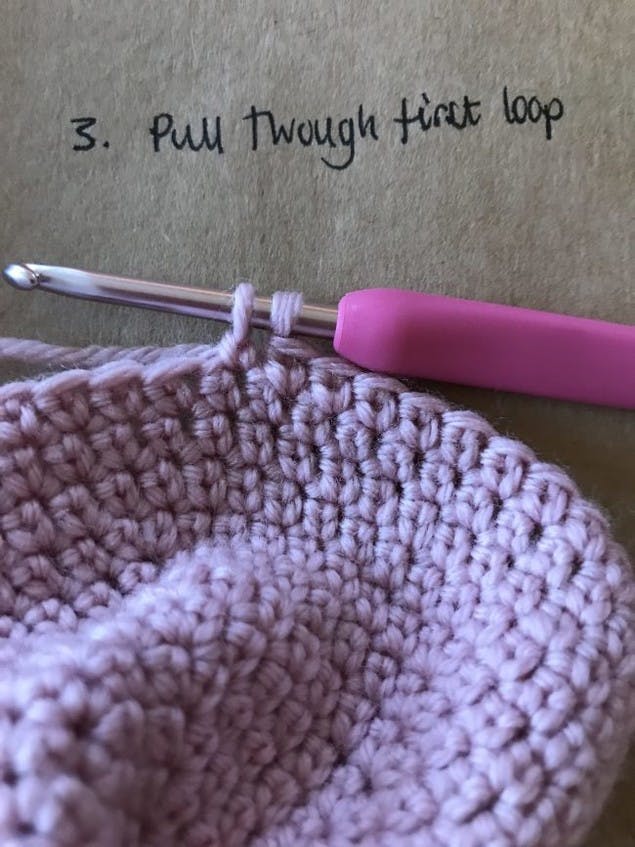
3
Pull through the first loop.
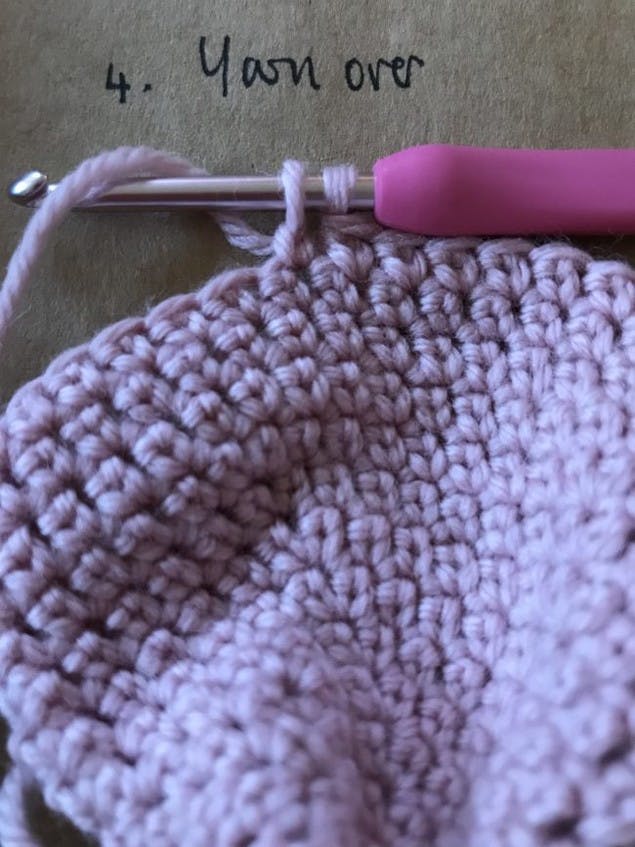
4
Yarn over.
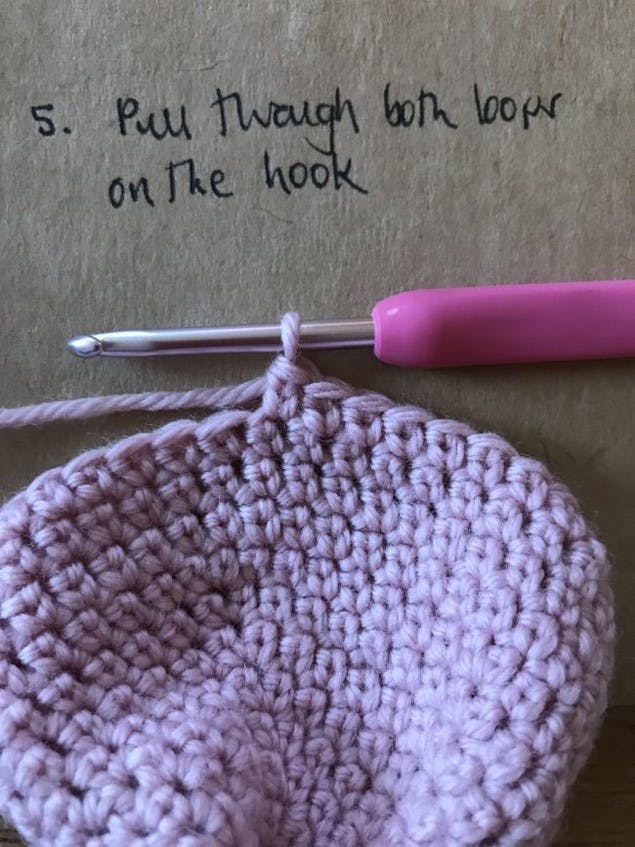
5
Pull through both loops on the hook.
Now that you've mastered the extended single crochet aka ESC, now on to the mittens!
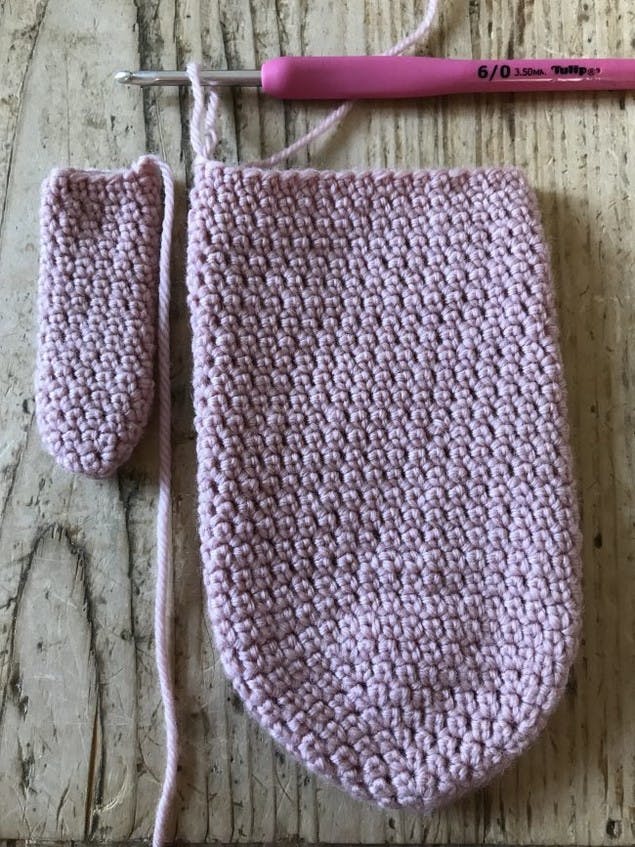
How to make your first mitten
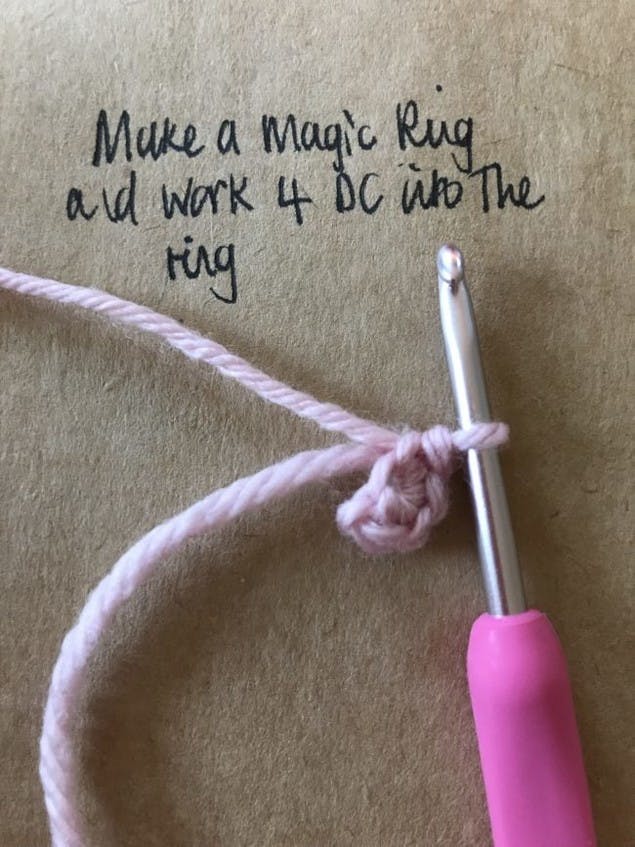
1
Round 1: Make a Magic Ring and work 6 SC in to the ring.
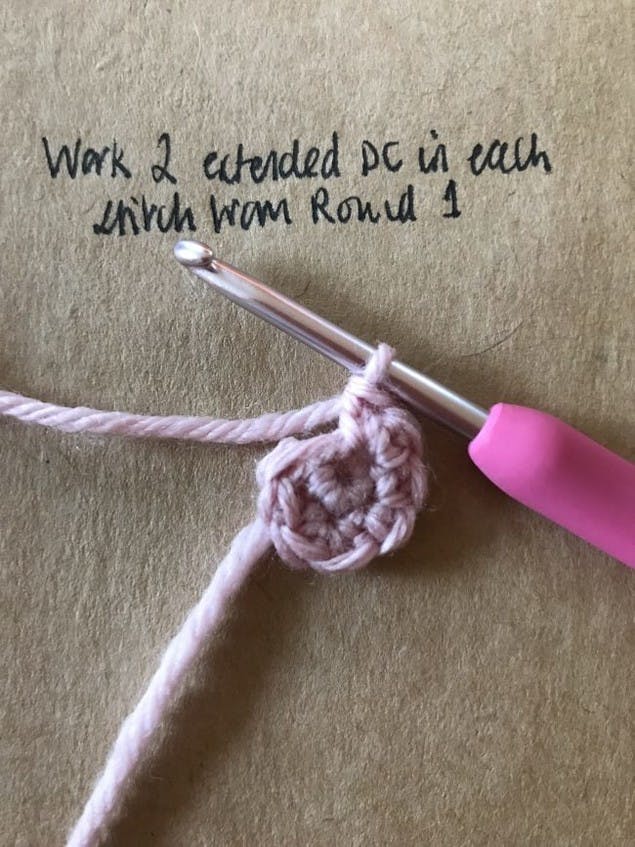
2
Round 2: Work 2 ESC in to each stitch from Round 1, 12sts.
3
Round 3: *Work 1 ESC in to the next stitch, followed by 2 ESC in to the next stitch.* Repeat all the way around , 18 sts.
4
Round 4: *Work 1 ESC in to each of the next two stitches, followed by 2 ESC in to the next stitch.* Repeat all the way around , 24 sts.
5
Round 5: *Work 1 ESC in to each of the next three stitches, followed by 2 ESC in to the next stitch.* Repeat all the way around , 30 sts.
6
Round 6: *Work 1 ESC in to each of the next four stitches, followed by 2 ESC in to the next stitch.* Repeat all the way around , 36 sts.
Continue working rounds of 36 ESC until your work measures 14.5cm. Do not finish off.
Next up we'll make the thumb part of your mitten.
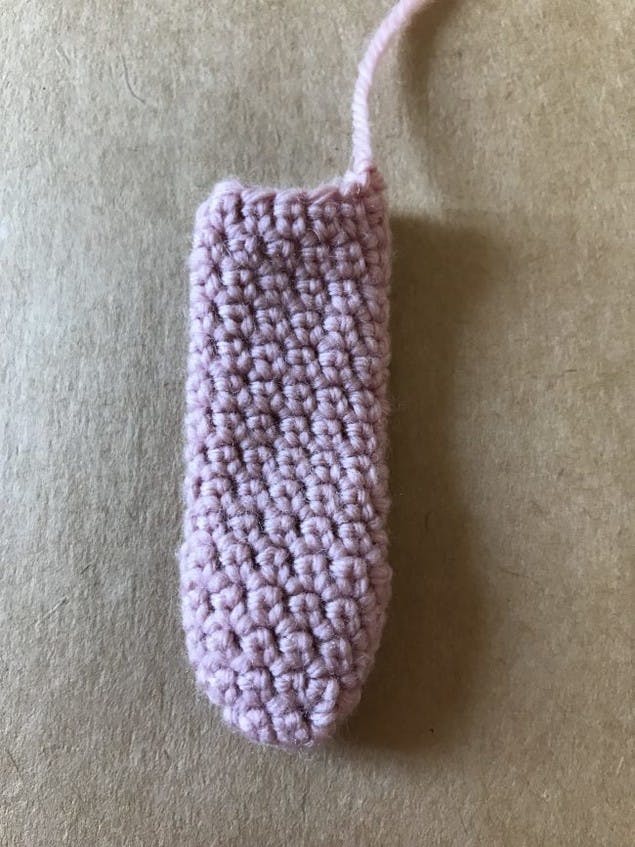
To make the thumb
1
Round 1: Make a Magic Ring and work 4 SC in to the ring.
2
Round 2: Work 2 ESC in to each stitch from Round 1, 8sts.
3
Round 3: *Work 1 ESC in to the next stitch, followed by 2 ESC in to the next stitch.* Repeat all the way around, 12 sts.
Continue working rounds of 12 ESC until your work measures 7.5cm. Sl St to finish.
When you've crocheted your thumb and main parts of your mitten then it's time to join them together. We'll guide you through step-by-step.
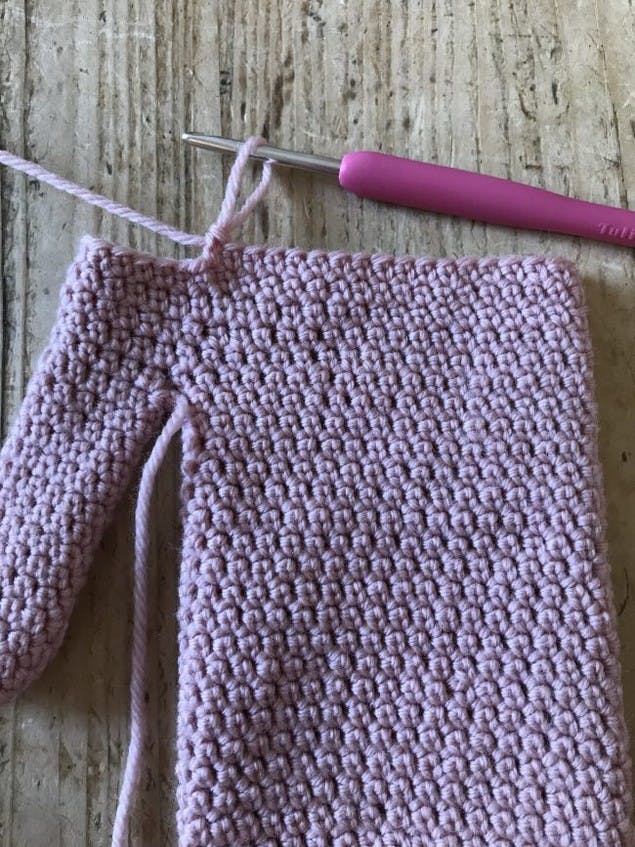
To join the hand and the thumb together
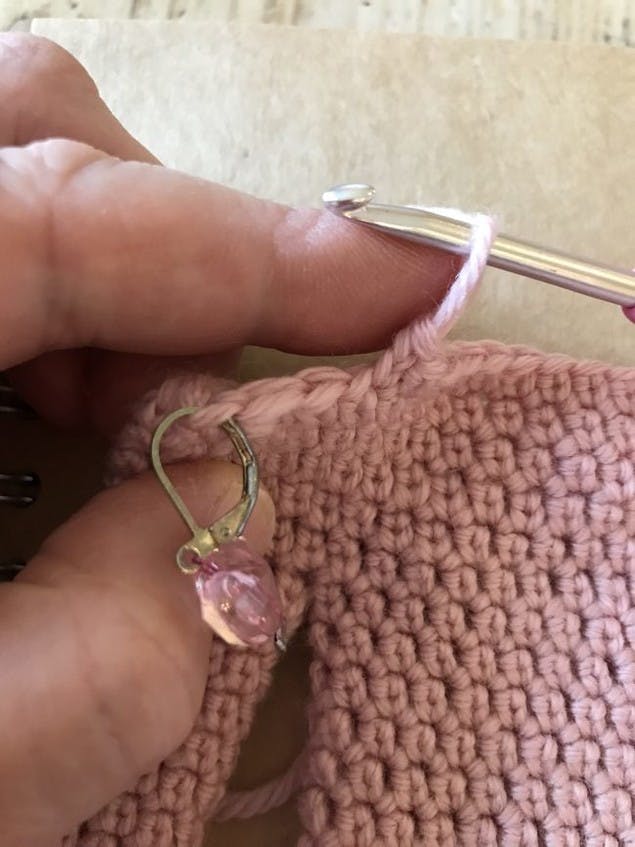
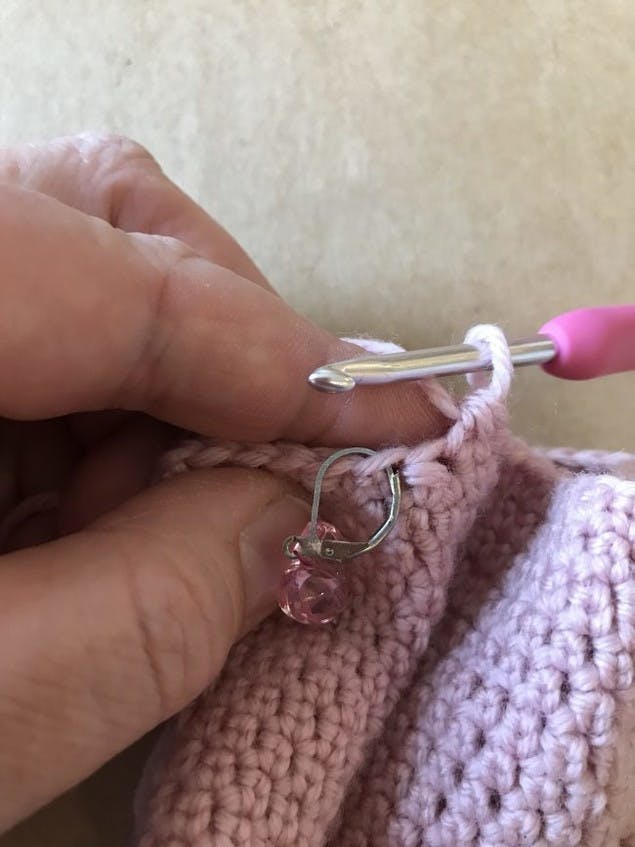
1
Bring your pieces together ready to attach. Lay the hand piece on to a flat surface, making sure that the hand is folded flat with your last stitch being at the left hand edge. Mark this stitch with a stitch marker.

2
Lay the thumb piece next to it, again folded flat, with the finishing off yarn being at the right hand edge.
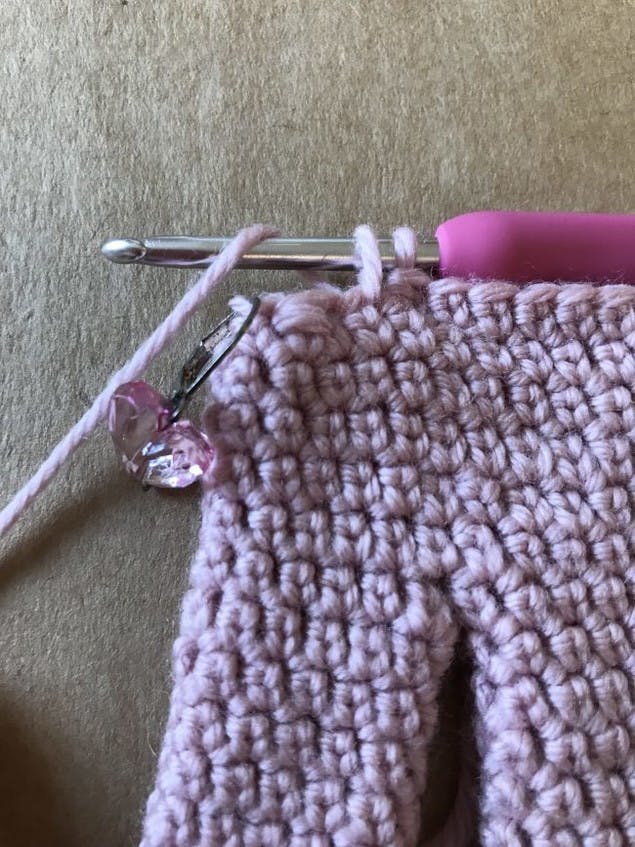
1
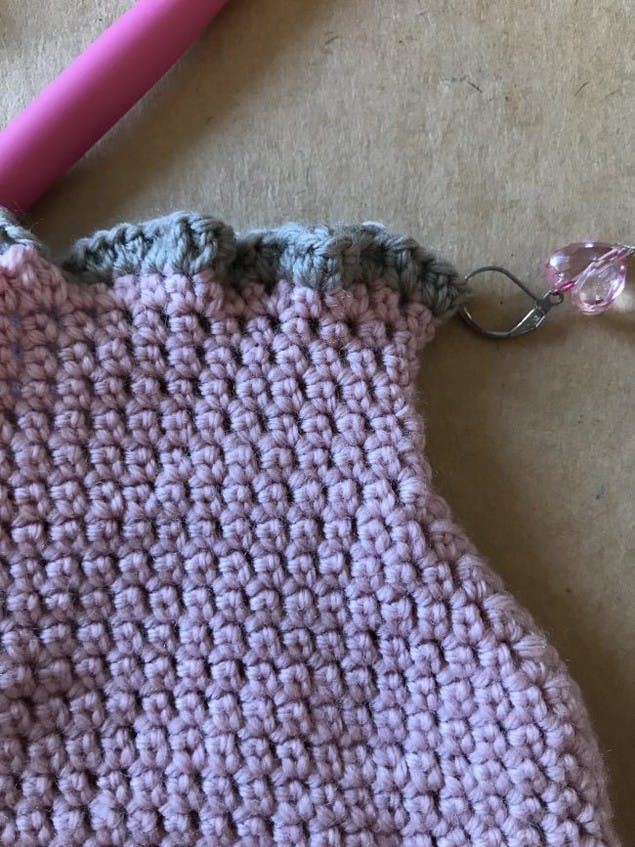
Joining. Join the two pieces together by working 12 ESC around the thumb and then 36 ESC around the hand. Mark the end of the round with the stitch marker.
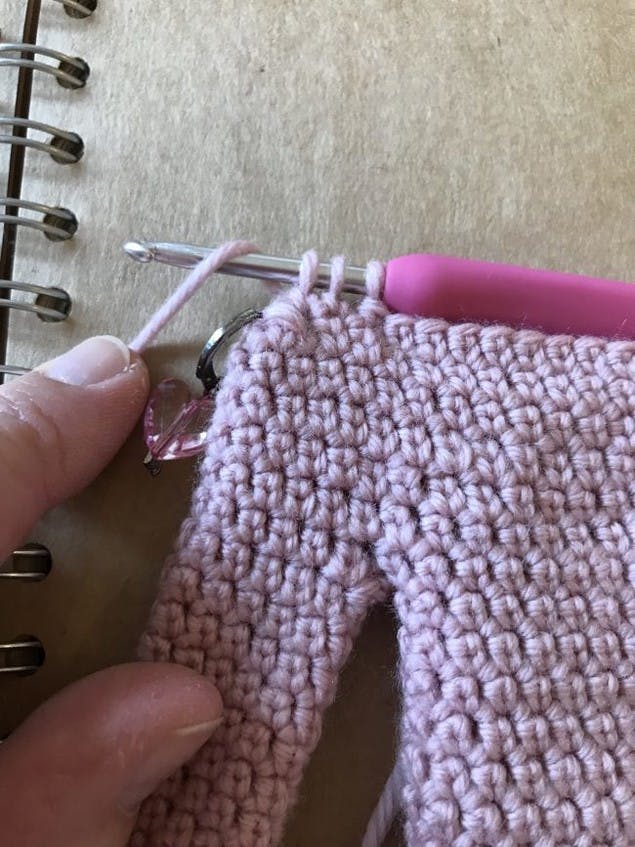
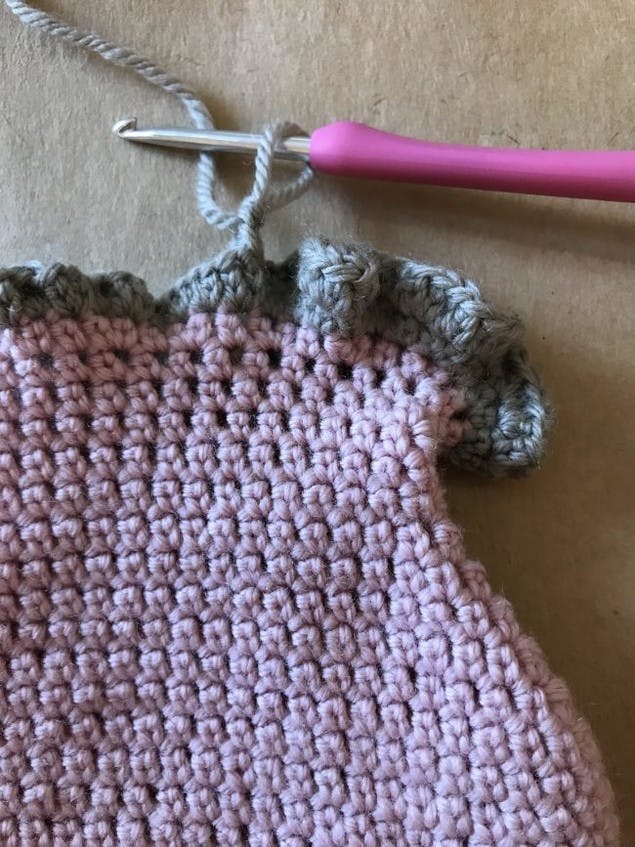
4
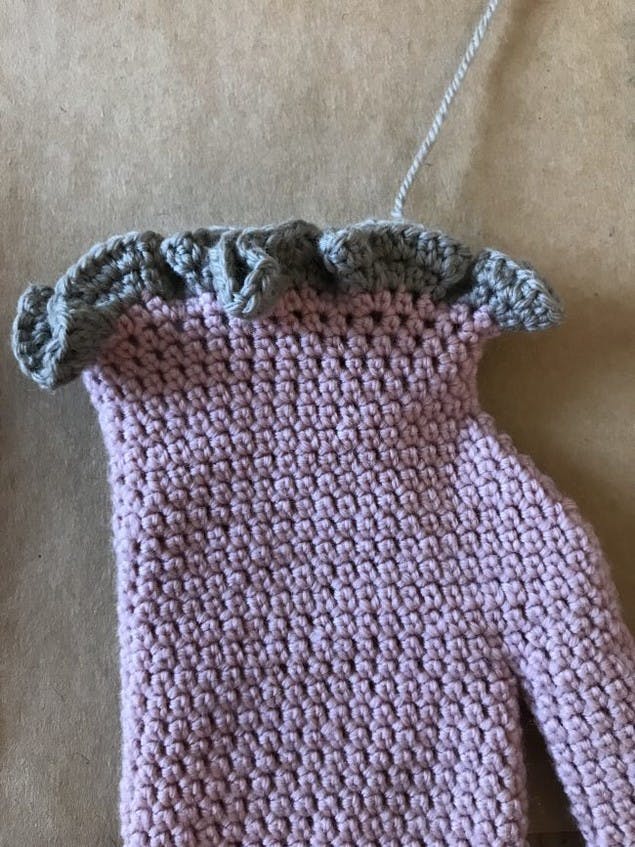
More extended double crochets. Now work 4 further rounds of 48 ESC.
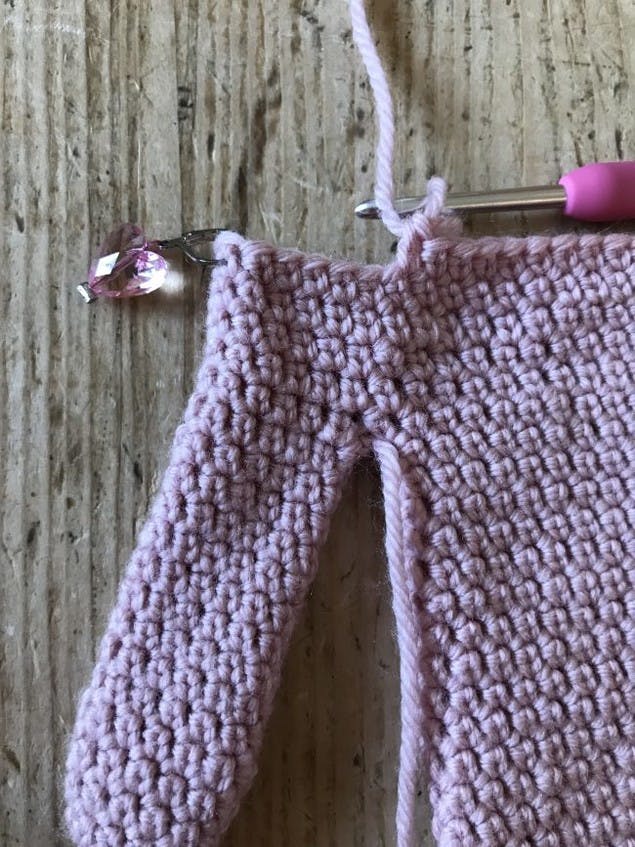
5
Next up! Lay your mitten flat with the thumb to the left and place your stitch marker at the stitch exactly on the fold.
1
Shape the side of your thumb. You are now going to create the shaping at the side of the thumb so that the mitten fits snuggly.
Work a few ESC so that you are 2 stitches away from the marker.
We're now going to decrease by working 2 ESC together at either side of the stitch marker.
To work a decrease in ESC
1
Insert hook. Yarn over, pull up loop.

2
Yarn over. Pull through one loop.
3
Insert hook in the next stitch. Yarn over, pull up loop.

4
Yarn over. Pull through one loop, yarn over, pull through all three loops.

5
Repeat from * to * until you have 34 sts left.
6
Work 5 rounds of 34 ESC.
7
For the next round you are going to begin the increasing that will form the cuff. Work 1 ESC, followed by 2 ESC in to the next stitch. Continue all the way around, 50sts.
8
Add your new color. Join in your Truffle yarn and work 2 ESC in to each stitch all the way around, 100 sts.
For your final round work 2 ESC in to each stitch all the way around, 200 sts.
9
Sl St to join and finish off.
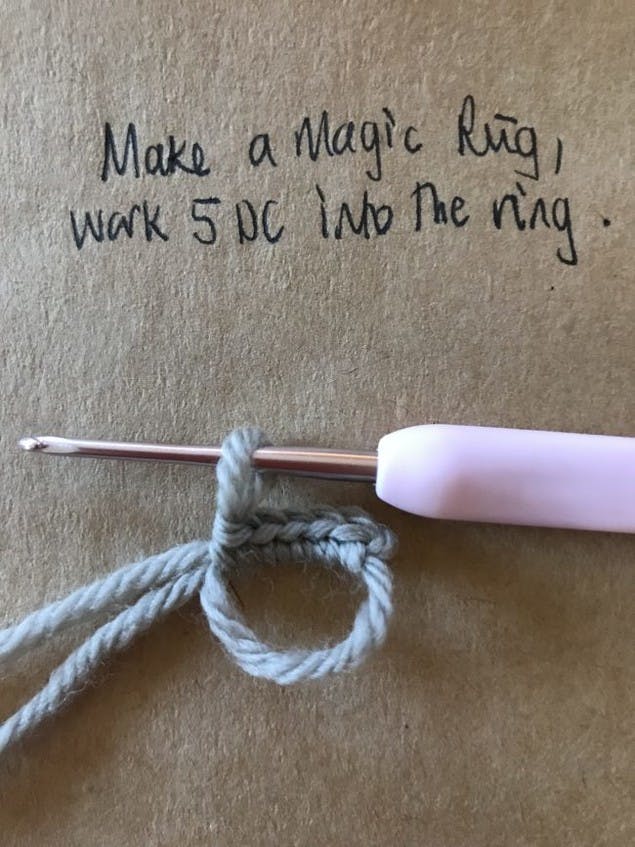
To make the stars
1
Round 1: Using the color truffle and a 2mm hook make a Magic Ring and work 5 SC in to the ring.
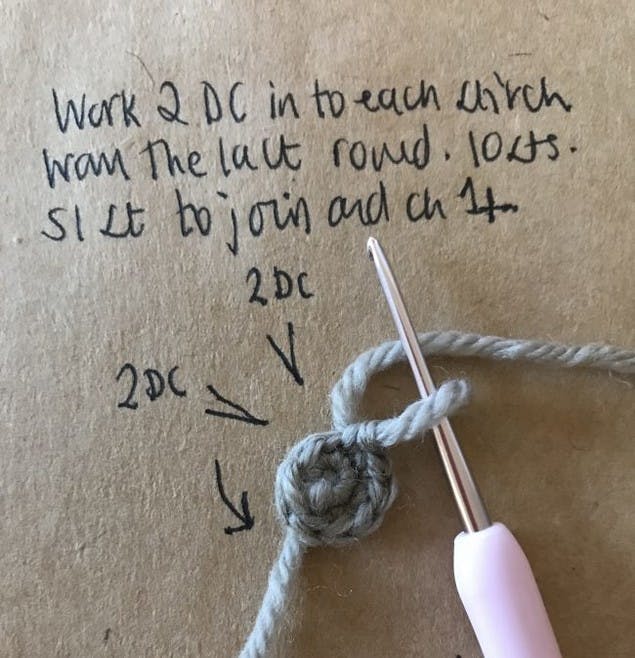
2
Round 2: Work 2 SC in to each stitch from Round 1, 10 sts. Sl St to join at the end of the round.
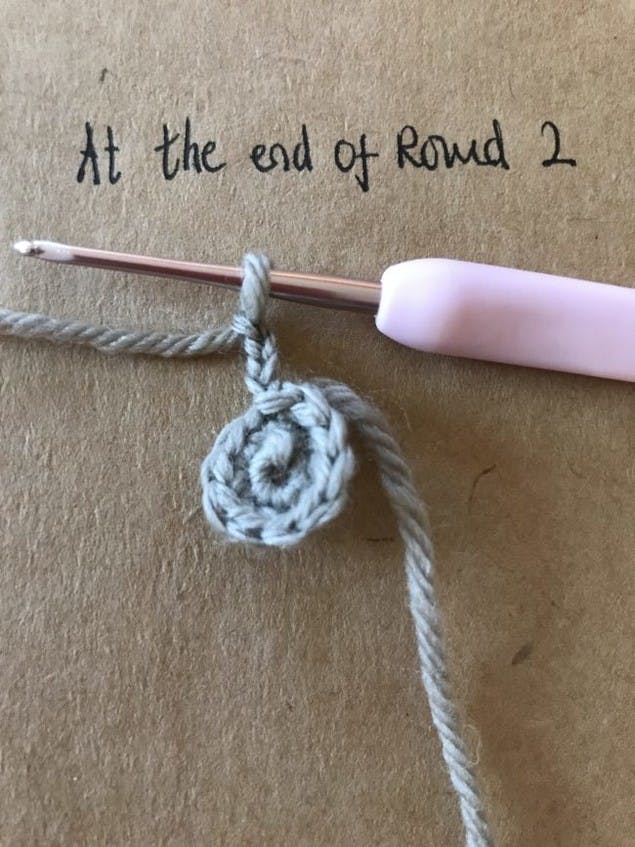
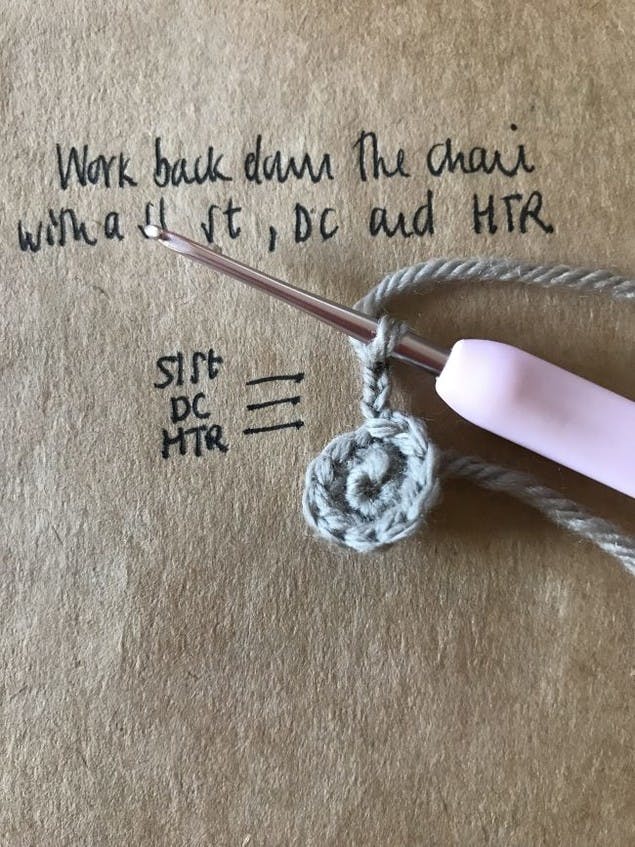
3
Round 3: *Chain 4, and starting in the second chain from the hook work back down the chain as follows: Sl St 1, SC 1, HDC 1. This will bring you back to the circular centre. Skip a stitch and Sl St back in to the next stitch*.
4
Slip a stitch and sl st into the next stitch.
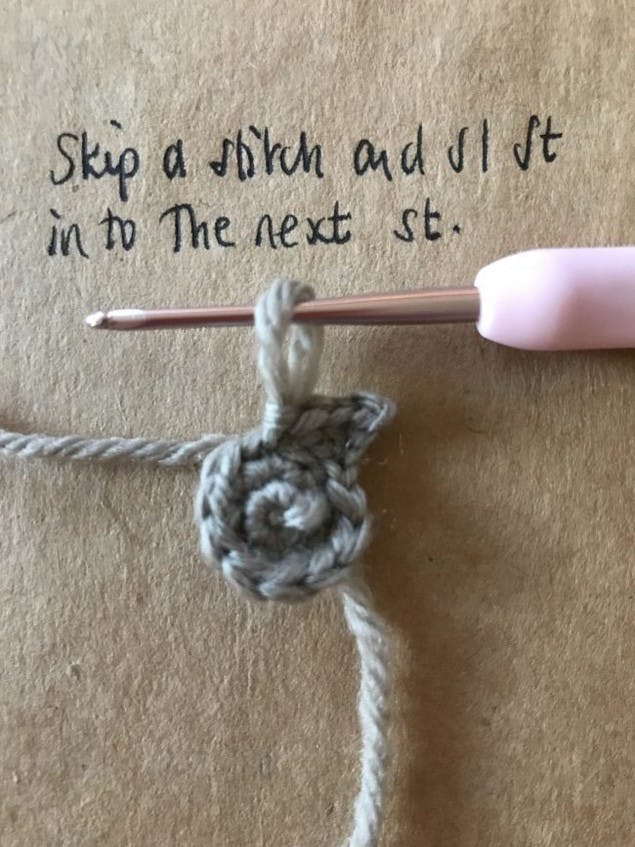
5
Continue. Repeat all the way around until you've made 5 points of your star.

I made a total of 7 stars for each mitten.
Once you've made your stars lay your mitten on to a flat surface and pin the stars where you want them to be. I find safety pins good for this!
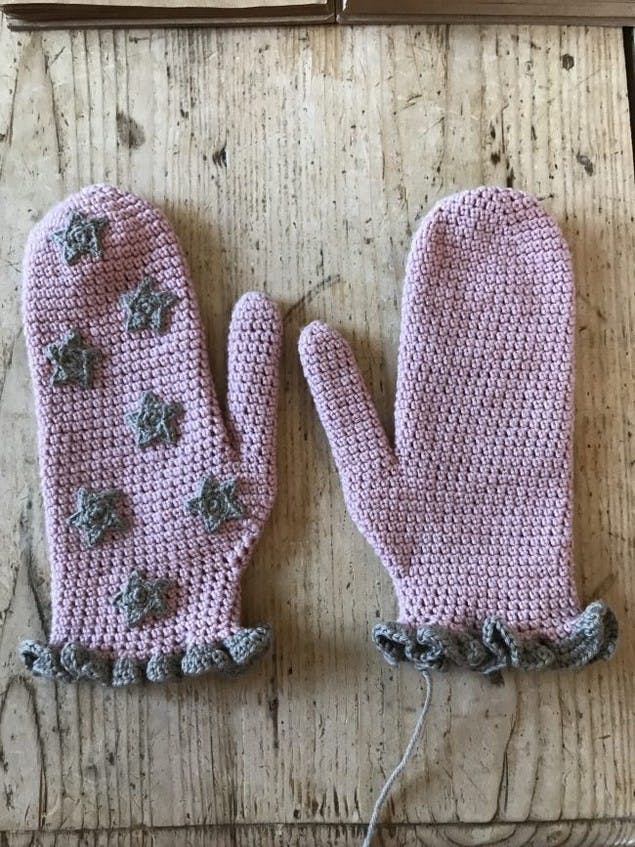
Sew the stars firmly into place with a needle and thread. And that's it!