How to sew a simple wall organiser
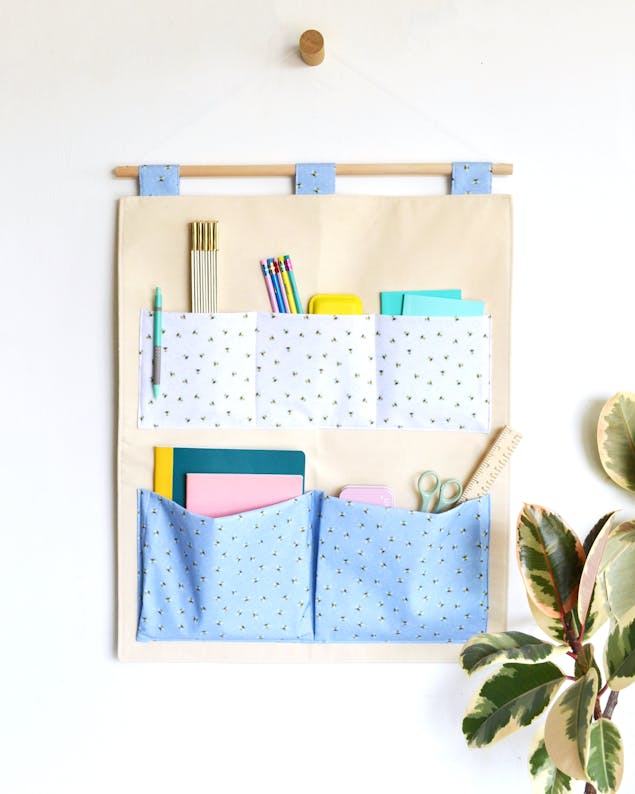
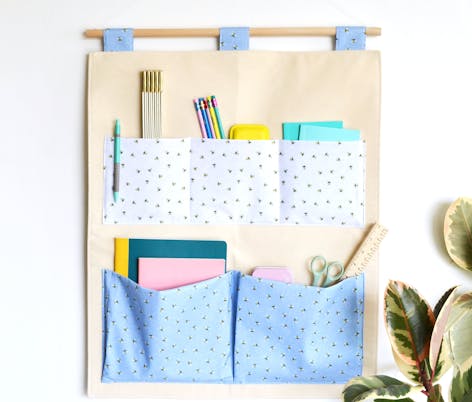
Published on 23 June 2022 1 min readThis fabric wall organiser is the perfect project for keeping your space tidy and looking stylish! Ideal for stationery or craft supplies, this organiser combines flat pockets for smaller items and concertinaed pockets for bulkier bits and pieces. With added interfacing, this organiser holds its shape even when in use! Here, Instagram craft extraordinaire Anna Alicia show you how to make this project, step by step.
Materials
- ¾m heavyweight calico, Anna used:
- Oddies Textiles Calico - Good Quality
- ½m quilting weight fabric for tabs and bottom pockets, Anna used:
- LoveCrafts Spring Garden - Honeybees I
- ¼m quilting weight fabric for the top pockets, Anna used:
- LoveCrafts Spring Garden - Honeybees II
- ½m stiff sew-in interfacing
- ½m medium weight sew-in interfacing
- Trimits Dowel 50cmx12mm
- 70cm scrap of non-stretchy yarn or string
- Standard sewing kit and sewing machine
How to make a stylish wall organiser
1
Start by cutting out our fabric pieces.
For the back panel:
Calico, two pieces 52cm x 62cm
Stiff sew-in interfacing, one piece 52cm x 62cm
For the hanging tabs:
Quilting weight fabric, three pieces 20cm x 12cm
For the lower pockets:
Quilting weight fabric, one piece 59cm x 42cm
Medium weight sew-in interfacing, one piece 59cm x 42cm
2
Prepare the little tabs that the dowel will go through at the top of our organiser. Take one of your three small tab pieces and fold in half, right-sides out, so that the shorter edges meet. Press to crease. Open out and now fold in the edges so that they meet along the centre crease, pressing again. Finally, refold along the centre crease and press again. Repeat with your other two strips.

3
Sew along both longer edges of each of the strips, roughly 2-3mm in. Set these aside for now while we prepare the back panel of the organiser.
4
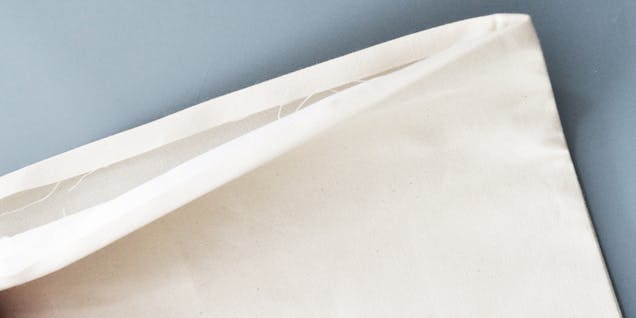
Take the two calico rectangles and lay one out on top of the other (right sides in if your fabric has a right side). On top of this, lay your stiff interfacing. Pin and then sew (with a 1cm seam allowance) along both longer and one of the narrower edges, leaving the top narrower edge open. Trim across the corners of the seam allowance. Turn the back panel right way out and press, making sure the interfacing ends up on the inside. Turn the top, open edge in by 1cm all the way around, pressing to crease.
5
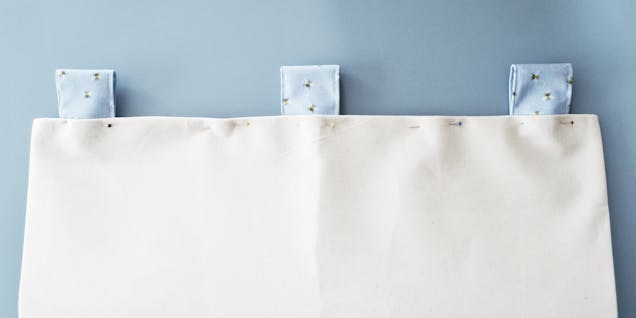
Measure and mark the centre of the top edge of the panel with chalk. Fold one of the little strips you made earlier in half, so the raw edges meet, and tuck that end inside the top edge of the panel by 1cm, at the centre point you marked, pinning in place. Fold another tab-strip in the same way and tuck in 2.5cm from the left-hand edge, pinning in place. Do the same with the final tab 2.5cm from the right-hand edge.
6
Sew all the way around all the edges of the back panel, roughly 4-5mm in.
7
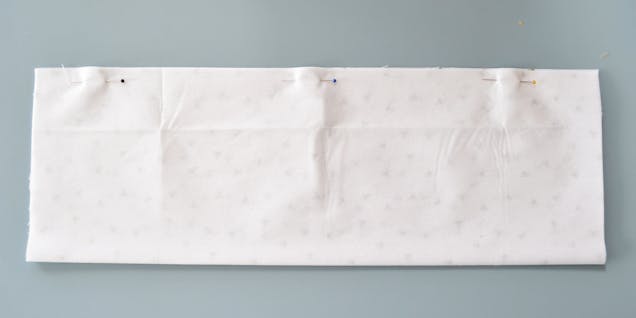
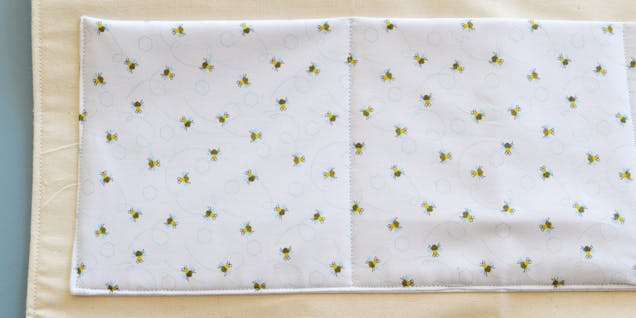
Lay out the interfacing pieces you cut for your pockets and lay the matching pocket piece on top of each, face-up. Fold each interfacing/fabric pair in half so that the longer edges meet, and the fabric is right-side in. Pin along the longer edge and sew along that edge only with a 1cm seam allowance.
8
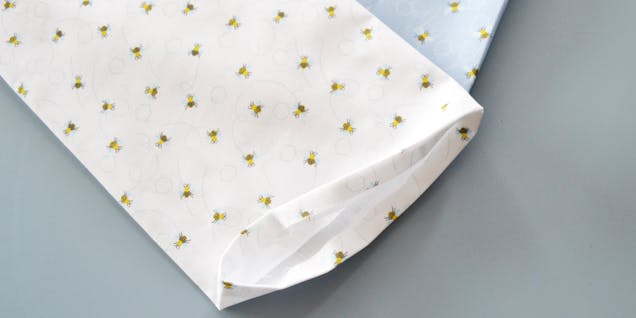
Turn the pocket pieces right way out and press. For each pocket piece, fold the open edges at both ends in by 1cm and press. Pin and sew along those edges only, 2-3mm in.
9
Now add the pockets to the back panel. Measure 15cm down from the top edge of the back panel and place the top pocket panel (the narrower one) directly below that point, making sure it is equidistant from the right and left edges (it should sit roughly 2.5cm from the side edges). Pin in place, then sew along the side and bottom edges 2-3mm in (sewing over the existing stitching at the side edges). Measure 15cm in from the left and right edges of the pocket panel and mark a line from top to bottom. Sew along both these lines to split your large pocket into three smaller pockets.
10
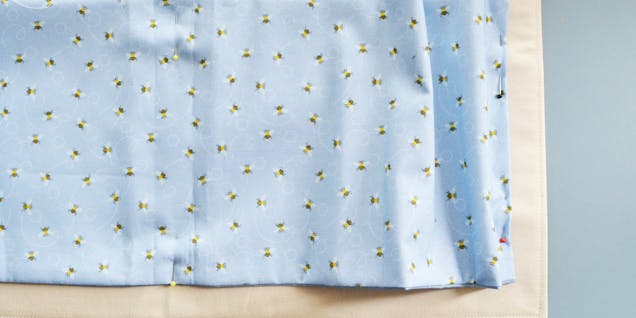
For the second pocket panel, sew the centre and sides in place before adding the concertina folds. Measure and mark a point 2.5cm up from the bottom edge of the back panel and in the middle, between the left and right edges. On the remaining pocket panel, mark the middle of the bottom, long edge. Lay the pocket panel on top of the back panel so that it is 2.5cm up from the bottom edge and the mark in the middle of its long bottom edge lines up with the centre mark on the back panel. Pin the pocket panel in place from top to bottom along that centre line. Now pin the sides in place. These will currently be overlapping the sides of the back panel, so bunch the pocket panel up on the left side and line up its left edge 2.5cm from the edge of the back panel, pinning in place. Do the same with the right edge of the pocket panel. Sew along the sides and the centre line you marked (leaving the bottom edge unsewn).
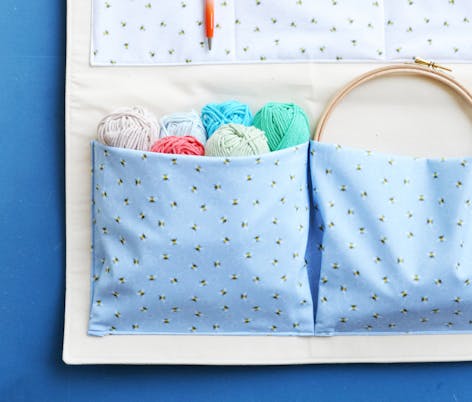
11
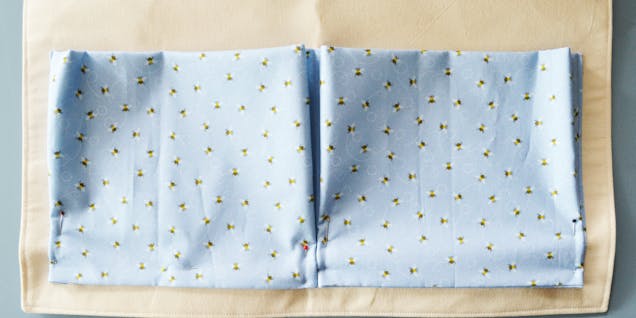
Now we can add the folds and sew along the bottom edge to secure them. At each side of the pocket panel create a 1.5cm wide concertina fold and pin in place. Do the same at the centre seam so each pocket has a concertina fold at each side. You may need to adjust them a little to get the concertina folds all roughly the same size. Pin and sew along the bottom edge of your pockets, roughly 2-3mm in, to hold the folds in place.
12
Finally, add the dowel and string! Slide the dowel through the tabs at the top of the organiser. Cut a length of yarn or string roughly 70cm long. If the dowel has holes at each end, thread the ends of your yarn through the holes and tie in place. If not, simply tie the yarn around the dowel at each end. Now you can hang your wall organiser on a hook or nail and fill it up!
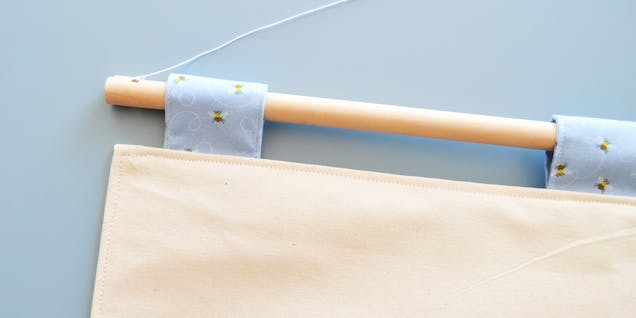
And you're finished! Playroom, bedroom or craft room, this is one handy storage solution that you can make in no time at all!