How to knit zig zags
Published on 16 September 2014 By Elizabeth Bagwell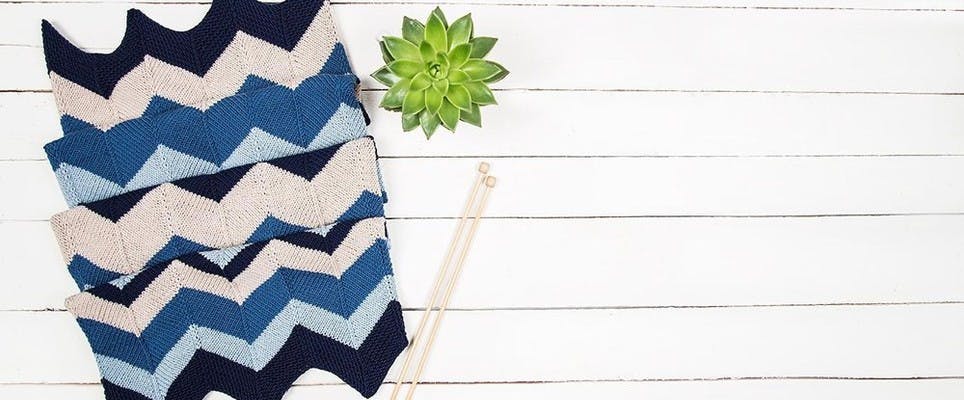
Add a bit of colour to your knitting. Elizabeth Bagwell explains 3 simple ways to knit zig zags, either vertically or horizontally.
Once you’ve got the hang of stripes, zig zags are a fun way to expand your skills. They’re a great way to use up scraps of yarn for a scarf. You can knit either horizontal or vertical zig zags, and use either shaping or colourwork techniques.
Shaping zig zags
Increases and decreases form nice, clean lines that are ideal for making zig zag patterns. Horizontal zig zags are an easy way to see the effect of shaping on plain knitting.
How to knit horizontal zig zags
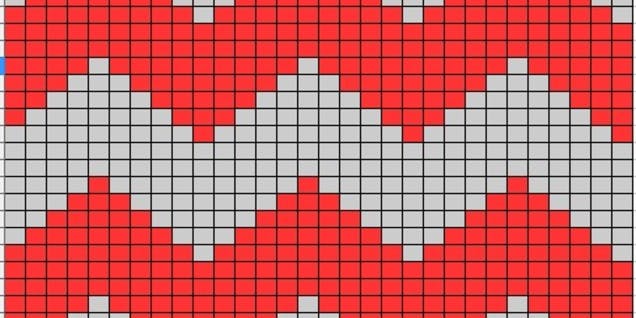
Pairs of increases and decreases spaced at regular intervals can turn knitting into zig zags. Best of all, you don’t need to change the pattern as you go. Repeat this two line pattern (or a similar one) for long enough, and you’ll have a chevron scarf.
Zig Zag pattern
1
Cast on a multiple of 16 stitches
Row 1: *K2tog, K5, kfb twice, K5, ssk. Rep from * to end
Row 2: Purl
2
Horizontal zig zags: If you want the cast on and cast off edges of your work to stay square, you can knit zig zags using stranded colourwork. It’s the same as any other colourwork pattern: to keep it simple, try to use only one or two colours per row and keep the colour changes short, typically 5-7 stitches or less.
Pro Tip
Add stripes as you would normally, using only one colour yarn per row.
How to knit vertical zig zags
Depending on how wide you want your zig zags, you can either use stranded colourwork or intarsia. Intarsia works really well for vertical zig zags, and uses less yarn. If you’re working in the round, use stranded colourwork.

Pro Tip
Knitting vertical zig zags are like vertical stripes. Simply knit until you need to change colour, twist the two strands together and continue with the new colour.