Crochet a sparkly stars Christmas stocking
Published on 3 December 2019 1 min read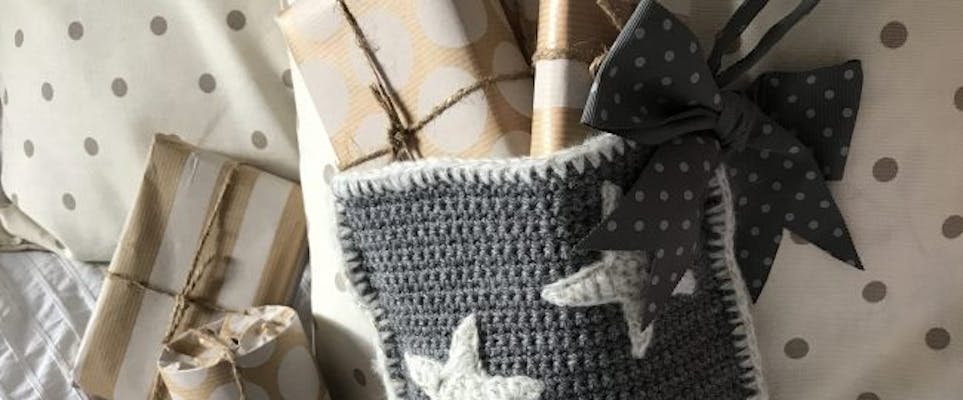
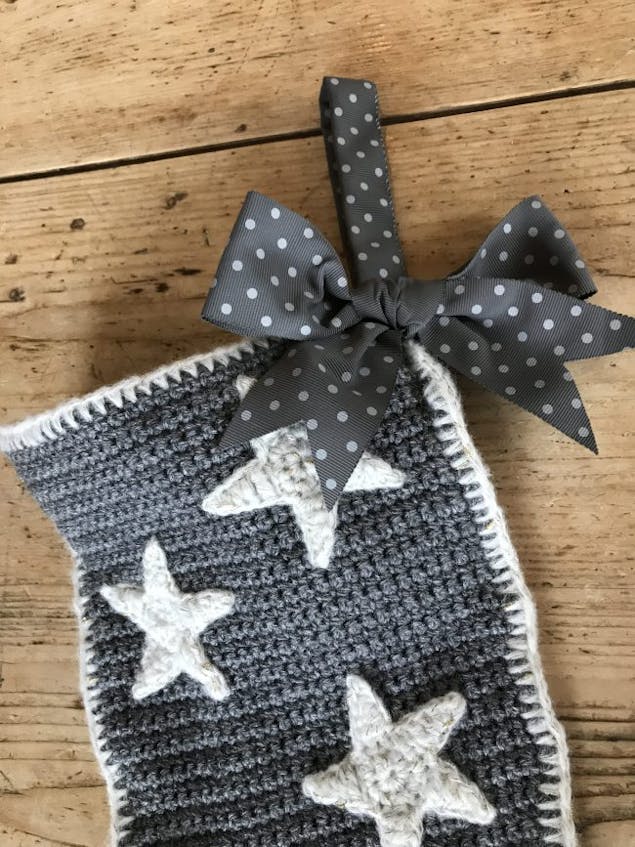
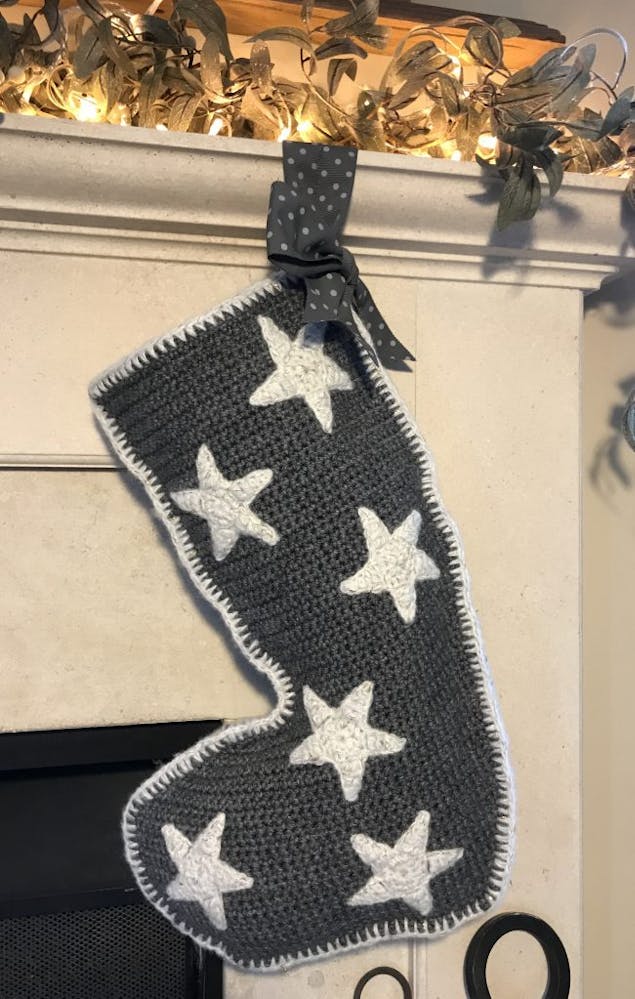
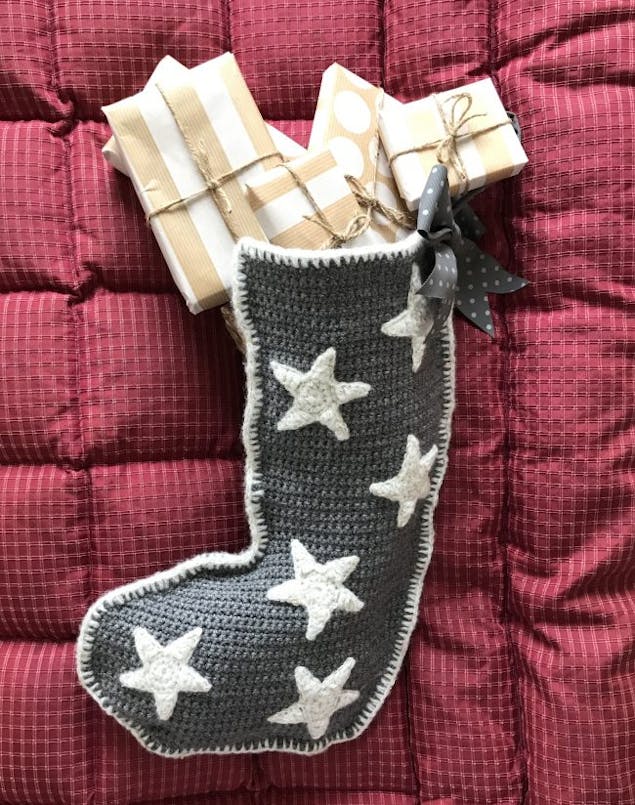
This fabulous Sparkly Stars Christmas stocking by Kate Eastwood is sure to put a twinkle in your eye! Perfect for decorating your home this festive season, this starry stocking will be ready for Santa to cram with all those glorious treats! Follow Kate's easy steps to crochet your very own, or make for someone special. A project you can treasure year after year!
With chillier evenings drawing in I’m sure I’m not the only one beginning to think about those upcoming Christmas crochet projects!
With that in mind, I have come up with a Christmas stocking pattern that will sparkle beautifully when hung up ready for Father Christmas.
For this project I used RICO Basic Super Big Aran, a mighty 400g ball of yarn. 1 x ball of Stone Grey 007 and 1 x ball of Ivory 01. For the stars on the stocking I used DMC Marquise, shade 01.
Materials
The stocking is worked with a 4.5mm hook and the stars are worked with a 4mm hook. You will also need a small amount of coordinating ribbon for the hanging loop and bow. In this pattern I use UK terminology.
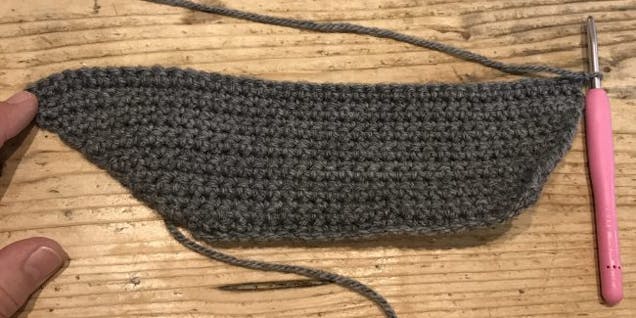
How to make the stocking
1
Row 1: Begin by making a chain of 26.
2
Row 2: Work 2 DC in to the first stitch, DC 23, work 2 DC in to the last stitch, 27sts. Chain 1 and turn.
3
Row 3: DC to last stitch, DC 2 in last stitch. 28sts. Chain 1 and turn.
4
Row 4: Work a row of DC, working 2 DC in to the first and last stitch. 30 sts. Chain 1 and turn.
5
Row 5: DC to last stitch, DC 2 in last stitch. 31sts. Chain 1 and turn.
6
Row 6: Work a row of DC, working 2 DC in to the first and last stitch. 33 sts. Chain 1 and turn.
7
Row 7: DC to last stitch, DC 2 in last stitch. 34sts. Chain 1 and turn.
8
Row 8: Work a row of DC, working 2 DC in to the first and last stitch. 36 sts. Chain 1 and turn.
9
Row 9: DC to last stitch, DC 2 in last stitch. 37sts. Chain 1 and turn.
10
Row 10: Work a row of DC, working 2 DC in to the first and last stitch. 39 sts. Chain 1 and turn.
11
Row 11: DC to last stitch, DC 2 in last stitch. 40sts. Chain 1 and turn.
12
Row 12: Work a row of DC, working 2 DC in to the first and last stitch. 42 sts. Chain 1 and turn.
13
Row 13: DC 42. Chain 1 and turn.
14
Row 14: DC to last stitch, DC 2 in last stitch. 43sts. Chain 1 and turn.
15
Rows 15 to 18: DC 43. Chain 1 and turn.
16
Row 19: Work 2 DC in to the first stitch, DC to the end. 44 sts. Chain 1 and turn.
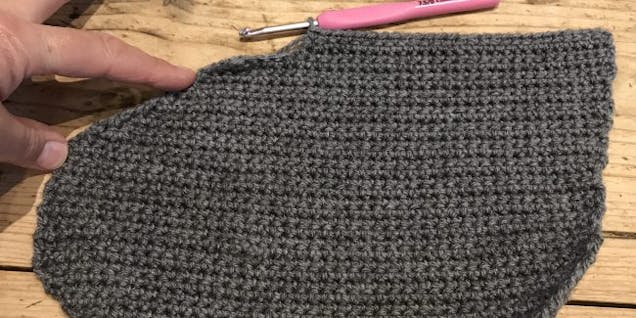
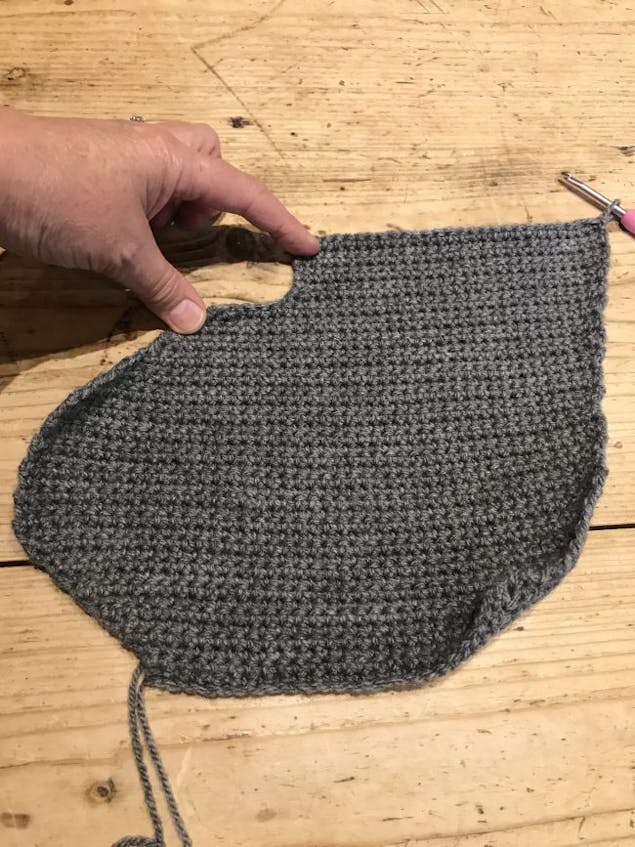
17
Rows 20 to 23: DC 44. Chain 1 and turn.
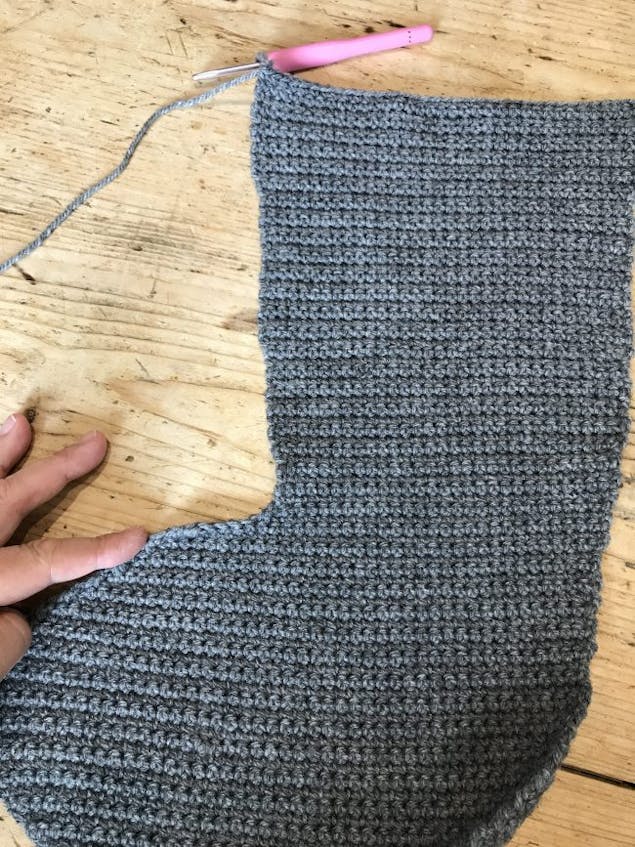
18
Row 24: Decrease by working the first 2 stitches together, DC to the last stitch, DC 2 in the last stitch. 44 sts. Chain 1 and turn.
19
Row 25: DC to the last 2 stitches, decrease by working the last two DC together. 43 sts. Chain 1 and turn.
20
Row 26: Decrease by working the first 2 stitches together, DC to the end. 42 sts. Chain 1 and turn.
21
Row 27: DC to the last 2 stitches, decrease by working the last two DC together. 41 sts. Chain 1 and turn.
22
Row 28: Decrease by working the first 2 stitches together, DC to the end. 40 sts. Chain 1 and turn.
23
Row 29: Work 2 DC in to the first stitch, DC to the last 2 stitches, decrease by working the last two DC together. 40 sts. Chain 1 and turn.
24
Row 30: Decrease by working the first 2 stitches together, DC to the end. 39 sts. Chain 1 and turn.
25
Row 31: DC to the last 2 stitches, decrease by working the last two DC together. 38 sts. Chain 1 and turn.
26
Row 32: Decrease by working the first 2 stitches together, DC to the end. 37 sts. Chain 1 and turn.
27
Row 33: DC to the last 2 stitches, decrease by working the last two DC together. 36 sts. Chain 1 and turn.
28
Row 34: Decrease by working the first 2 stitches together, DC to the last stitch, DC 2 in the last stitch. 36 sts. Chain 1 and turn.
29
Row 35: DC to the last 2 stitches, decrease by working the last two DC together. 35 sts. Chain 1 and turn.
30
Row 36: Decrease by working the first 2 stitches together. 34 sts. Chain 1 and turn.
31
Row 37: DC 27, DC the next 2 stitches together, 28 sts. Chain 1 and turn.
32
Row 38: Decrease by working the first 2 stitches together. 27 sts. Chain 1 and turn.
33
Row 39: Work 2 DC in to the first stitch, DC to the end. 28 sts. Chain 1 and turn.
34
Rows 40 to 43: DC 28. Chain 1 and turn.
35
Row 44: Work 2 DC in to the first stitch, DC to the last stitch, work 2 DC in to the last stitch, 30sts. Chain 1 and turn.
36
Rows 45 to 53: DC 30. Chain 1 and turn.
37
Row 54: Work 2 DC in to the first stitch, DC to the last stitch, work 2 DC in to the last stitch, 32sts. Chain 1 and turn.
38
Rows 55 to 71: DC 32. Chain 1 and turn.
39
Row 72: Work 2 DC in to the first stitch, DC to the last stitch, work 2 DC in to the last stitch, 34sts. Chain 1 and turn.
40
Rows 73 to 82: DC 34. Chain 1 and turn.
41
Row 83: Work a row of 34 DC, at the end of the row work 2 DC in to the end stitch and then continue working a round of DC all the way around the edge of the stocking. Sl St to join and finish off.
42
Work a second stocking shape as above and at the end of row 82 finish off.
43
With the right side facing rejoin your yarn and work a row of 34 DC. At the end of the row work 2 DC in to the end stitch and then continue working a round of DC all the way around the edge of the stocking.
44
Sl St to join and finish off.
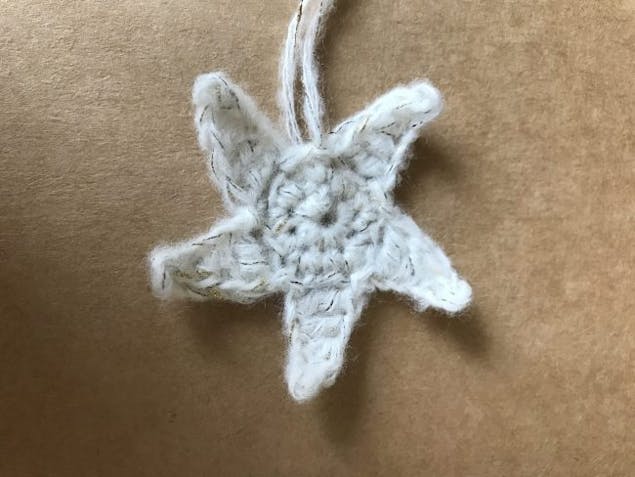
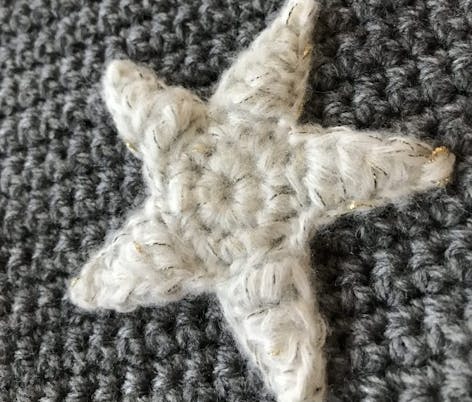
How to make the stars
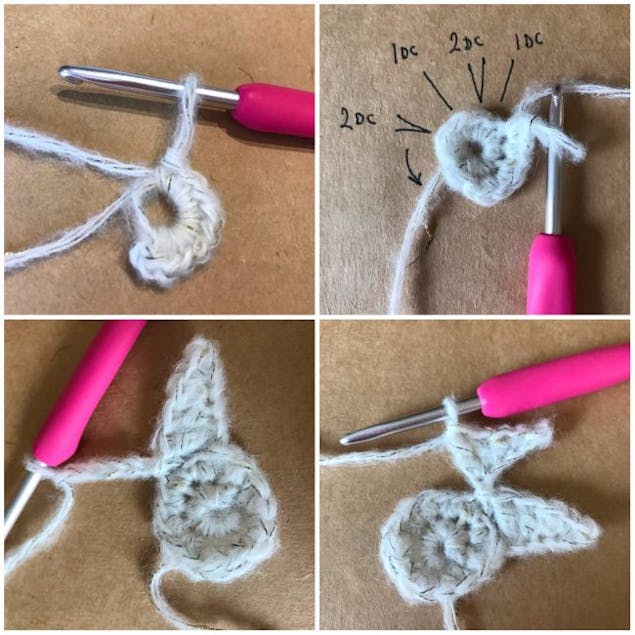
1
Round 1: Using the DMC Marquise and a 4mm hook make a Magic Ring and work 10 DC in to the ring. Sl St to join and chain 1.
2
Round 2: *Work 1 DC, followed by 2 DC in to the next stitch*. Repeat from * to * all the way around, 15 sts. Sl St to join.
3
Round 3: *Chain 6 and starting in the second chain from the hook work back down the chain as follows: Sl St, DC, HTR, TR and DTR. This will bring you back to the centre of the star. Skip one stitch and Sl St in to the following stitch. Sl St in to the next stitch* and repeat from * to *. Work around the centre of the star until you have made 5 points. Sl St to join and finish off.
How to finish your stocking
1
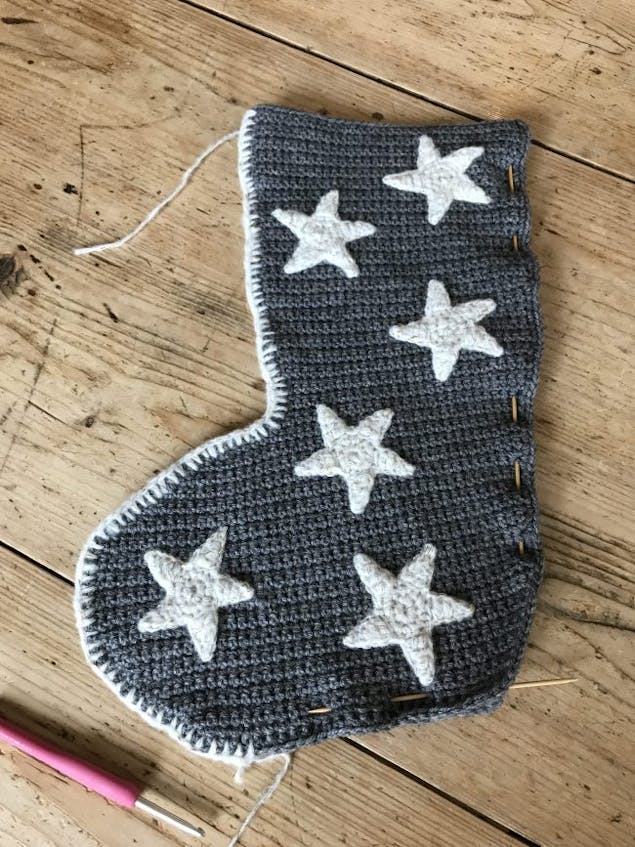
Lay the front piece of your stocking on to a flat surface, right side facing, and place the stars where you want them to be.
2
Pin in place and use a needle and thread to sew the stars securely to the stocking.
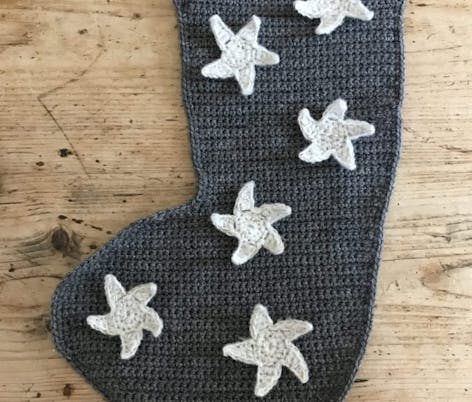
3
Pin the front and back stocking pieces together securely.
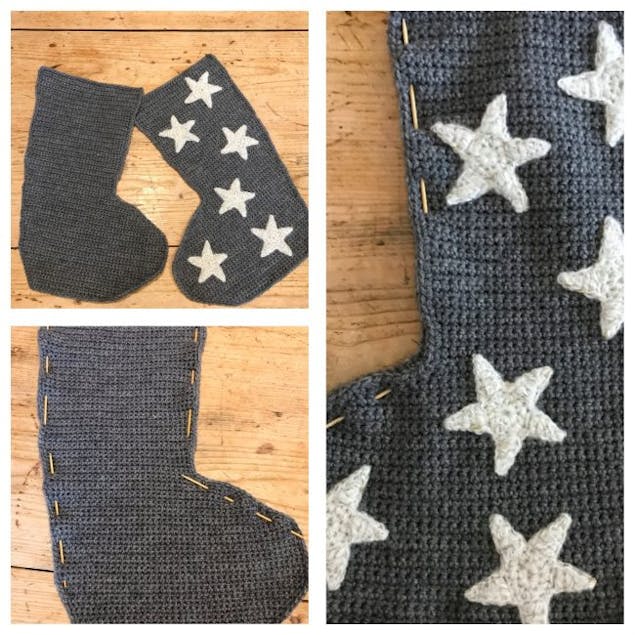
4
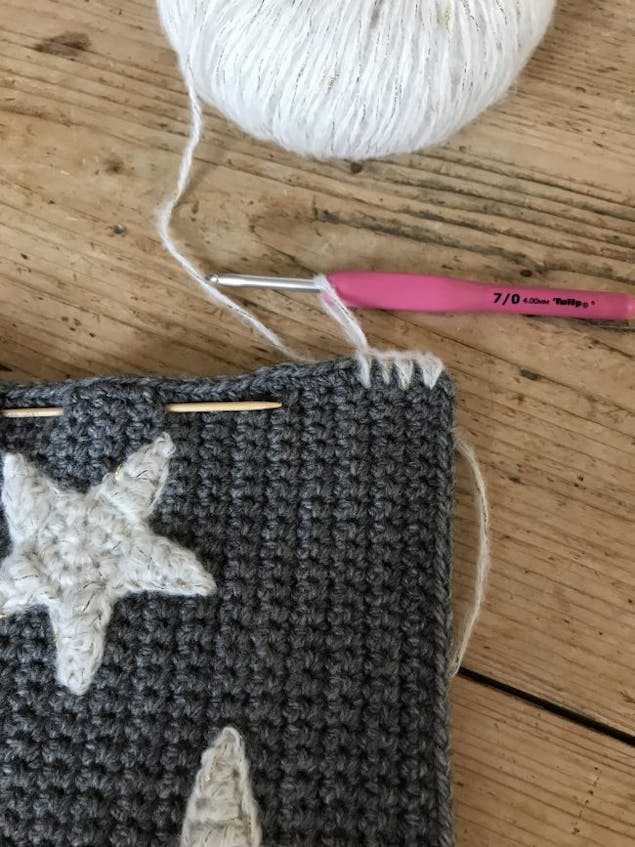
Using the DMC Marquise and a 4mm hook work a round of deep DC all the way around the edge of the two pieces to join them together.
5
Work the same edging around the top of the stocking. Sl St to join and finish off.
6
To finish my stocking off I added a hanging loop and a bow which I sewed on securely with a needle and thread.