Crochet with Kate: a garland for autumn
Published on 17 October 2015 By Merion 2 min read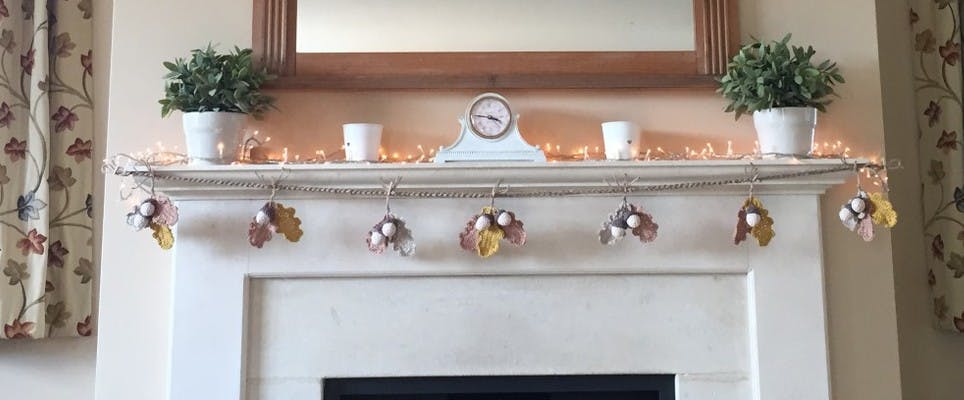
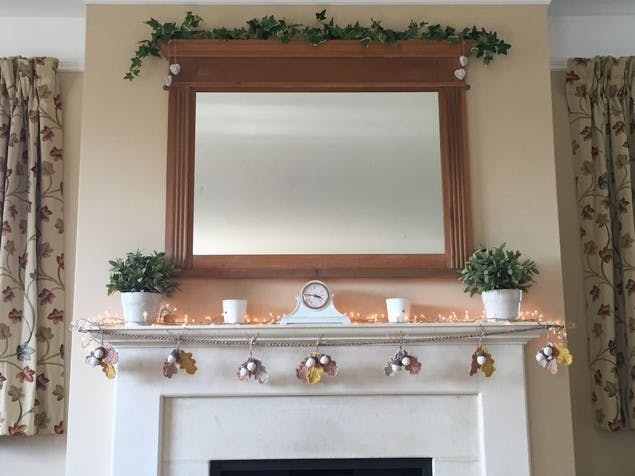
We’re well and truly into the autumn months – kicking tumbling leaves, drinking hot chocolate by open fires and of course, festooning our homes autumnal shades. Kate Eastwood from Just Pootling has designed a stunning garland for your home to bring the glorious autumnal colourscape inside!
At this time of year it’s very hard not to become swept up in the warm feelings of autumn approaching, and whilst its lovely to be out in the late summer sun what could be better than having your own little piece of autumnal beauty to hang in your home.
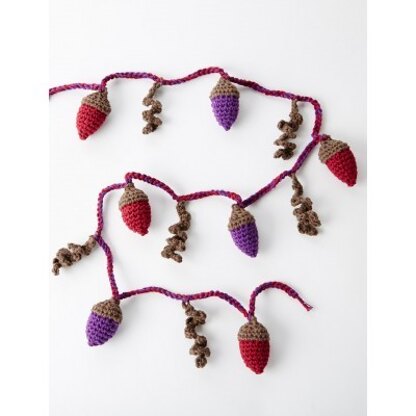
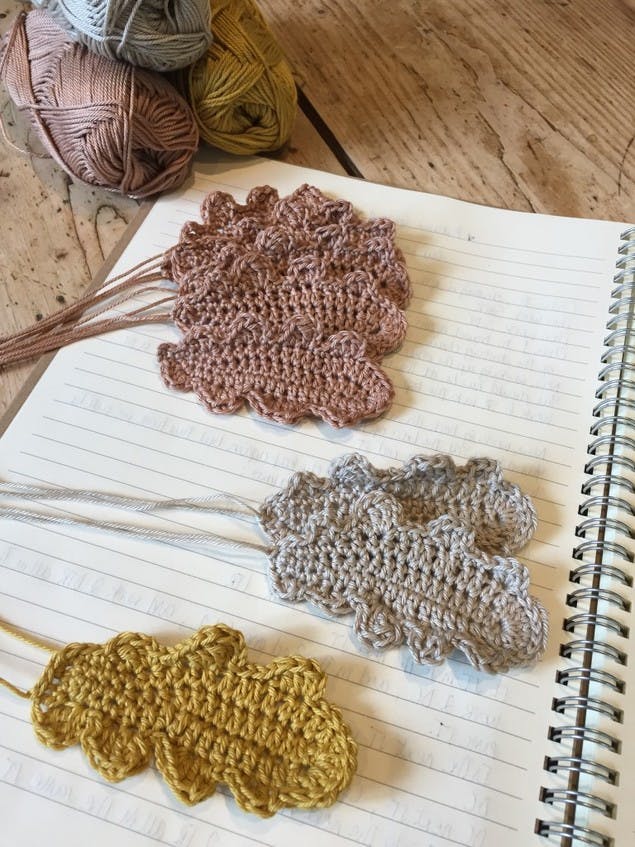
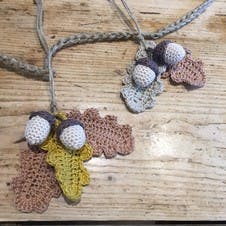
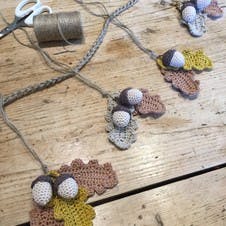
My autumn garland is made of clusters of oak leaves and acorns hanging from a rustic string rope, and it couldn’t be simpler to make as there is just one pattern for the leaves and one for the acorns.
Pattern notes
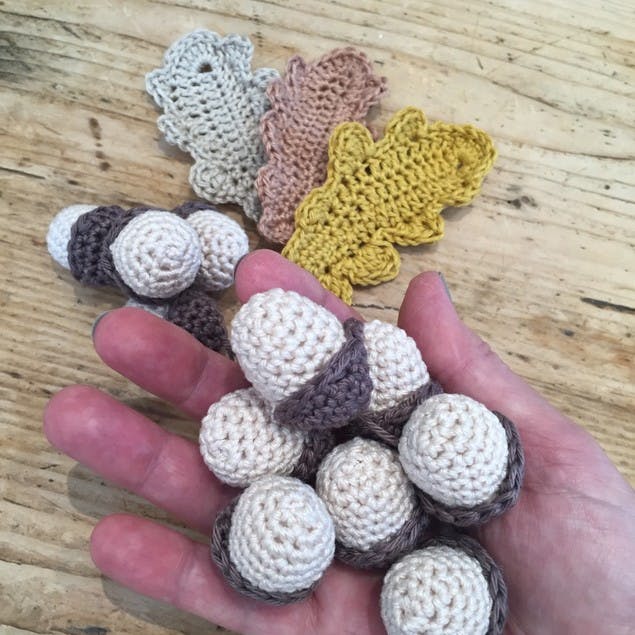
For my garland I chose a selection of autumn colours and worked with a cotton yarn, to give good stitch definition and form. The finished length of my garland is 1m 45cm.
My final pieces count are: 8 x Rose Gold acorn leaves, 5 x Curry acorn leaves, 4 x Silbur acorn leaves, 12 x complete acorns made from Fango (the tops) and Ivor (the bottoms).
Yarn notes
Schoeller und Stahl Limone is the original cotton yarn used in this pattern. A great alternative to this yarn, that even matches the colours used in the original is Schachenmayr Catania. This is another cotton, sport weight yarn that is so affordable!
Materials
- Schachenmayr Catania in Curry
- Schachenmayr Catania in Fango
- Schachenmayr Catania in Rose Gold
- Schachenmayr Catania in Ivor
- Schachenmayr Catania in Silbur
- Schachenmayr Catania
- 3.5mm hook
- KnitPro Waves Crochet Hook
- Garden string to make a rope to hang your garland
- Polyester or wool toy stuffing
To make the oak leaf
1
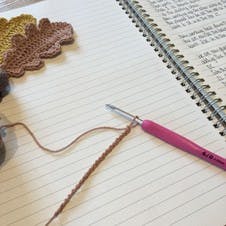
To get started. Make a starting chain of 21.
2
Next up. Beginning in the 4thchain from the hook, work 10 TR along the starting chain.Then work 5HTR, followed by 3DC. You will now be at the end of the chain.
3
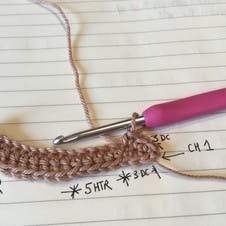
For the next chain. Work 1 CH to travel across the bottom of the leaf to the other side of the starting chain.
4
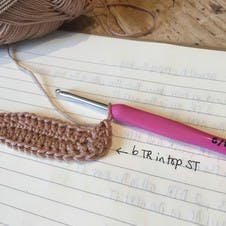
Now. Working up the other side of the CH, work 3DC, 5HTR and 9TR. You should now be back at the top of your leaf: work 6 TR in to the top ST.
5
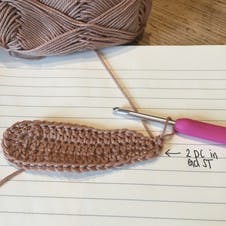
Continue. Work back down again with 8TR, 5 HTR and 4DC. Once back at the bottom again, work 2DC in to the end ST.
6
Working around the leaf. You are now going to work around the leaf again, but this time you will be adding the oak leaf shape. DC2. For the 1st shape, work 1DC, 1HTR and 1TR all in to the same ST. SL ST in to the next ST.
7
Next up. DC2. For the 2nd shape, work 1DC, 1HTR, 1TR all in to the same ST. SL ST in to the next ST.
8
Next. DC1, then for the 3rd shape work 1DC , CH2 and work 2 DTR all in to the same ST. In the next ST work 1TR and 1 SL ST.
9
Next up. DC1, then for the 4th shape DC1, CH3 and work 2DTR all in to the same ST. SL ST in to the next ST.
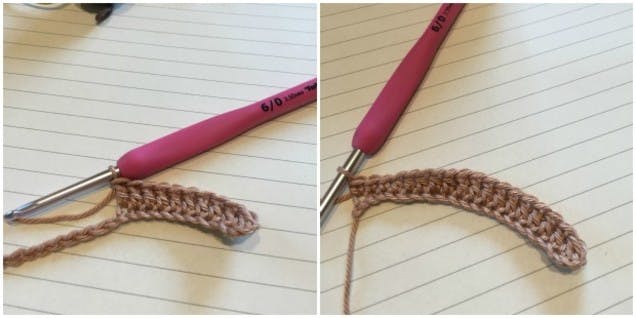
10
Next. DC, then for the 5th shape DC1, CH2 and work 2TR all in to the same ST. SL ST in to the next ST. Your leaf should now be looking something like this picture.
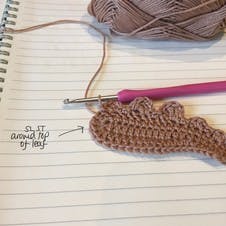
11
Now. SL ST 7 around the top of the leaf. Work back down the other side of the leaf as follows. For the 1st shape, DC1, CH2 and 2TR all in to the next ST. SL ST in to the next ST.
12
For the next bit. DC2, then for the 2nd shape DC1, CH2, 1TR, 1DTR and 1HTR all in to the next ST. SL ST in to the next ST.
13
Next up. DC2, then for the 3rd shape DC1, CH3, 2DTR all in to the same ST. Then 1TR and 1DC in the next ST.
14
Next. DC1 and then for 4th shape, DC1, CH3 and 1TR in to the same ST. SL ST in to the next ST.
15
Finish it up. Then work 4 SL ST to the bottom of the leaf. Finish off and sew in the ends. Repeat this whole process again with your desired amount of oak leaves. Remember I made a total of 17 acorn leaves for reference (8 x Rose Gold, 5 x Curry, 4 x Silbur).
To make the acorn
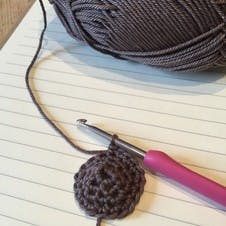
1

To make the acorn top. Using the Fango CH2. Then for round 1, DC5 in the 2nd CH from the hook.
2
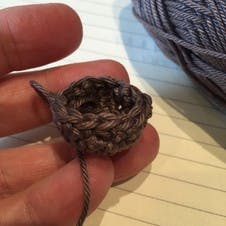
For round 2. DC2 in each ST all the way around. 10sts.
3

For round 3. *DC1, 2DC in next ST, repeat from * 4 more times. 15 sts.
4
For round 4. *DC2, 2DC in next ST, repeat from * 4 more times. 20sts.
5
For round 5. *DC2, DC 2 together, repeat from * 4 more times. 15sts.
6

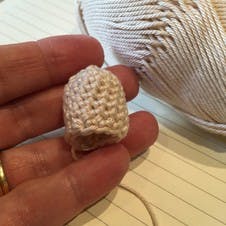
Finish it off. Finish off and sew in ends, using the yarn tale from the start to make a small loop as the acorn stalk.
7
To make the acorn bottom. Using the Ivor CH2. Then for round 1, DC5 in the 2nd CH from the hook.
8
For round 2. DC2 in each st all the way around. 10sts.
9
For round 3. *DC1, 2DC in next ST, repeat from * 4 more times. 15 sts.
10
For rounds 4 to 6. DC all the way around. 15sts.
11
For round 7. *DC3, DC 2 together, repeat from * 2 more times. 12 sts.
12
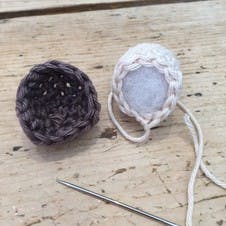
Stuffing time. Use a small amount of soft toy stuffing to stuff the bottom part of the acorn, pop it in to the acorn cap and using the yarn tale from the acorn bottom carefully sew the two together.
13
Keep going. Repeat until you have your desired acorn amount. I made a total of 12 acorns.
Making the garland
1
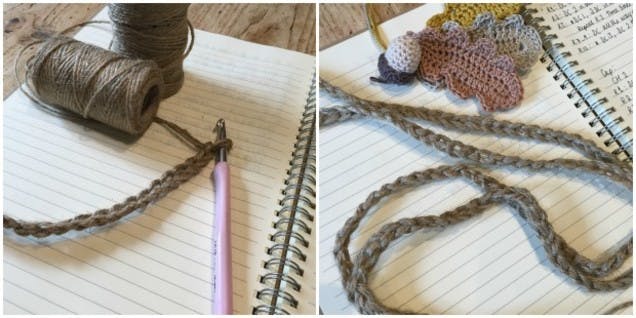
To get started. The final step is to put your garland together. I used two strands of string crocheted together in a chain to make the garland rope, with the length of the finished chain being 1m45cm. I used a 6mm hook for this.
2
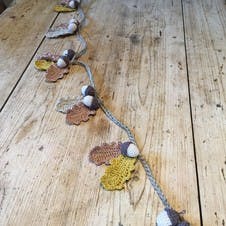
Space it out. Once you are happy with the length of your garland rope lay it out on a flat surface and roughly space your leaves and acorns out as you want them to be. I find this helpful to do so that you can be sure to get your grouping and spacing as you want it.
3
Join them. Once you have your leaves and acorns in their groups use one strand of the string to join each little cluster together. You may find that it helps to hold the cluster in place with a couple of additional sewing stitches.
4
Thread the clusters. Then carefully thread each cluster onto the main garland rope and secure in place with a knot. You are now ready to go and find the perfect place to hang your garland!