3 crochet projects to upcycle your clothes!
Published on 14 January 2020 By Holly Butteriss 2 min read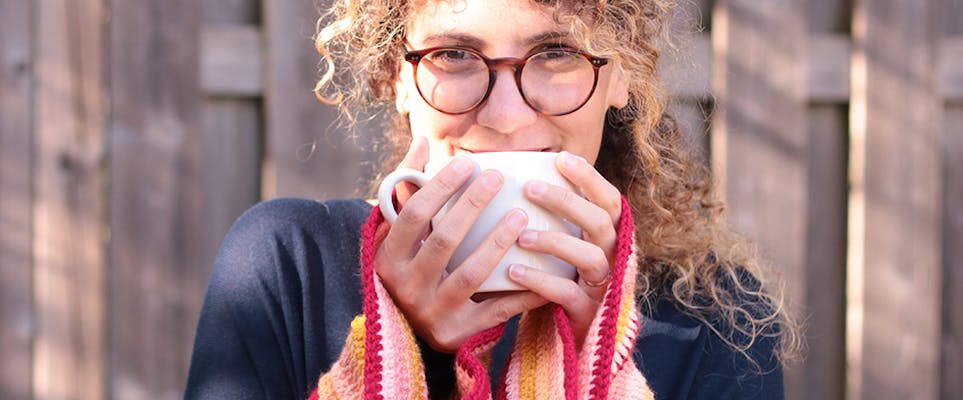
Amazing maker, Ezgi, is a musician, lover of the colour yellow and the proud owner of one very cute Persian cat! Ezgi loves to make, whether it's crochet, embroidery, sewing or a bit of cross stitch! Always keen to learn and grow, Ezgi believes in the value and beauty of the handmade.
If you're looking for a way to jazz up your wardrobe without breaking the bank, these fantastic upcycling projects are the perfect way to give an old favourite jumper a new lease of life!
Bored of wearing the same old thing? Why not show off your uniqueness and creativity by revamping old outfits, I think it’s time to add some colour to our closets! So, grab a cup of tea in your favourite mug and let's explore our creative side and try a few designs together.
Here are 3 little patterns for when your clothes need a little love!
These patterns use US crochet terms, and you can use the LoveCrafts conversion tables for UK equivalents.
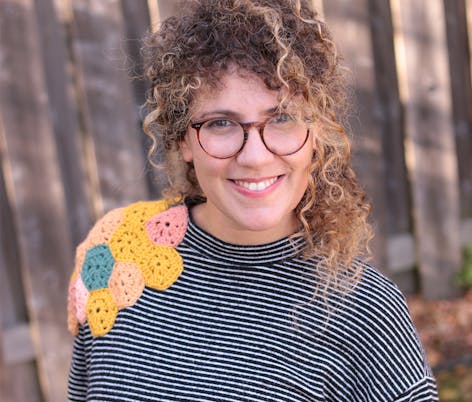
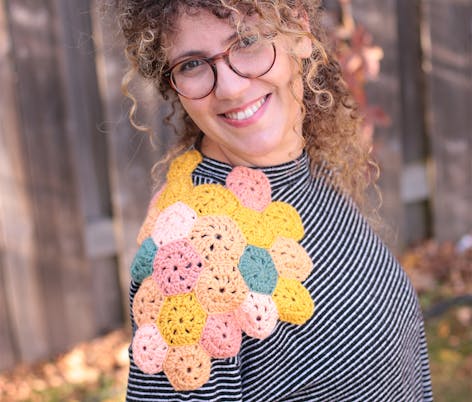
Mini hexagon shoulder detail
For the first project, I crocheted 22 mini hexagons to add to the shoulder of an old sweatshirt.
Materials
- Paintbox Yarns Simply DK
- 4.50 mm. crochet hook
- Scissors
How to make the hexagons!
2
Row: work 3ch (this is your first dc), make 1dc in the magic ring, 2ch, *2dc, 2ch * 5 more times in the magic ring, slip stitch to join with first double crochet. Cut the yarn, weave the end. (6 times 2dc, 6 times 2ch spaces).

3
Row: work 3ch, dc into the next 2 stitches, *dc,ch2,dc into the 2ch space from previous round (this is your first corner), dc into the next 4 stitches* repeat 5 more times, dc,ch2,dc into the last 2ch space, slip stitch to join with first double crochet. Cut the yarn, weave the end. (24dc, 6 times2ch spaces).
4
Join the hexagons using the mattress stitch method.
5
You can place the hexagons as I do, but each outfit will be different, try a few placements and see what works for you! Finally, I sewed the crocheted piece on the right side of my sweatshirt using a fitting sewing thread.
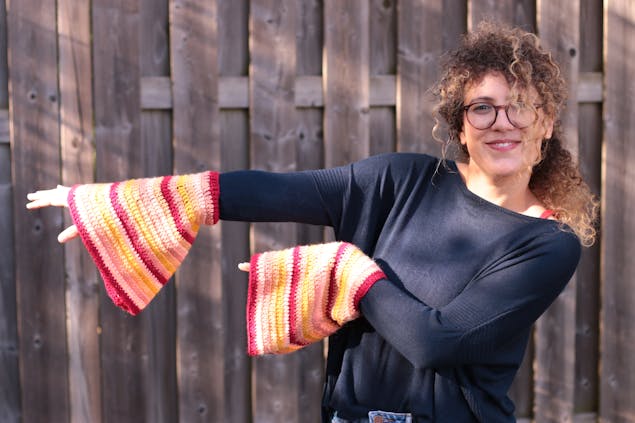
Vintage bell sleeve
For the second project, I wanted to create a vintage, bell sleeve look. I thought it would be a fabulous way to brighten up an old jumper, but they make great arm warmers too!
Everybody has a different sleeve length, if you need to edit the pattern for your measurements you can do this by adding more rows or you can remove some rows, depending on what fits you best!
For the right measure for the bell sleeve, measure your arm beginning 10 cm/4 inches below your elbow to the tips of your fingers.
Pro Tip
If you want the option to take the bell sleeves off, don't cut the arms of the jumper off! Just sew the crocheted bell sleeves onto the sweater, as seen in the photo.
Materials
- Paintbox Yarns Simply DK
- Vintage Pink (155)
- Mustard Yellow (123)
- Red Wine (115)
- Peach Orange (154)
- Melon Sorbet (116)
- 4.50 mm. crochet hook
- Scissors
- Tapestry needle
Pro Tip
You will change the colour in each row, so you have to start at the same side.
How to make the bell sleeves!
1
Make 38ch using the Red Wine colour yarn.
2
Row 1: make 1dc into the third chain of your hook and work a dc in each stitch. Cut the yarn and weave in the end (36dc).
3
Row 2: Using Vintage Pink work 3 chain into the first stitch (this is your first dc) and make 1dc into the same stitch, work 16dc, increase in the next stitch, work 16dc, and increase into the last stitch. Cut the yarn and weave in the end (39dc).
4
Row 3: Using Peach Orange work 3 chain into the first stitch (this is your first dc) and make 1dc into the same stitch, work 18dc, increase in the next stitch, work 18dc, and increase into the last stitch. Cut the yarn and weave in the end (42dc).
5
Row 4: Using Melon Sorbet work 3 chain into the first stitch (this is your first dc) and make 1dc into the same stitch, work 19dc, increase in the next stitch, work 20dc, and increase into the last stitch. Cut the yarn and weave in the end (45dc).
6
Row 5: Using Mustard Yellow work 3 chain into the first stitch (this is your first dc) and make 1dc into the same stitch, work 21dc, increase in the next stitch, work 21dc, and increase into the last stitch. Cut the yarn and weave in the end (48dc).
7
Row 6: Using Vintage Pink work 3 chain into the first stitch (this is your first dc) and make 1dc into the same stitch, work 22dc, increase in the next stitch, work 23dc, and increase into the last stitch. Cut the yarn and weave in the end (51dc).
8
Row 7: Using Red Wine work 3 chain into the first stitch (this is your first dc) and make 1dc into the same stitch, work 24dc, increase in the next stitch, work 24dc, and increase into the last stitch. Cut the yarn and weave in the end (54dc).
9
Row 8: Using Melon Sorbet work 3 chain into the first stitch (this is your first dc) and make 1dc into the same stitch, work 25dc, increase in the next stitch, work 26dc, and increase into the last stitch. Cut the yarn and weave in the end (57dc).
10
Row 9: Using Peach Orange work 3 chain into the first stitch (this is your first dc) and make 1dc into the same stitch, work 27dc, increase in the next stitch, work 27dc, and increase into the last stitch. Cut the yarn and weave in the end (60dc).
11
Row 10: Using Vintage Pink work 3 chain into the first stitch (this is your first dc) and make 1dc into the same stitch, work 28dc, increase in the next stitch, work 29dc, and increase into the last stitch. Cut the yarn and weave in the end (63dc).
12
Row 11: Using Melon Sorbet work 3 chain into the first stitch (this is your first dc) and make 1dc into the same stitch, work 30dc, increase in the next stitch, work 30dc, and increase in to the last stitch. Cut the yarn and weave in the end (66dc).
13
Row 12: Using Mustard Yellow work 3 chain into the first stitch (this is your first dc) and make 1dc into the same stitch, work 31dc, increase in the next stitch, work 32dc, and increase into the last stitch. Cut the yarn and weave in the end (69dc).
14
Row 13: Using Vintage Pink work 3 chain into the first stitch (this is your first dc) and make 1dc into the same stitch, work 33dc, increase in the next stitch, work 33dc, and increase into the last stitch. Cut the yarn and weave in the end (72dc).
15
Row 14: Using Red Wine work 3 chain into the first stitch (this is your first dc) and make 1dc into the same stitch, work 34dc, increase in the next stitch, work 35dc, and increase into the last stitch. Cut the yarn and weave in the end (75dc).
16
Row 15: Using Peach Orange work 3 chain into the first stitch (this is your first dc) and make 1dc into the same stitch, work 36dc, increase in the next stitch, work 36dc, and increase into the last stitch. Cut the yarn and weave in the end (78dc).
17
Row 16: Using Mustard Yellow work 3 chain into the first stitch (this is your first dc) and make 1dc into the same stitch, work 37dc, increase in the next stitch, work 38dc, and increase into the last stitch. Cut the yarn and weave in the end (81dc).
18
Row 17: Using Melon Sorbet work 3 chain into the first stitch (this is your first dc) and make 1dc into the same stitch, work 39dc, increase in the next stitch, work 39dc, and increase into the last stitch. Cut the yarn and weave in the end (84dc).
19
Row 18: Using Vintage Pink work 3 chain into the first stitch (this is your first dc) and make 1dc into the same stitch, work 40dc, increase in the next stitch, work 41dc, increase into the last stitch. Cut the yarn and weave in the end (87dc).
20
Row 19: Using Orange Peach work 3 chain into the first stitch (this is your first dc) and make 1dc into the same stitch, work 42dc, increase in the next stitch, work 42dc, increase into the last stitch. Cut the yarn and weave in the end (90dc).
21
Row 20: Using Red Wine work 3 chain into the first stitch (this is your first dc) and make 1dc into the same stitch, work 43dc, increase in the next stitch, work 44dc, and increase into the last stitch. Cut the yarn and weave in the end (93dc).
22
To finish, sew the corners as seen in the photo and sew the sleeve on to your sweater.

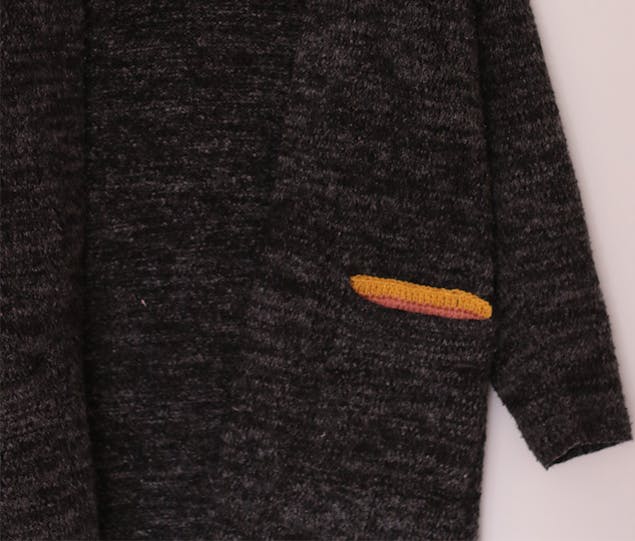
Cardigan pocket pop of colour
Looking for something more subtle to refresh an old sweater? Then this one's for you!
A small piece of double crochet is all you need to complete this pretty project, sew it right behind the pocket leaving a portion poking out of the top and voila!
My cardigan pocket is 15cm wide, so a 15cmx3cm piece fits perfectly.
Materials
- Paintbox Yarns Simply DK
- Vinatge Pink (155)
- Mustard Yellow (123)
- 4.50 mm. crochet hook
- Scissors
How to make the pop of colour for you cardi!
1
Make 27ch using Vintage Pink colour.
2
Row 1: make 1dc into the third chain from your hook. And work 1dc in each stitch. Cut the yarn and weave in the end. (24dc).
3
Row 2: Using Mustard Yellow colour work 3 chain into the first stitch (this is your first dc), and work 23dc. Cut the yarn, and weave in the end. (24dc).
4
To finish, sew the crocheted pieces right behind the pocket.